
La creación de eventos en Fanz es un proceso integral que abarca desde la configuración básica con foto y descripción hasta funciones avanzadas como mapas de asientos numerados, generación masiva de fechas y división de ingresos. La plataforma permite personalizar completamente la experiencia de compra con preguntas específicas, secciones de agenda y FAQ, mientras gestiona múltiples métodos de pago incluyendo Stripe, tarjetas de crédito y Apple Pay. Con herramientas como el programa de referidos, eventos exclusivos para miembros y gestión de equipos, Fanz ofrece una solución completa de ticketing sin comisiones para organizadores.
Introduction
In this guide, you'll see with screenshots and without skipping anything, how to go from a blank page to an event ready to sell tickets. We're going to upload the photo, choose the category, set the location, define if there are numbered seats, request or not require ID from the buyer, display agenda and FAQs, create tickets with their prices, and if you want, generate hundreds of shows in two clicks. You'll also learn to invite your team and connect your social networks. When finished, your event will be published under your own white-label domain, ready to collect payments with Stripe, credit cards, ACH, and Apple Pay. Additionally, our platform offers advantages like zero commissions for organizers and simplicity in event management.
If you want to also have the configuration with your own white-label website, check this other document.
Step 1 — Basic Event Data
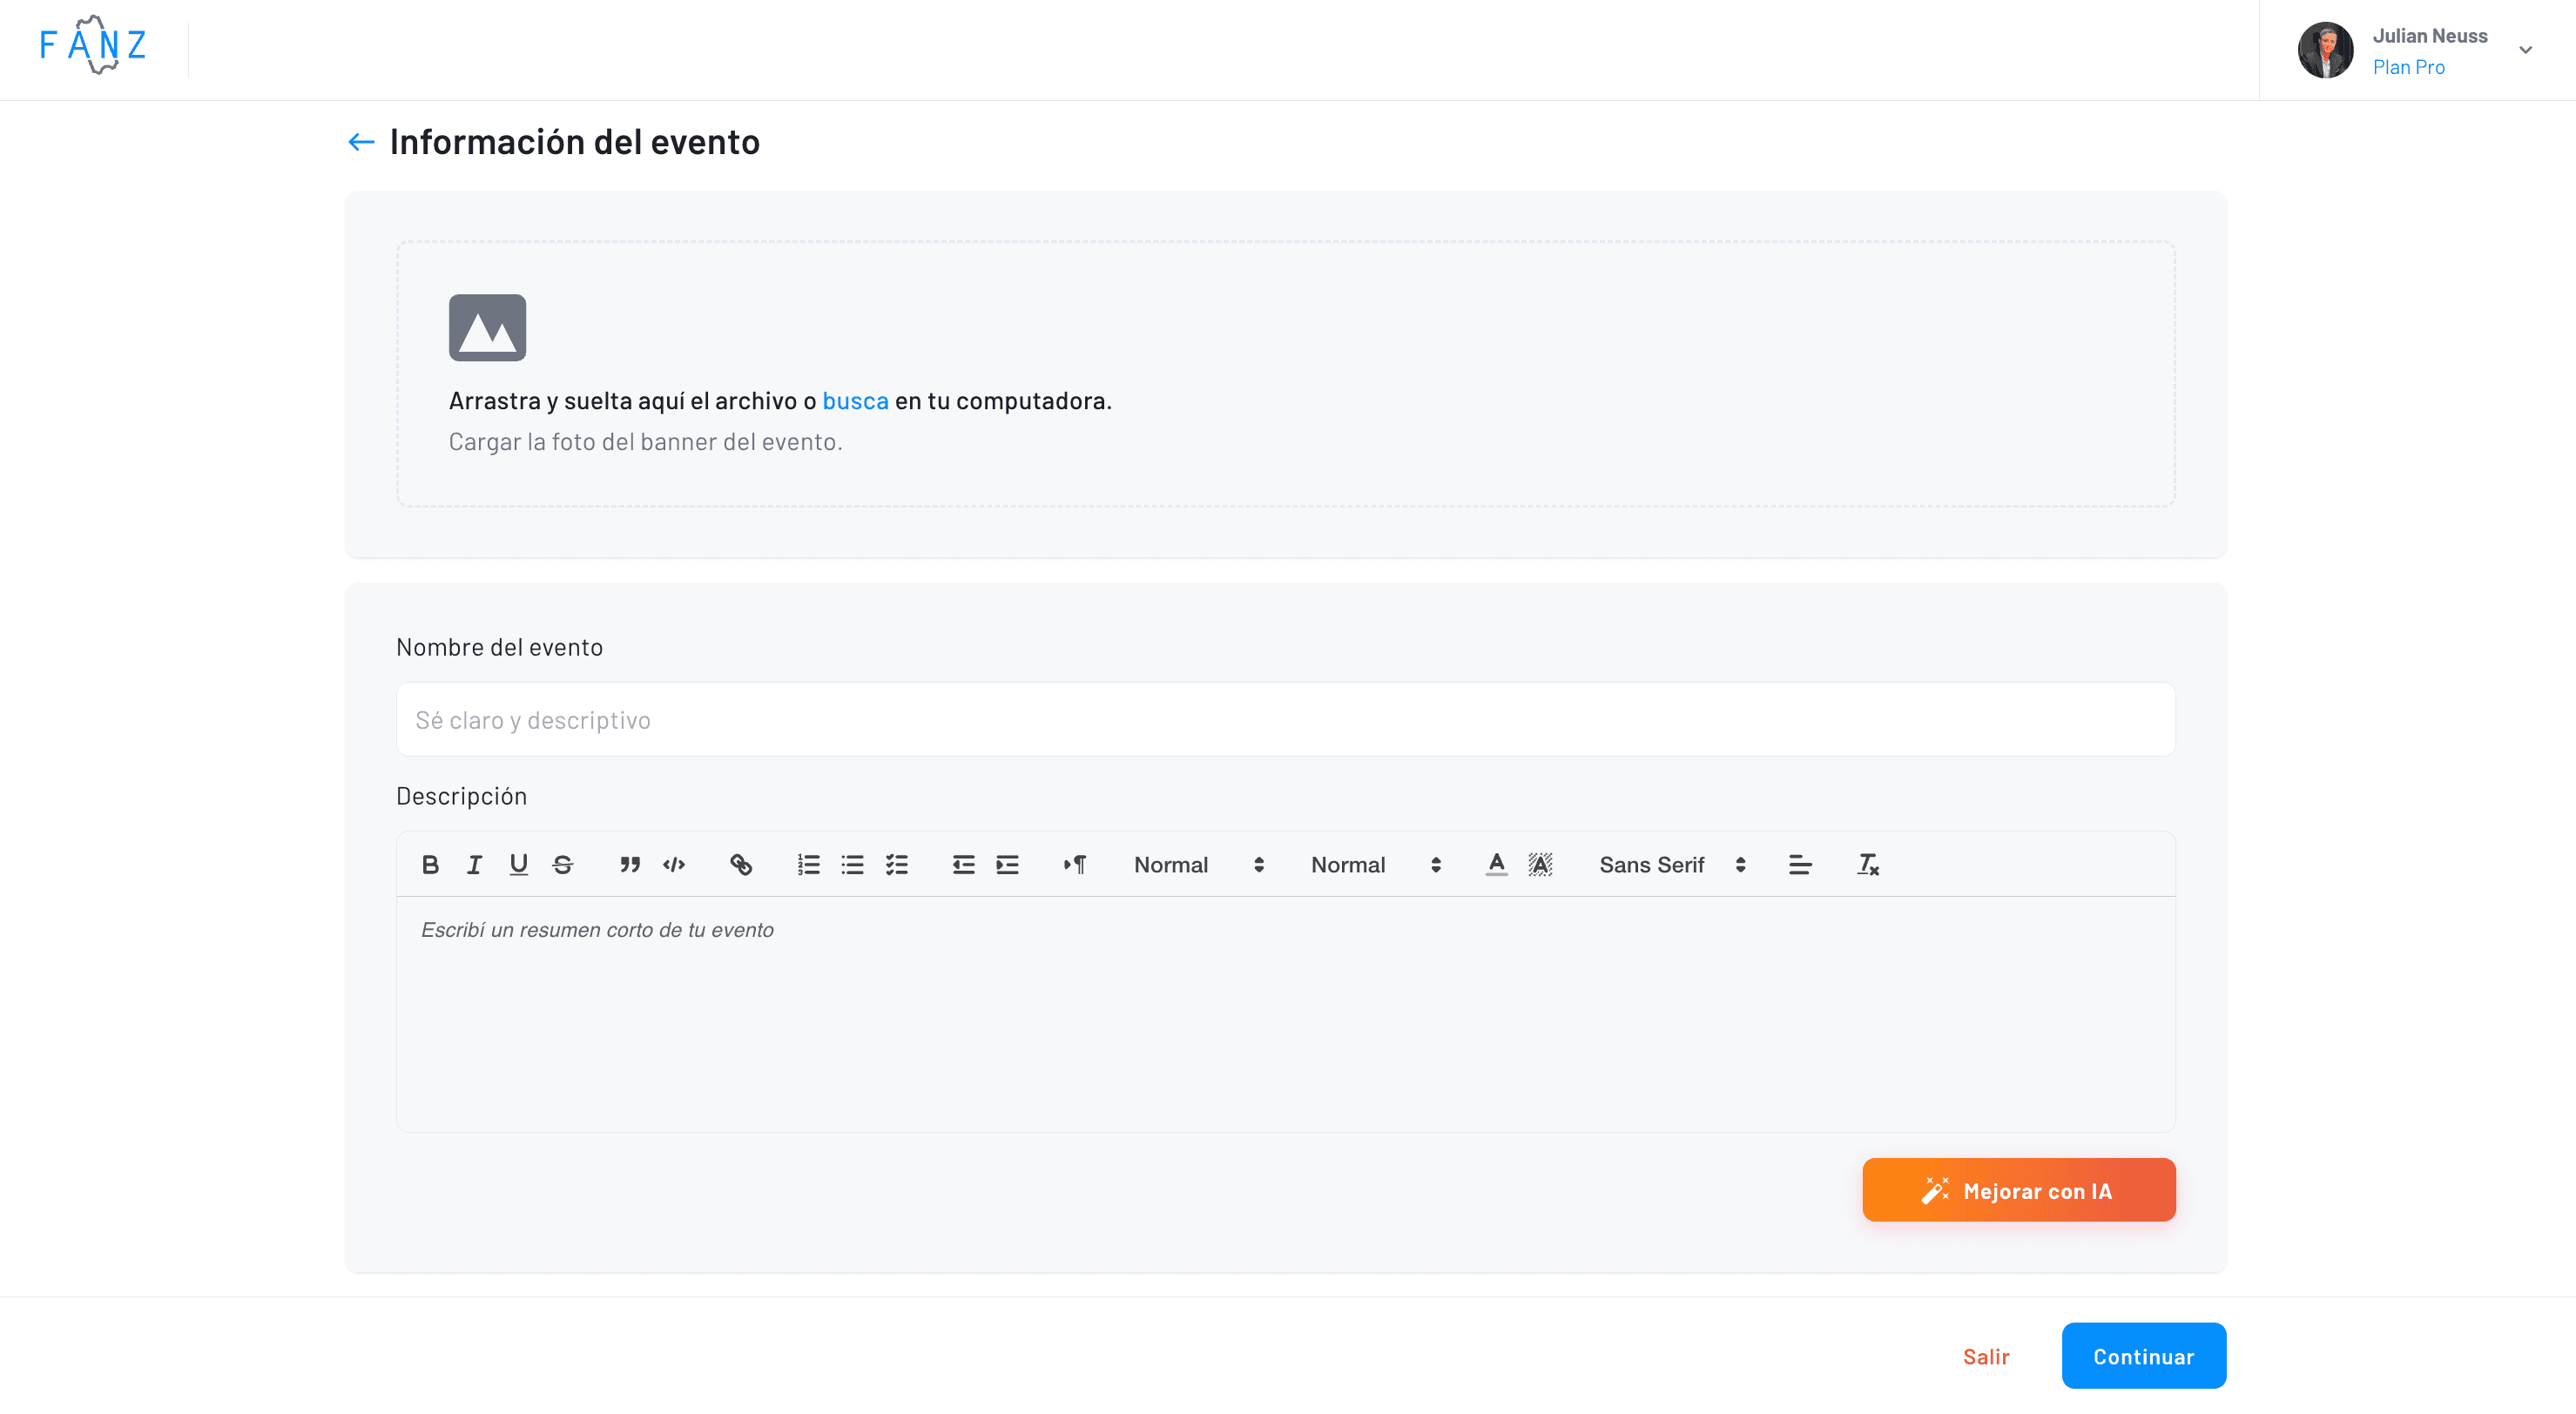
Click Create Event and you'll see a screen with three fields.
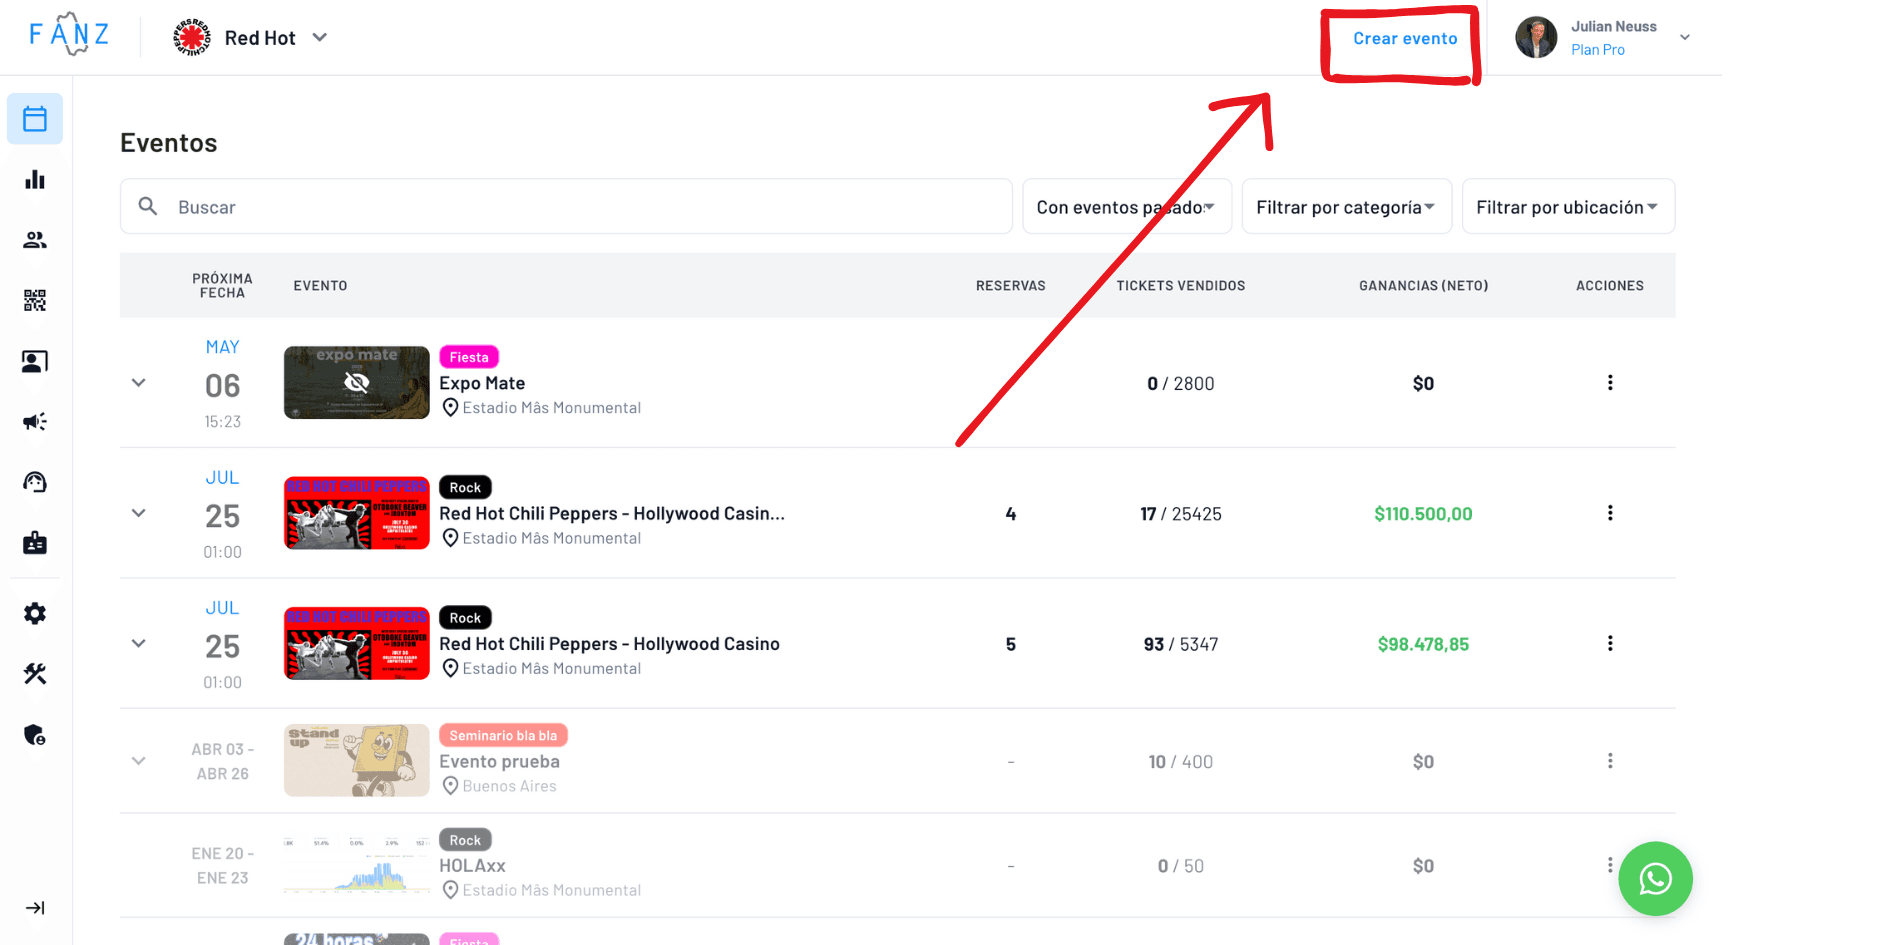
In the first one, upload the main photo: think of it as the poster at the door, rectangular and crisp. In the second, write the name, for example "Hamilton Musical". In the third, tell in one sentence what it's about. If you want it to sound better, click "Improve with AI" and the platform will suggest text with emojis and nice formatting.
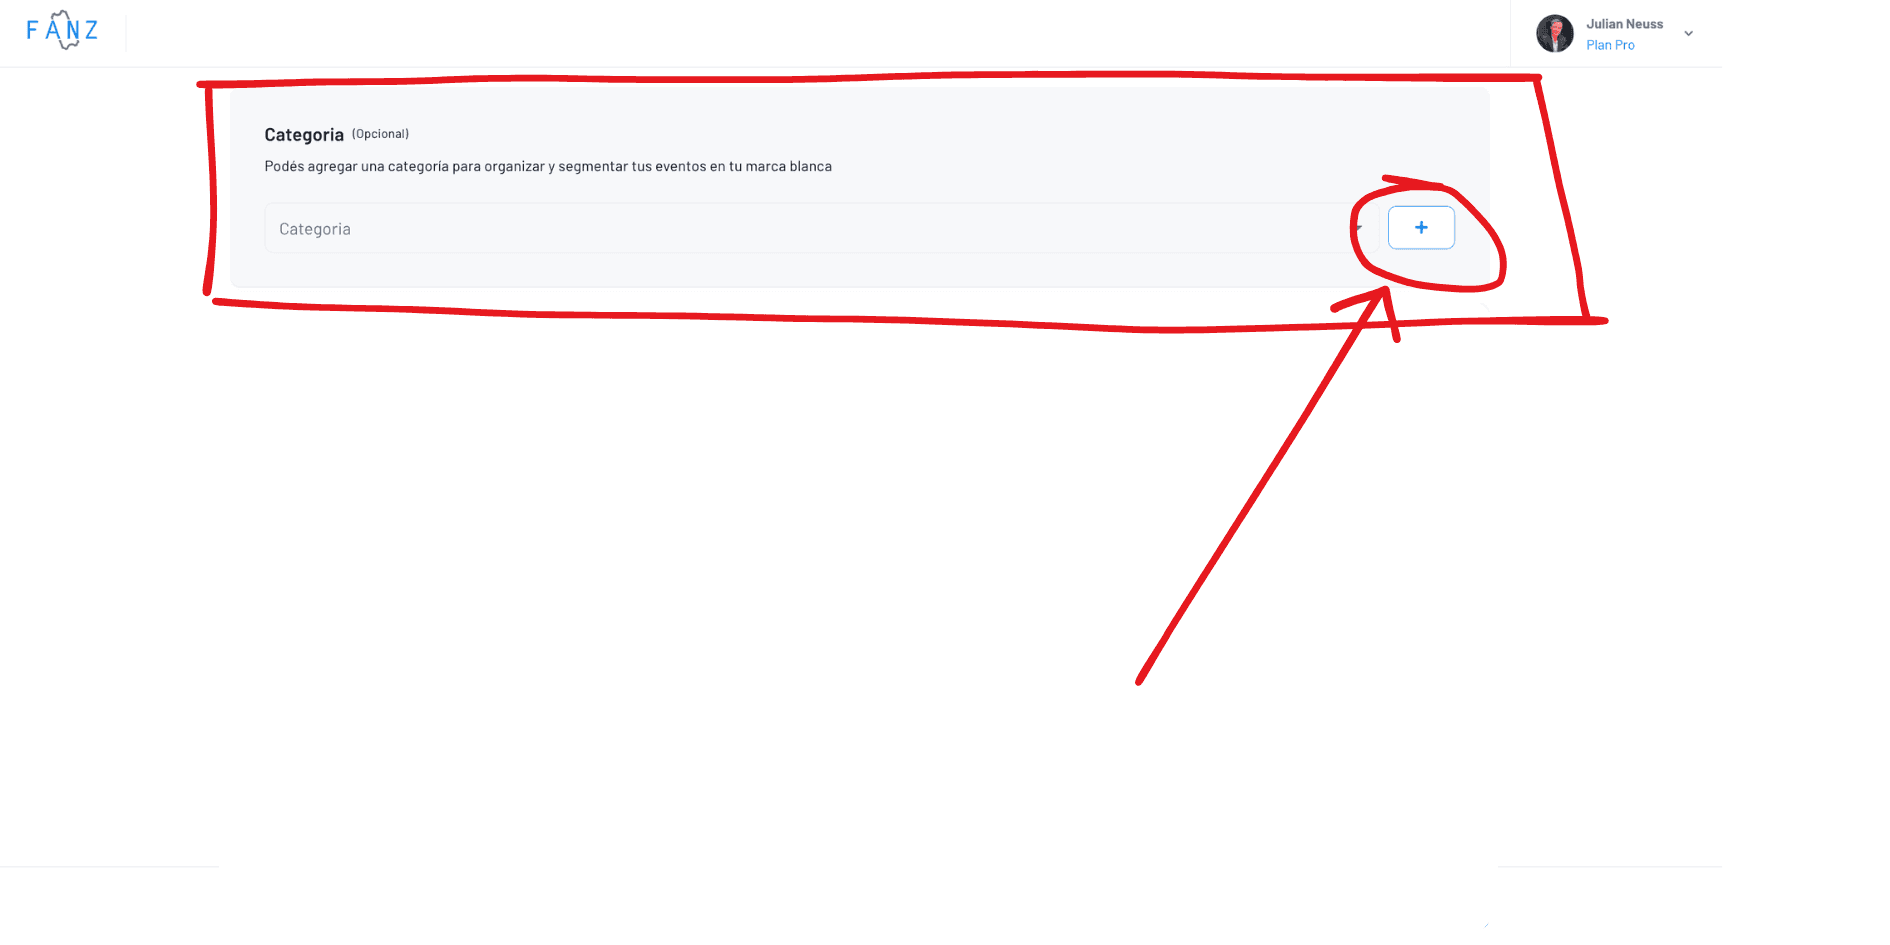
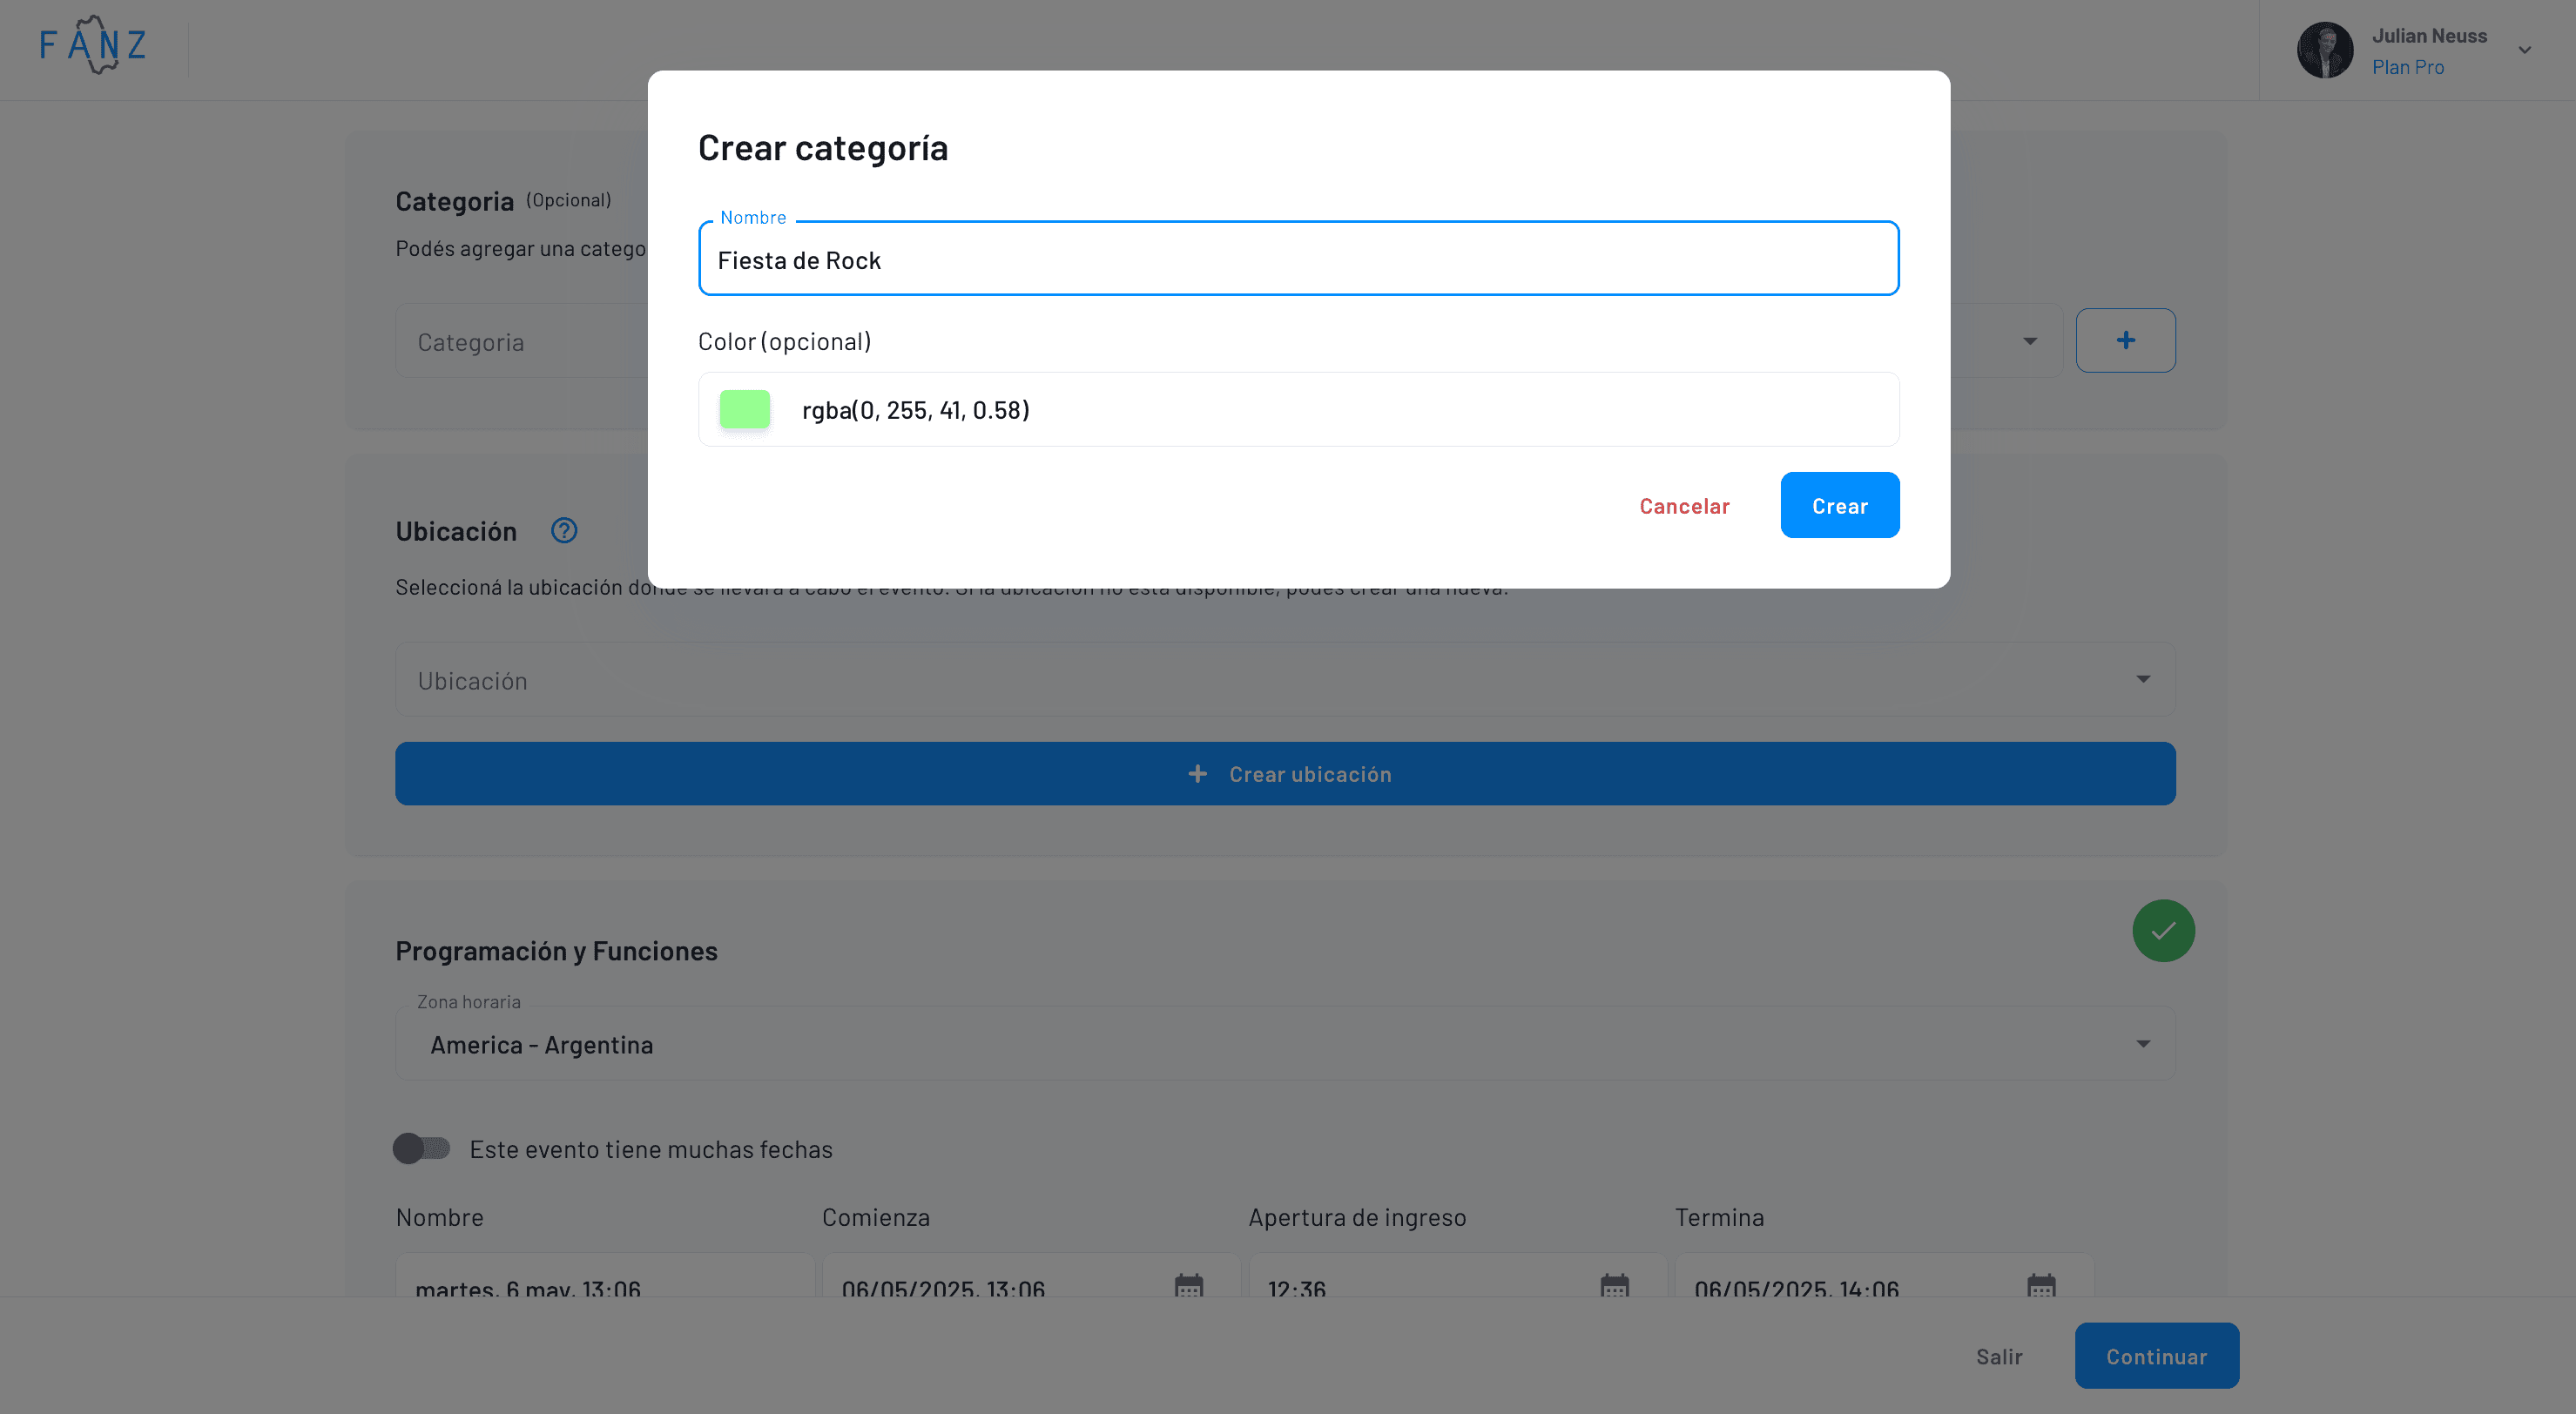
Step 2 — Select the Category
Categories are created once and saved. They help organize your dashboard and let the audience filter in your website calendar. Open the list and click the corresponding one (Theater, Music, Expo, etc.)
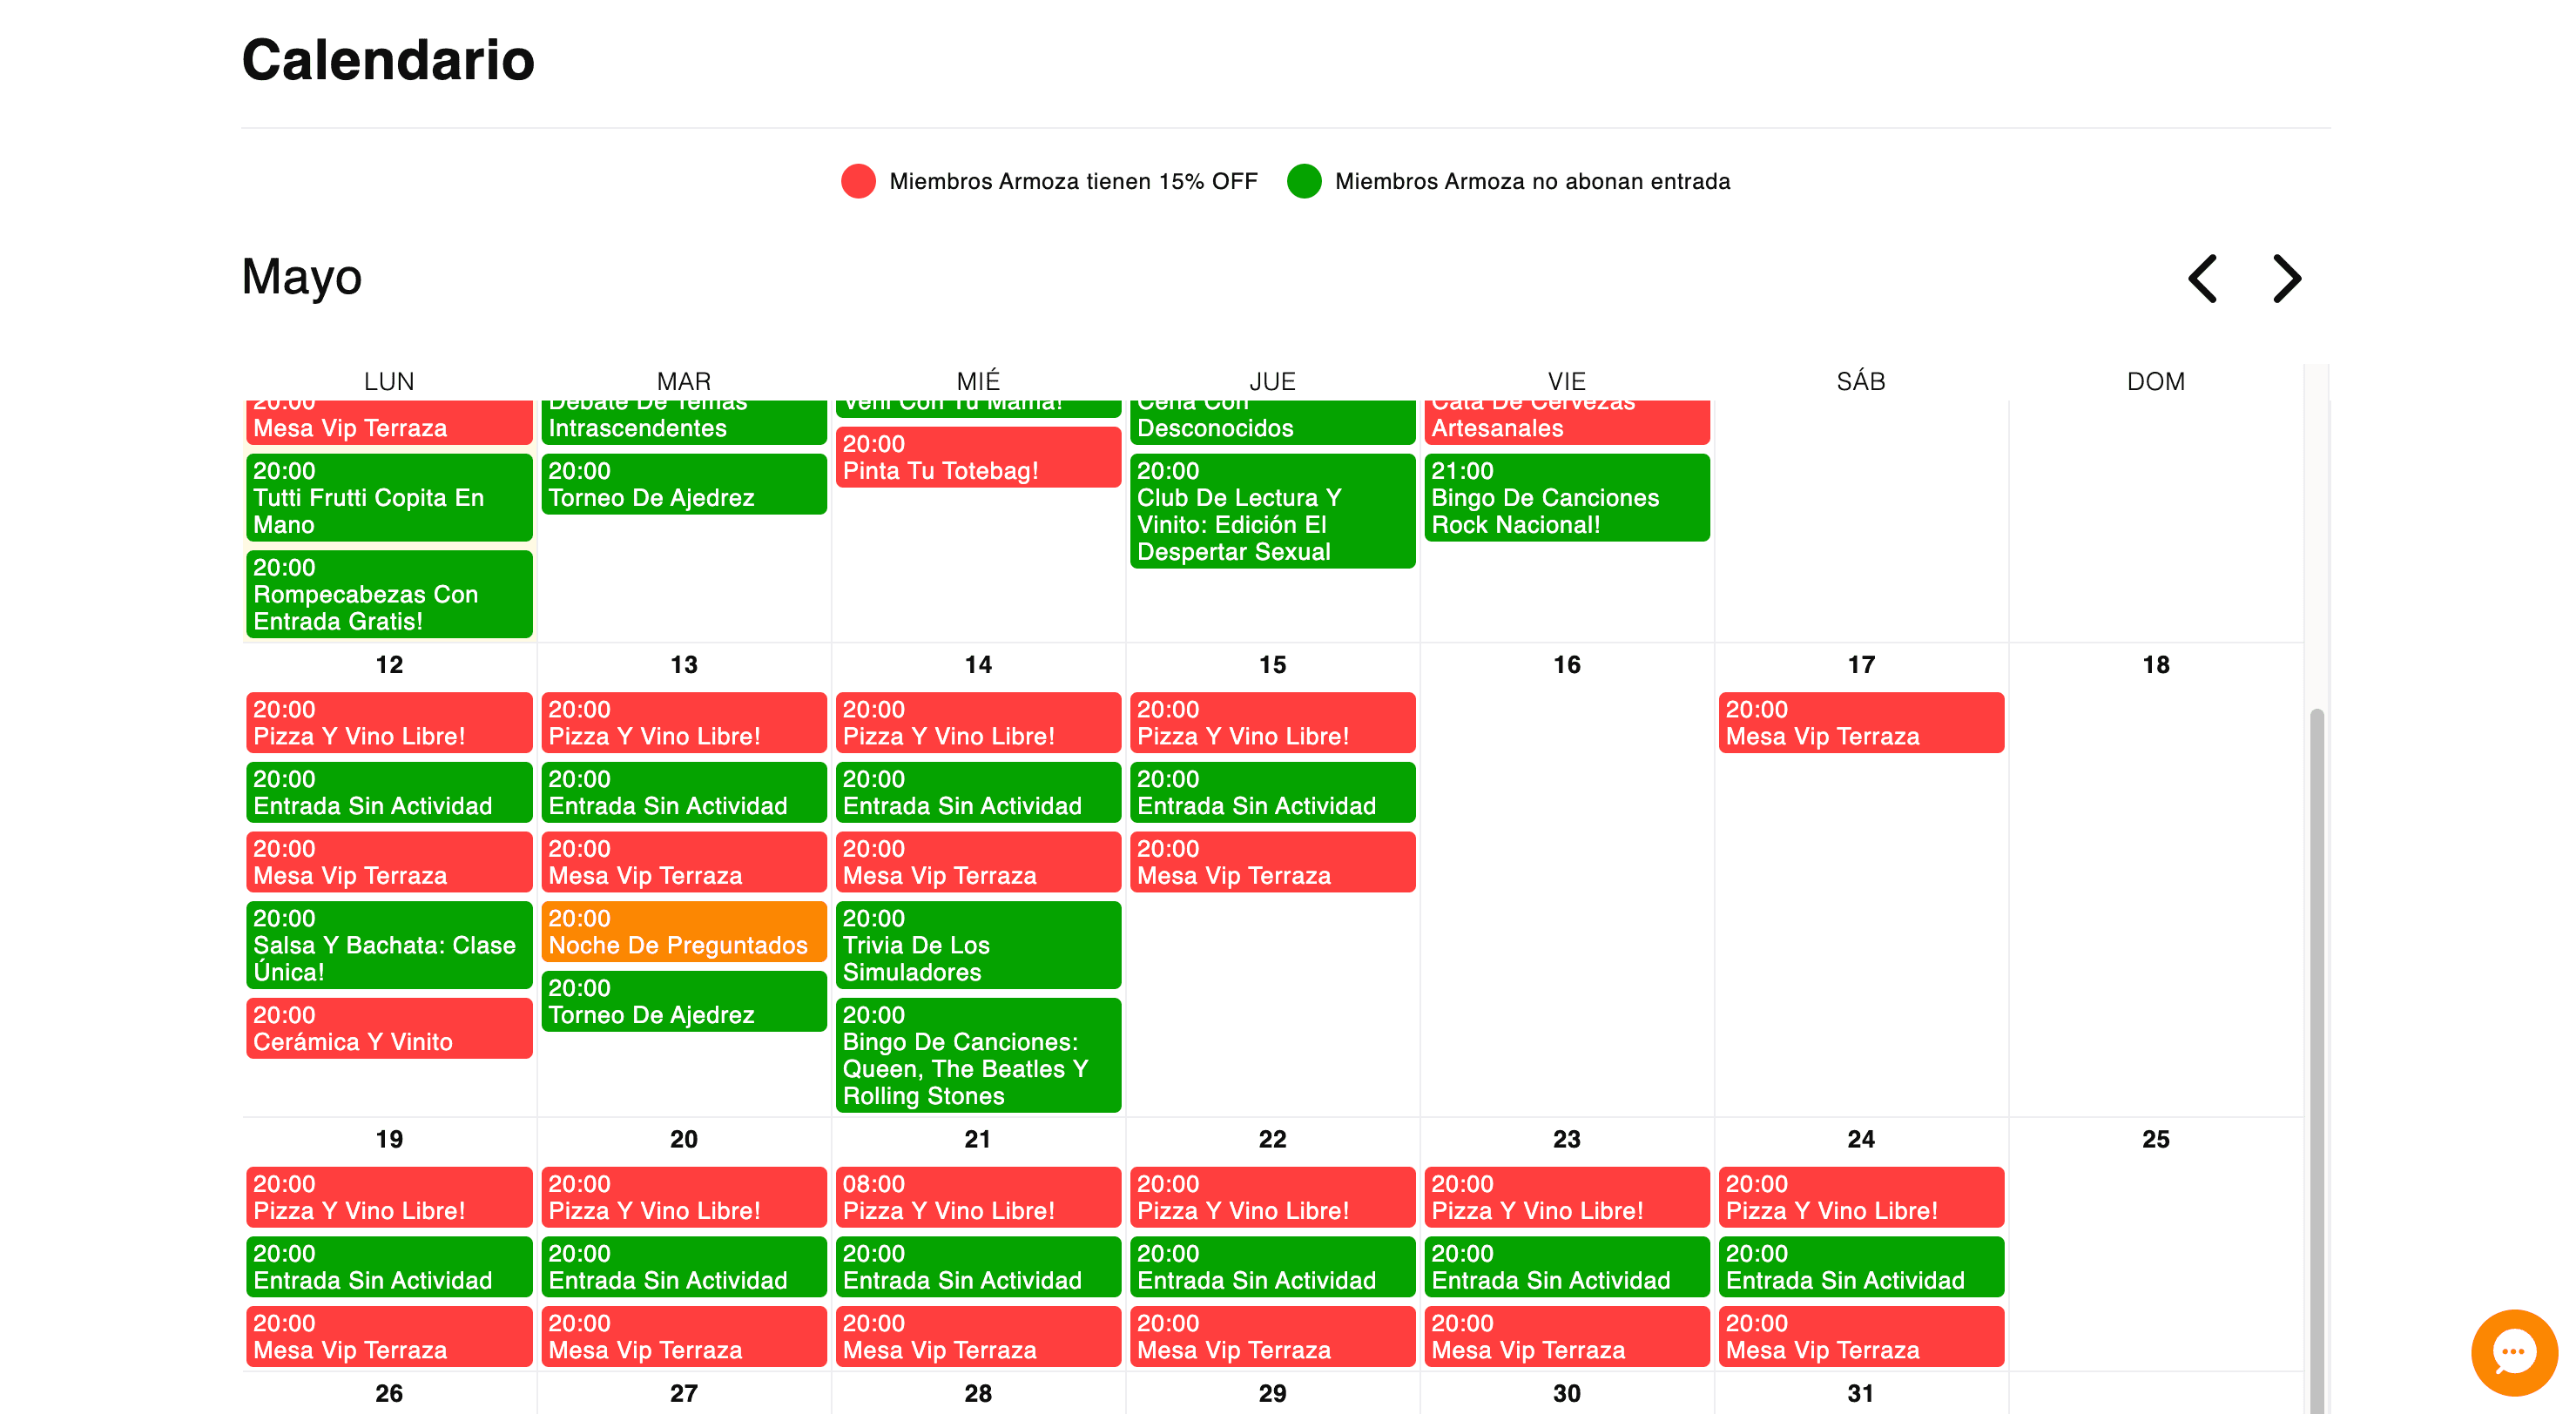
This is how your customer sees it in the calendar:
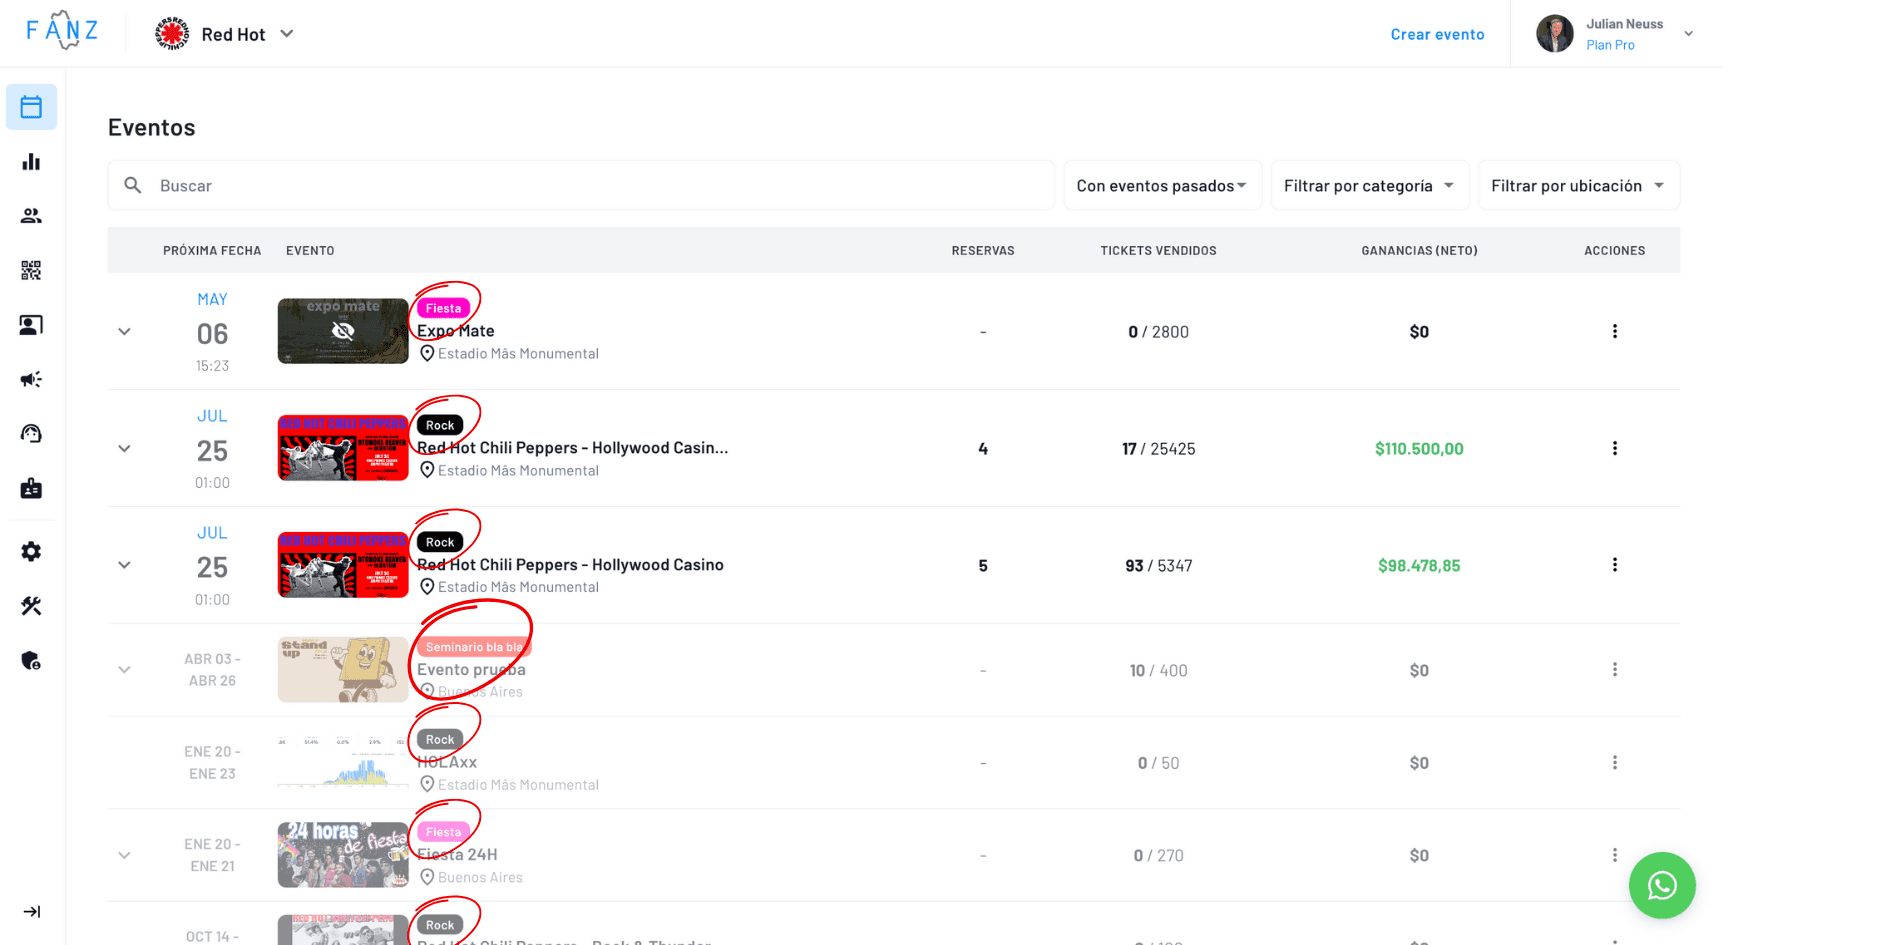
And this is how you see it in the dashboard, where you can filter by that same category:
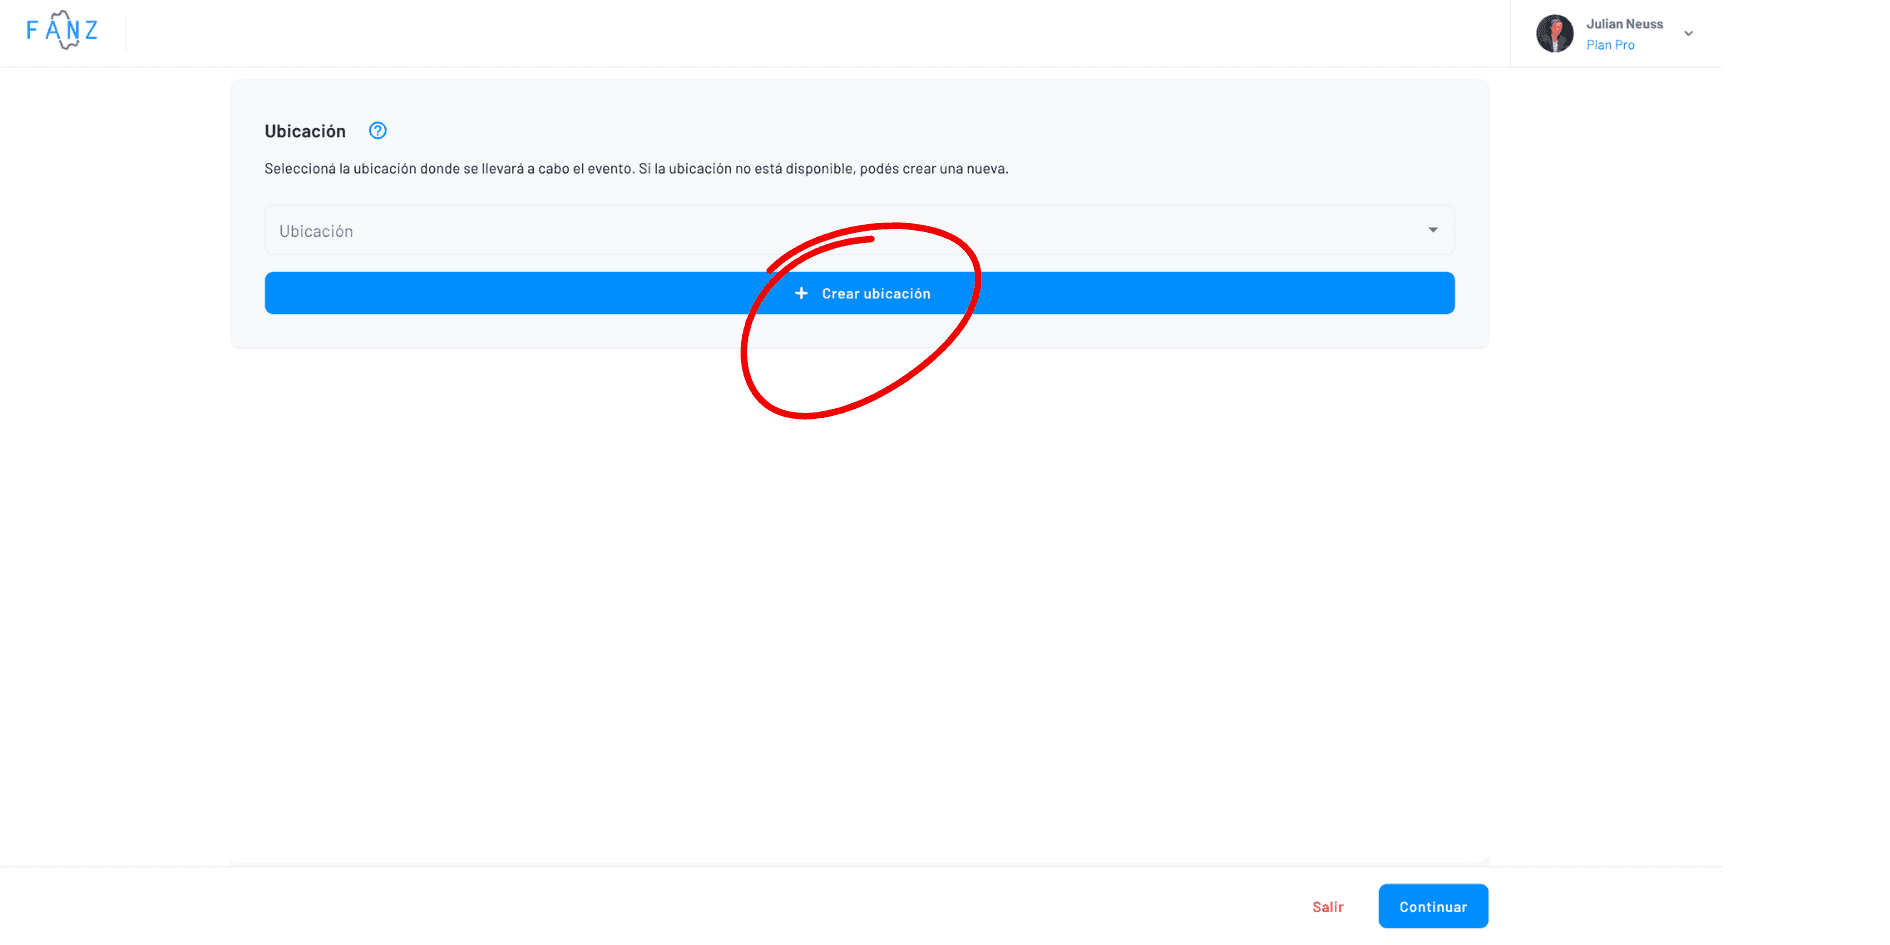
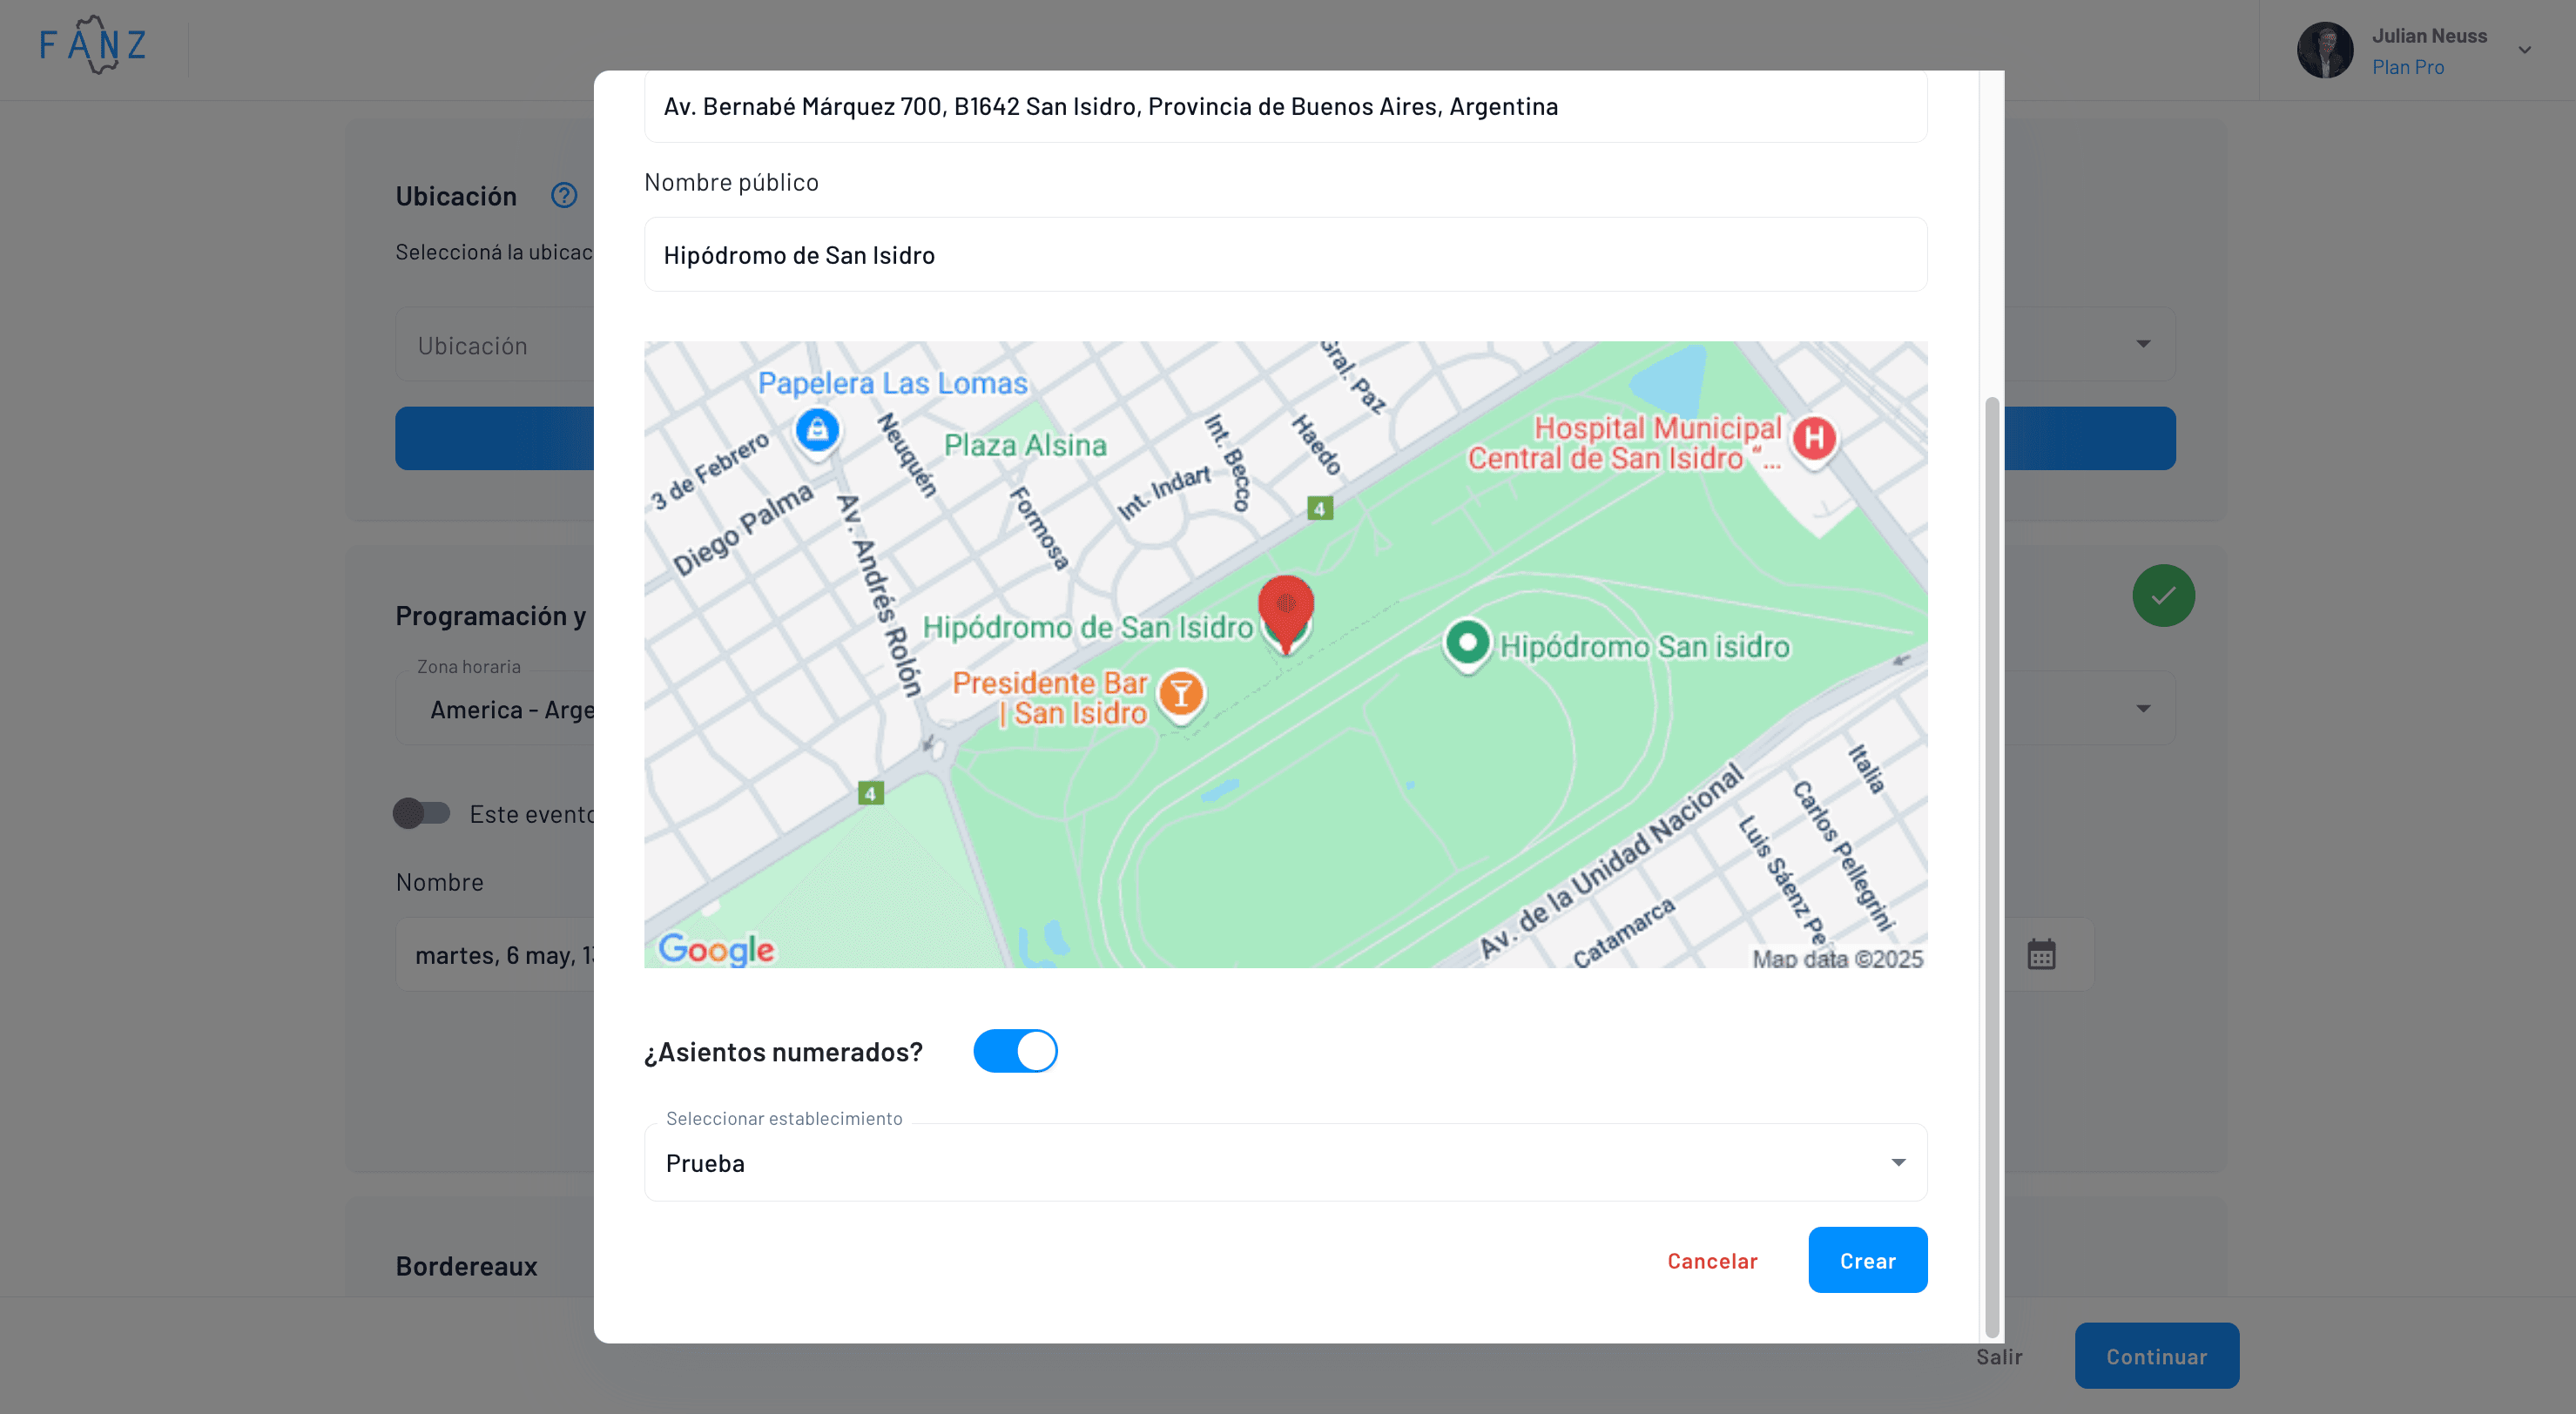
Step 3 — Location and Time Zone
Fanz works with reusable locations. If you always use the same theater or venue, you set it up once and then just select it. Write the venue address; Google Maps will suggest options, click the correct one and you'll see the map. If your venue has numbered seating, check "Use 3D Floor Plan" and choose the map you already created in the Constructor.
The location form asks for an internal name (just for you), the real address, and if you want, a different external name to show the public.
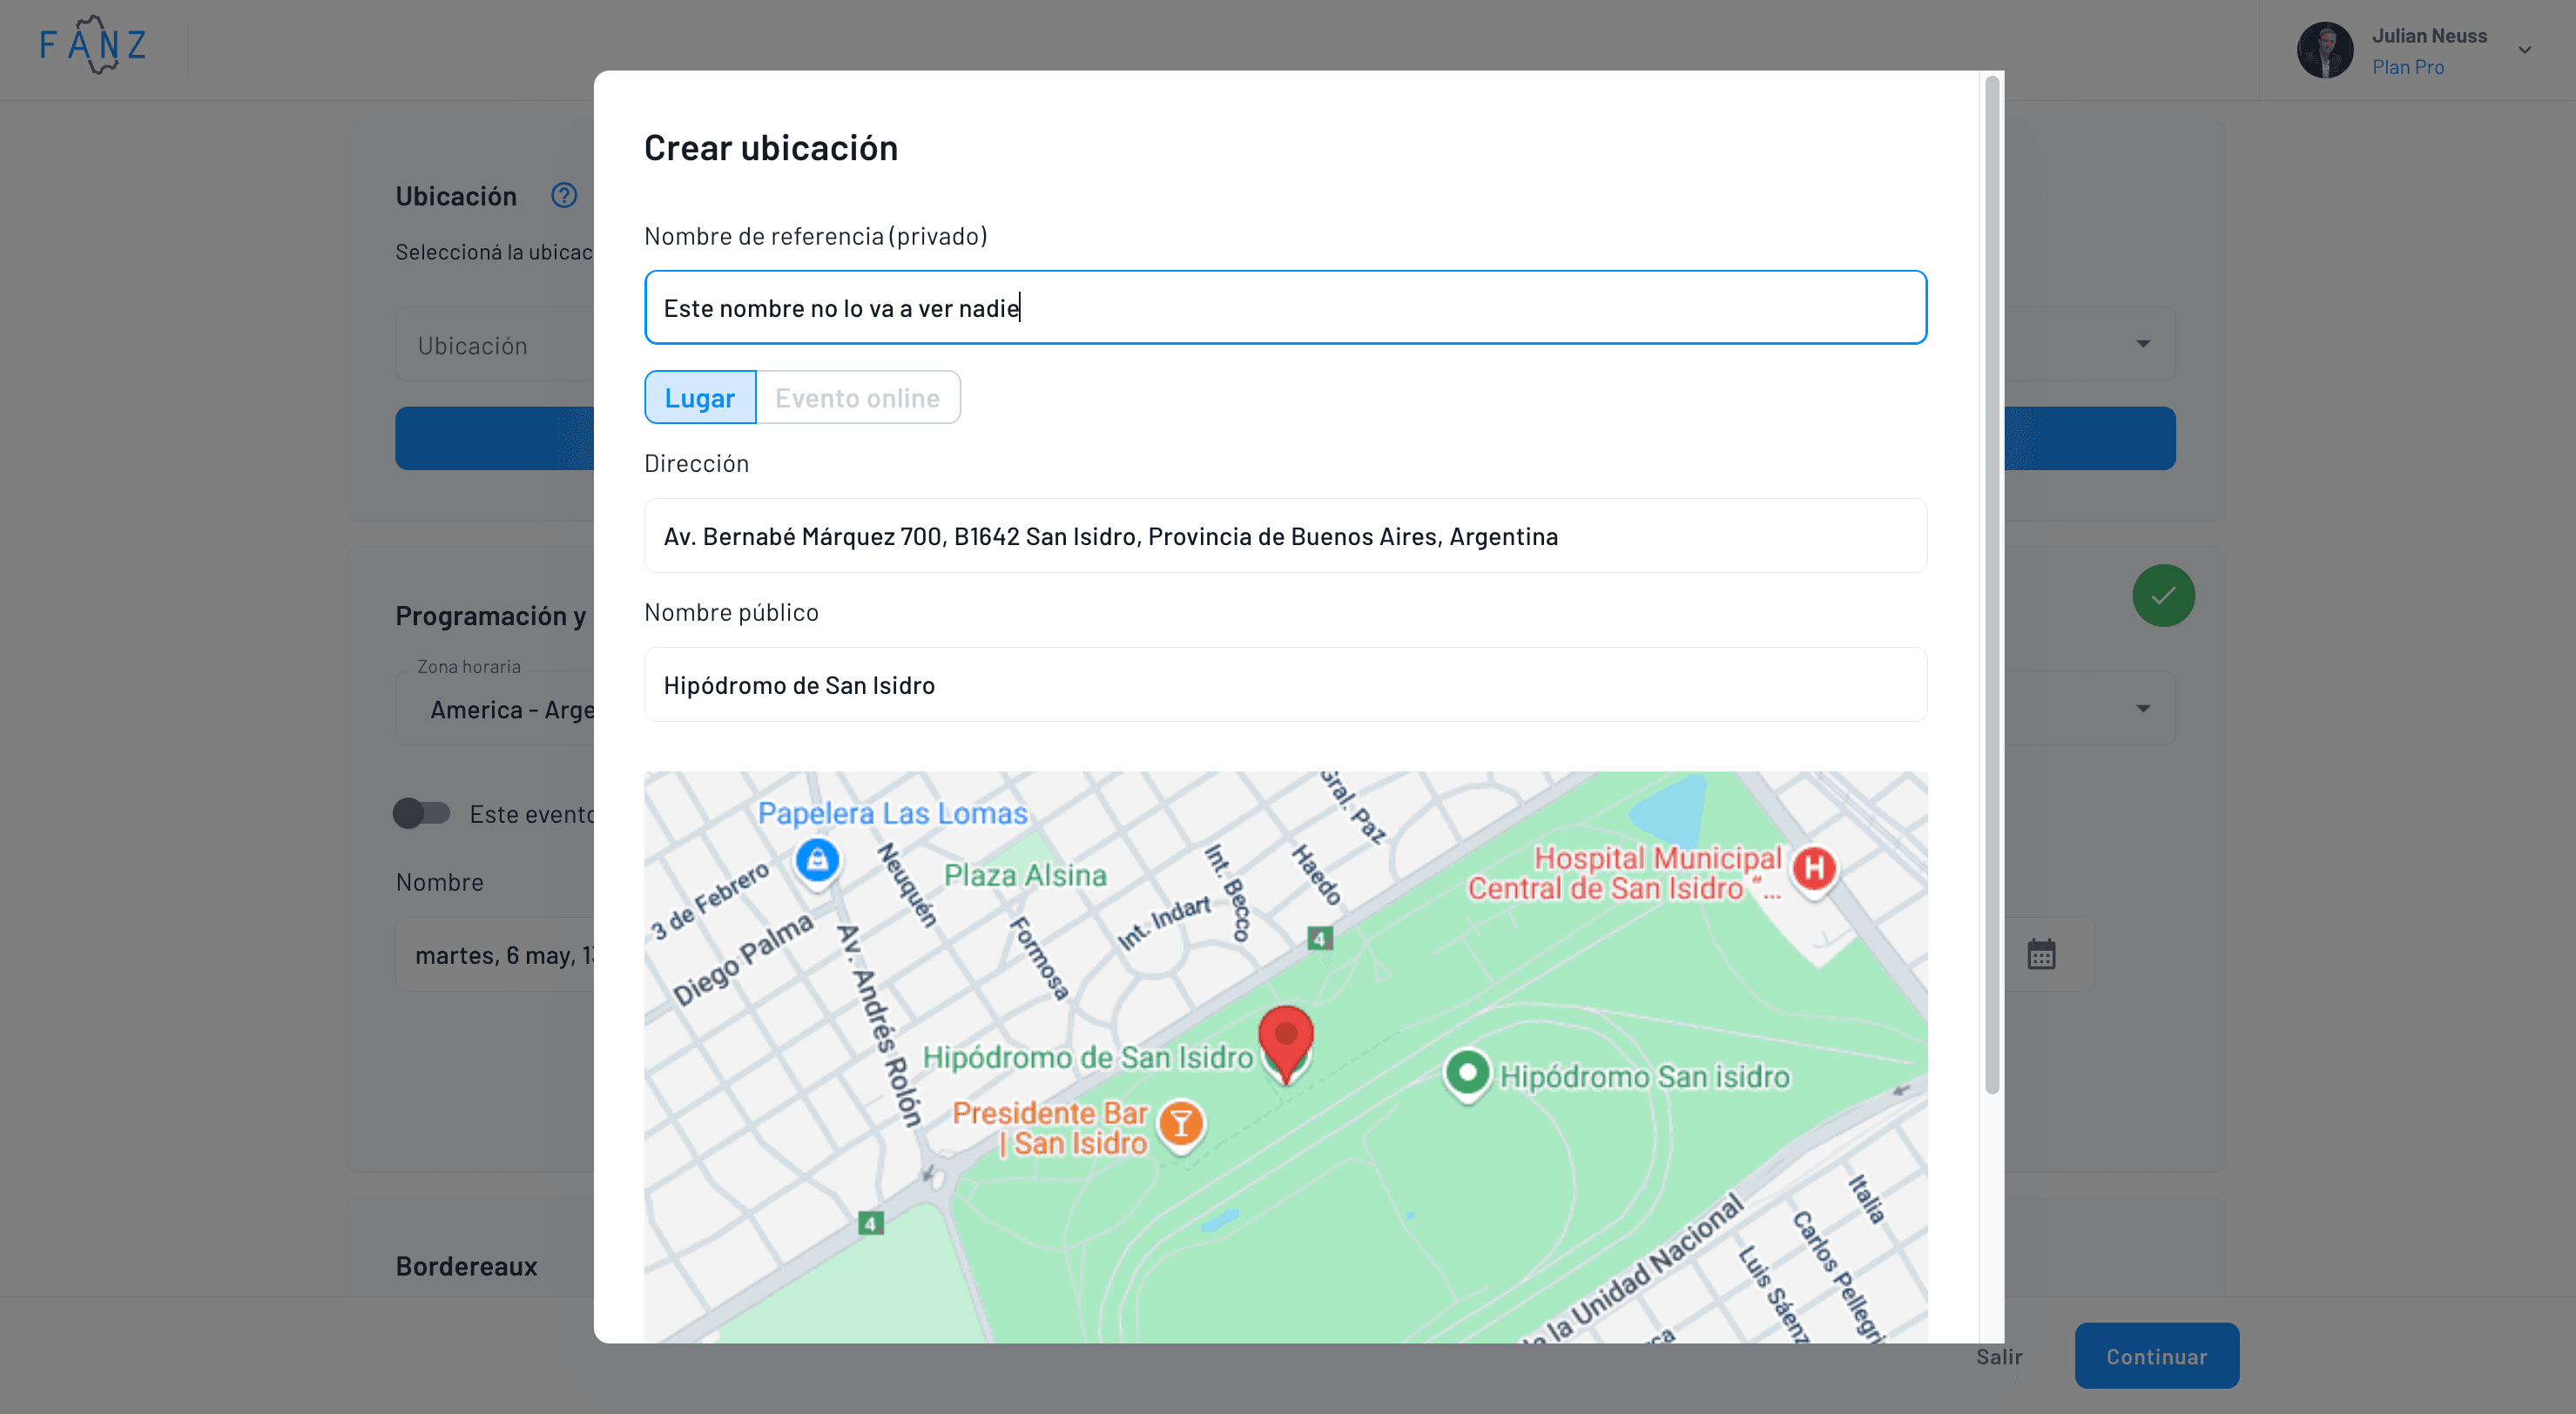
Finally, if you use a numbered location (which you must first create in the Constructor) you'll need to check that option and select the correct floor plan.
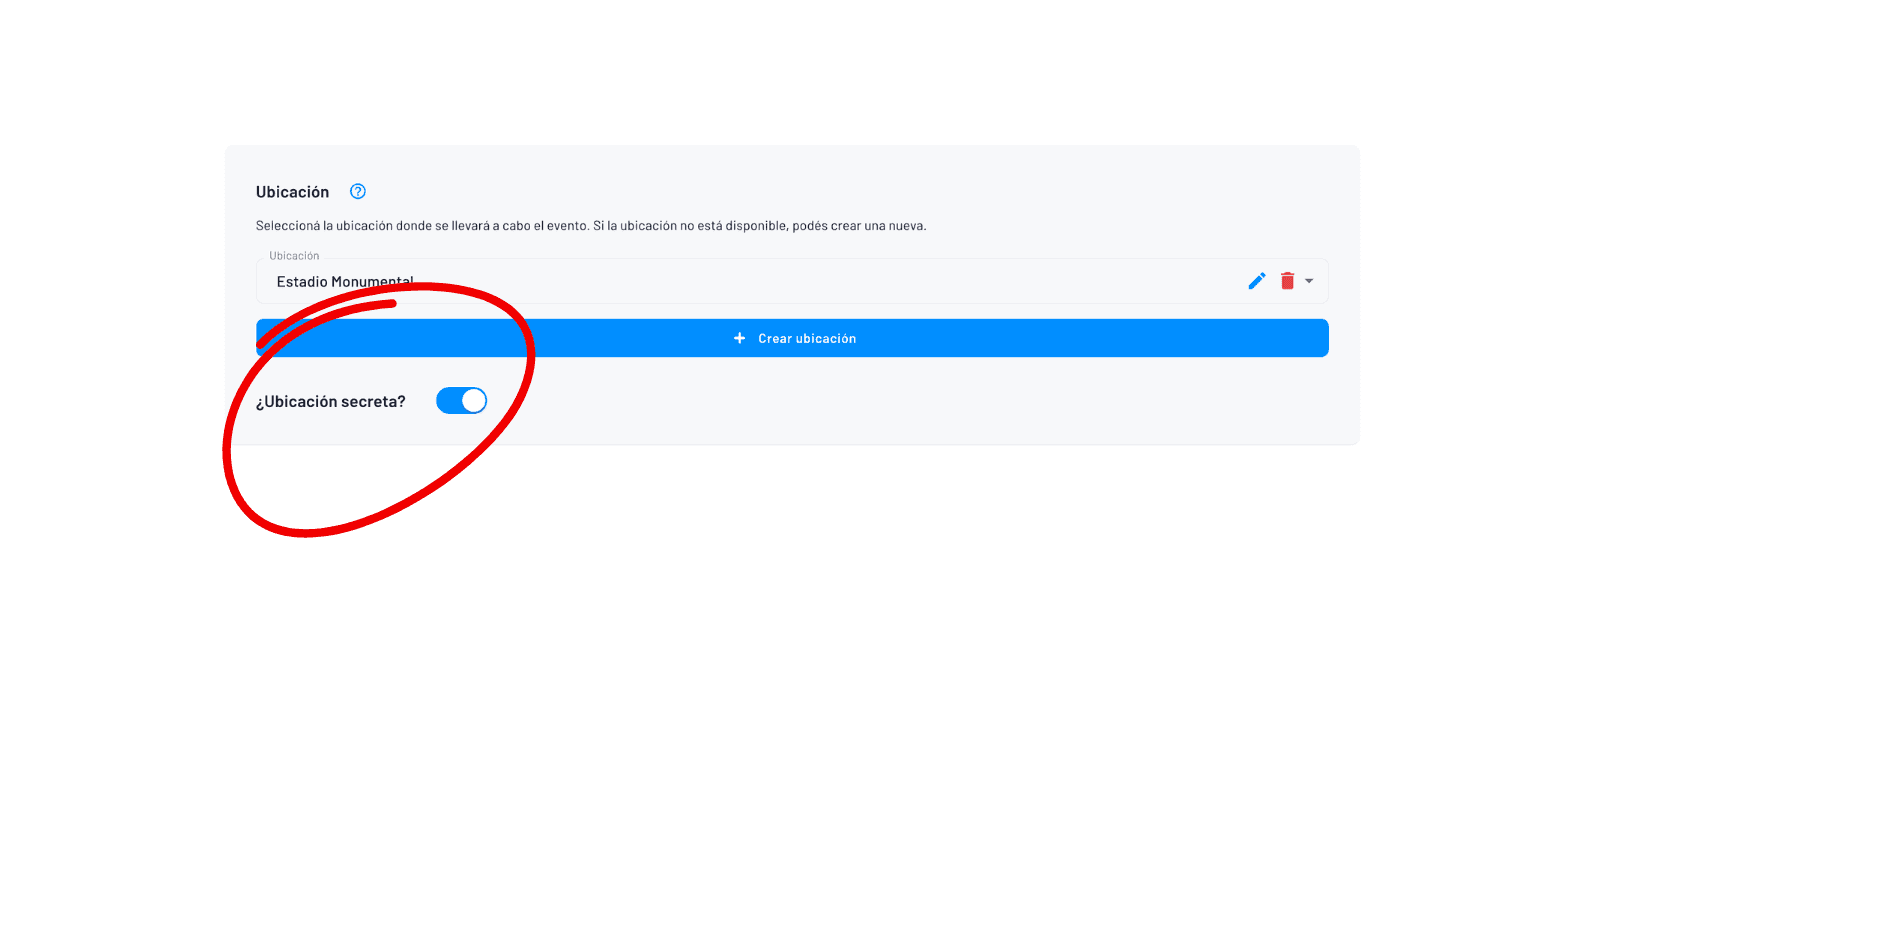
After creating the location, you'll be able to select it for all your events with one click
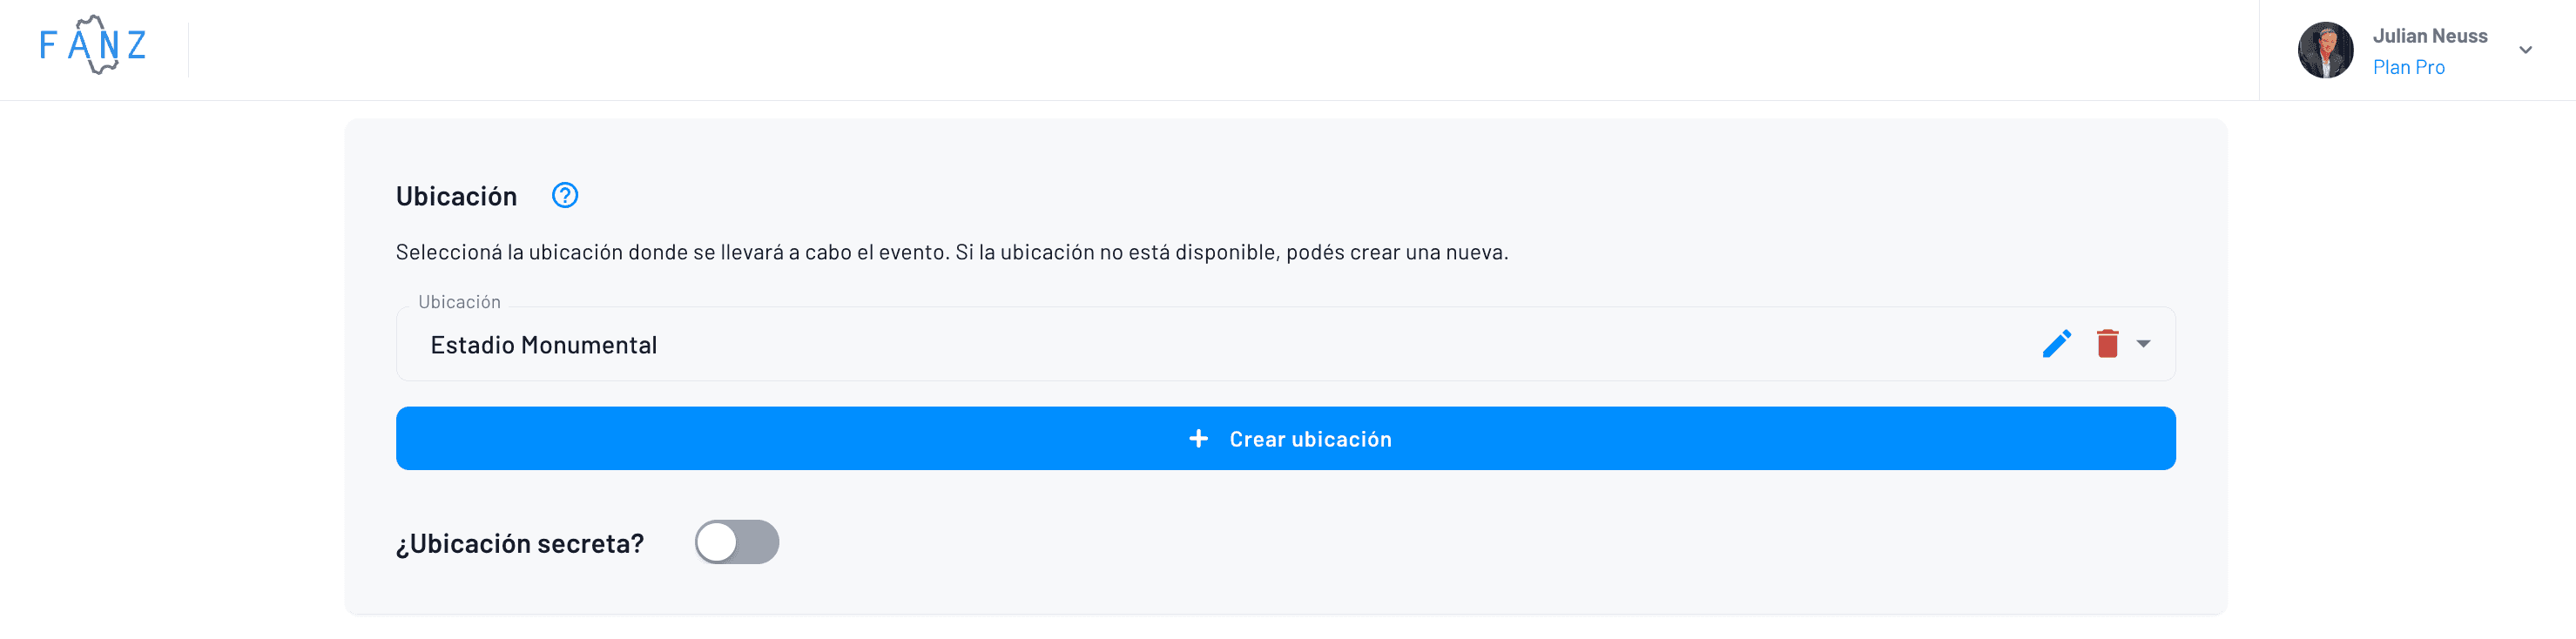
If you want to set the location to "secret" mode until the day you can announce it, you can do so with this button:
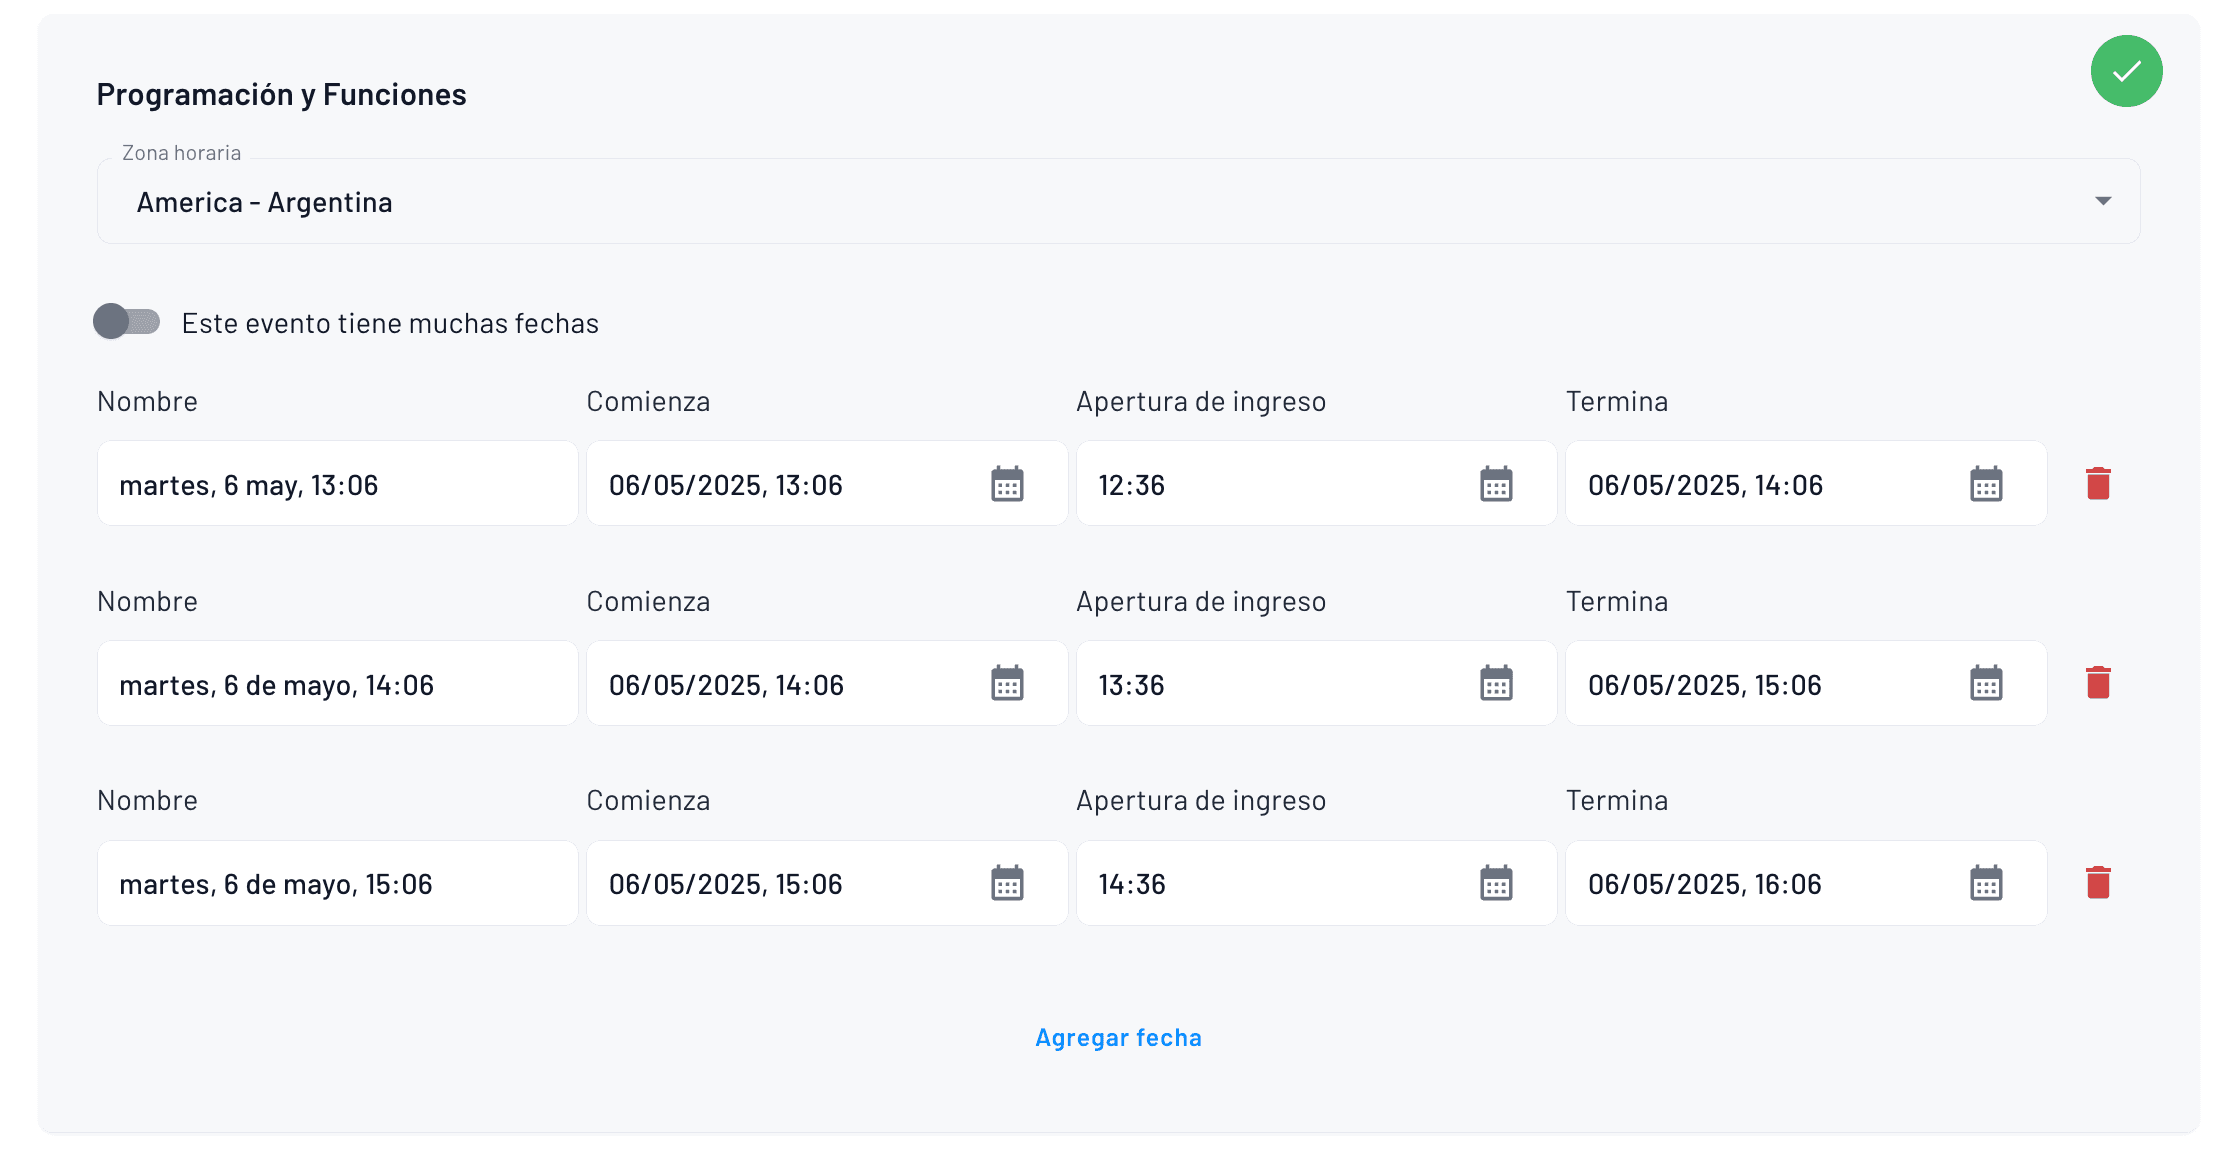
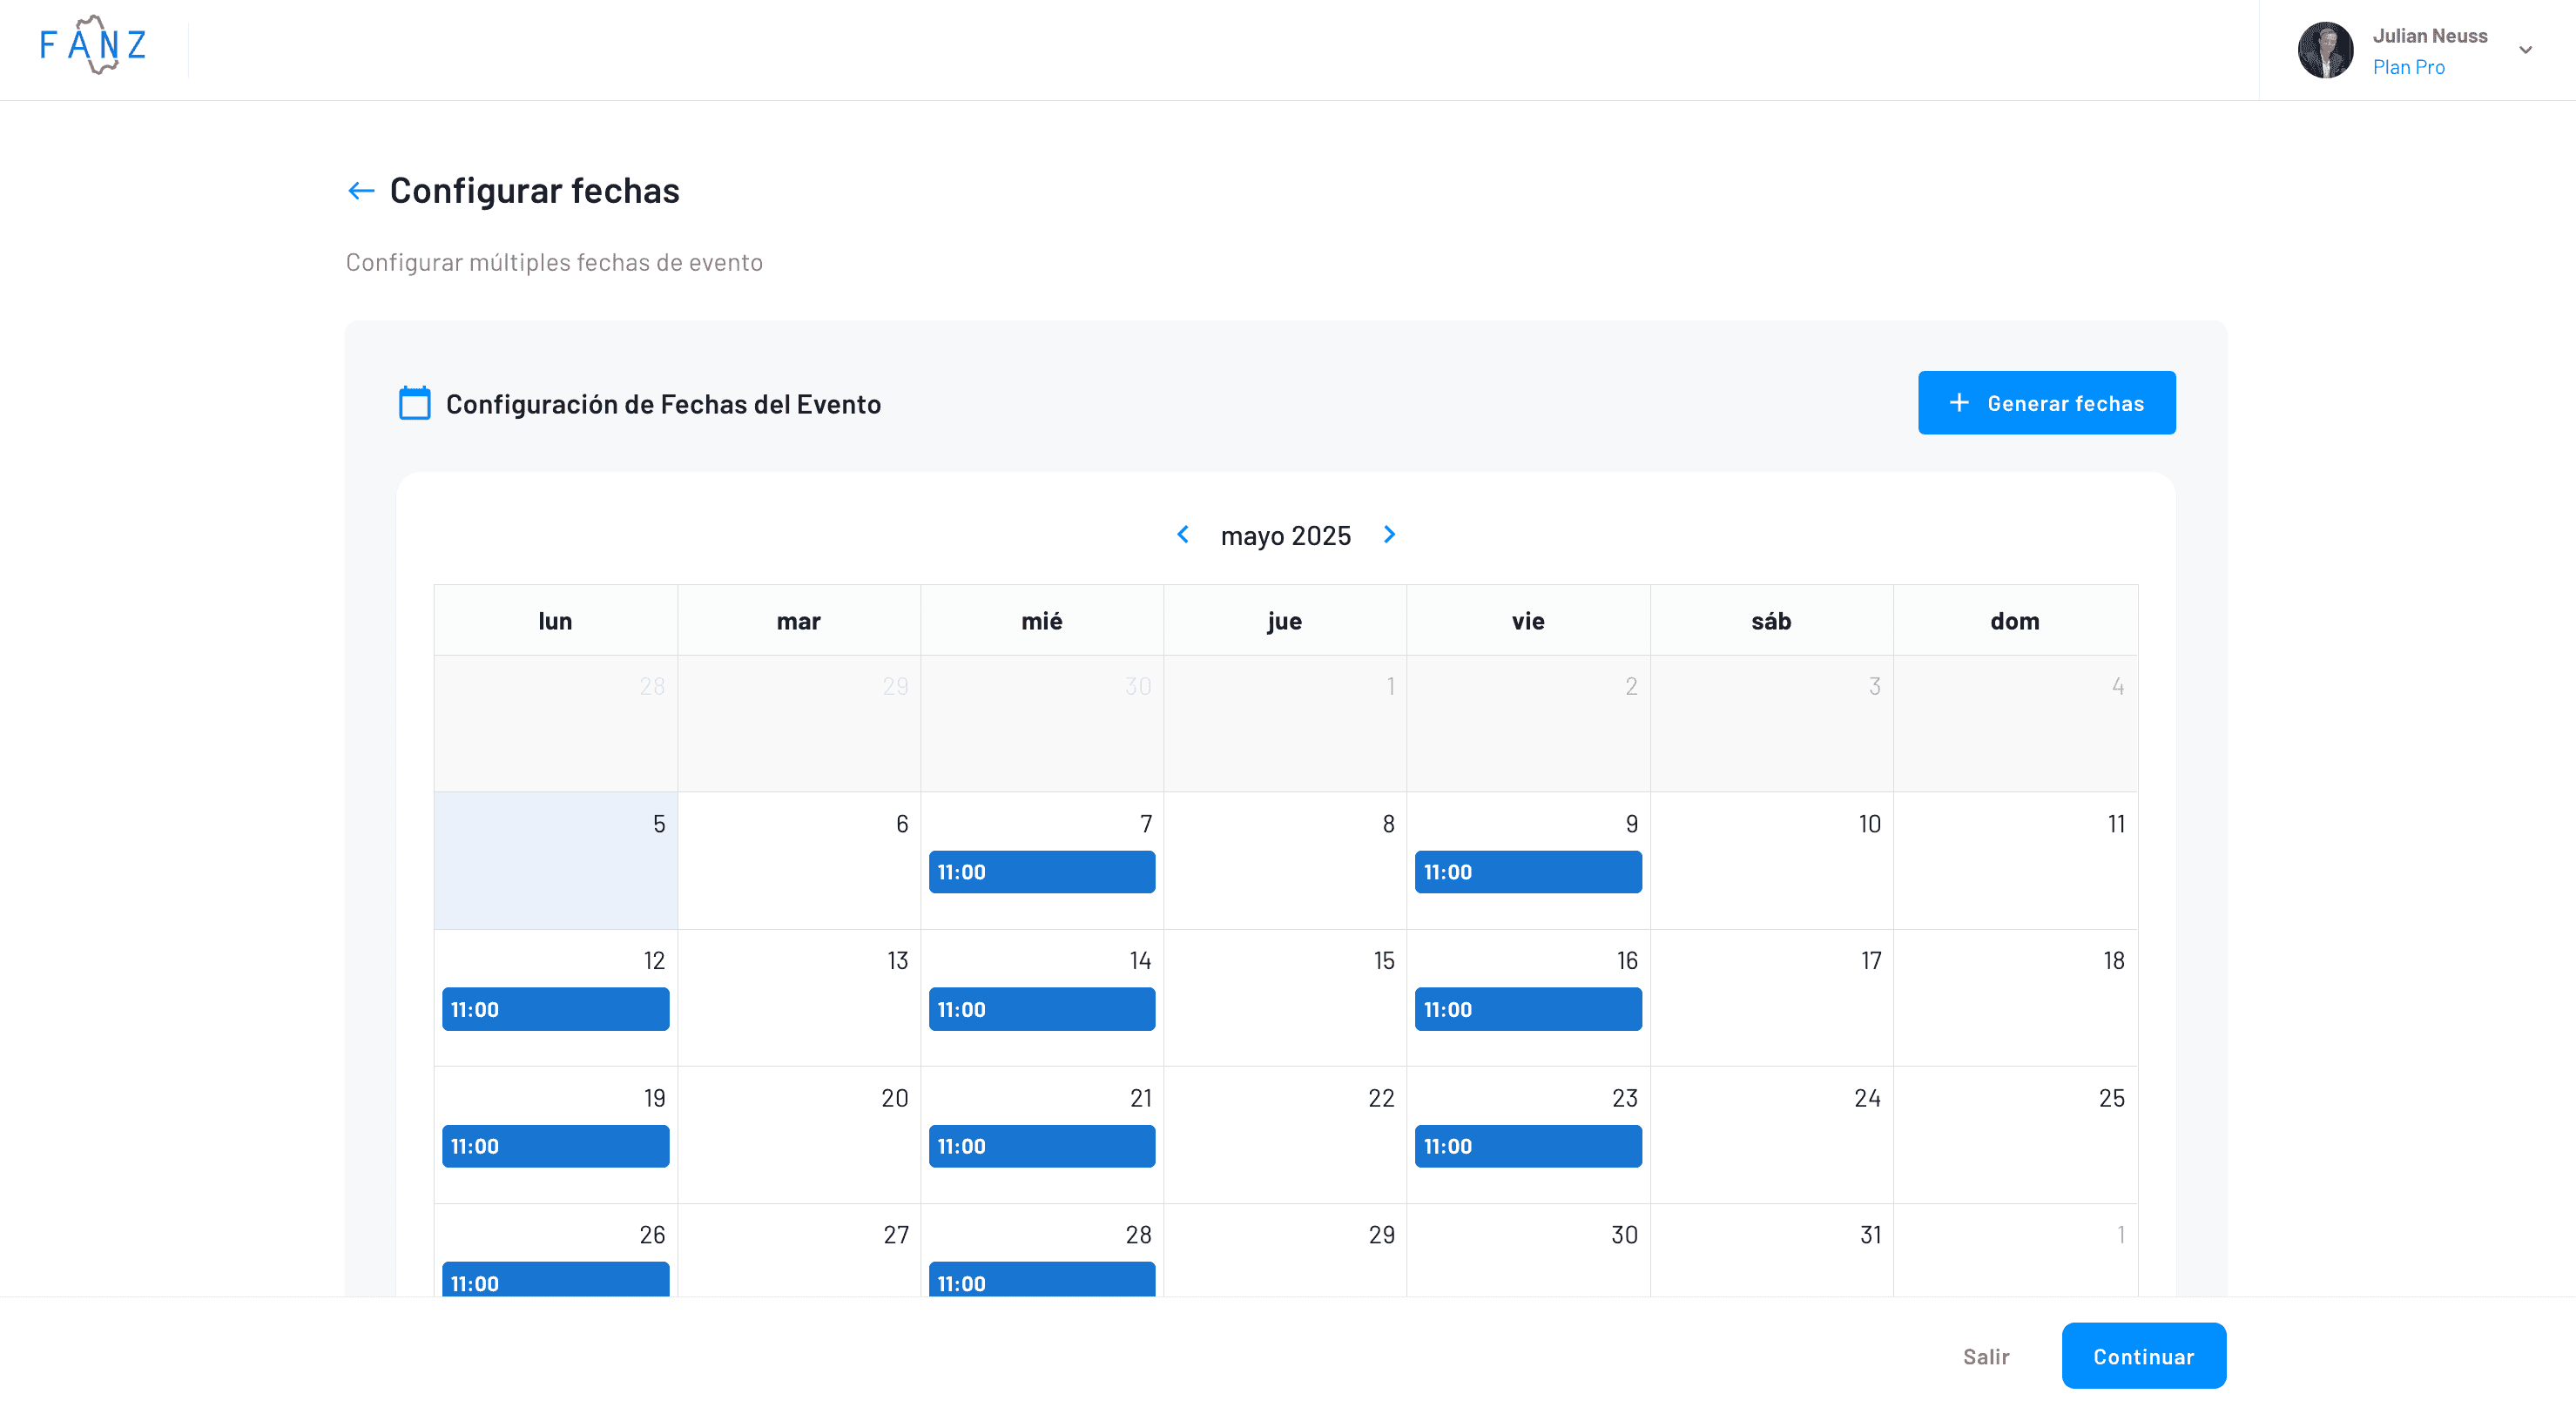
Step 4 — Single Date or Multiple Shows
To configure dates, it's important to choose the event's time zone, which by default will be that of the location, and then configure the indicated date
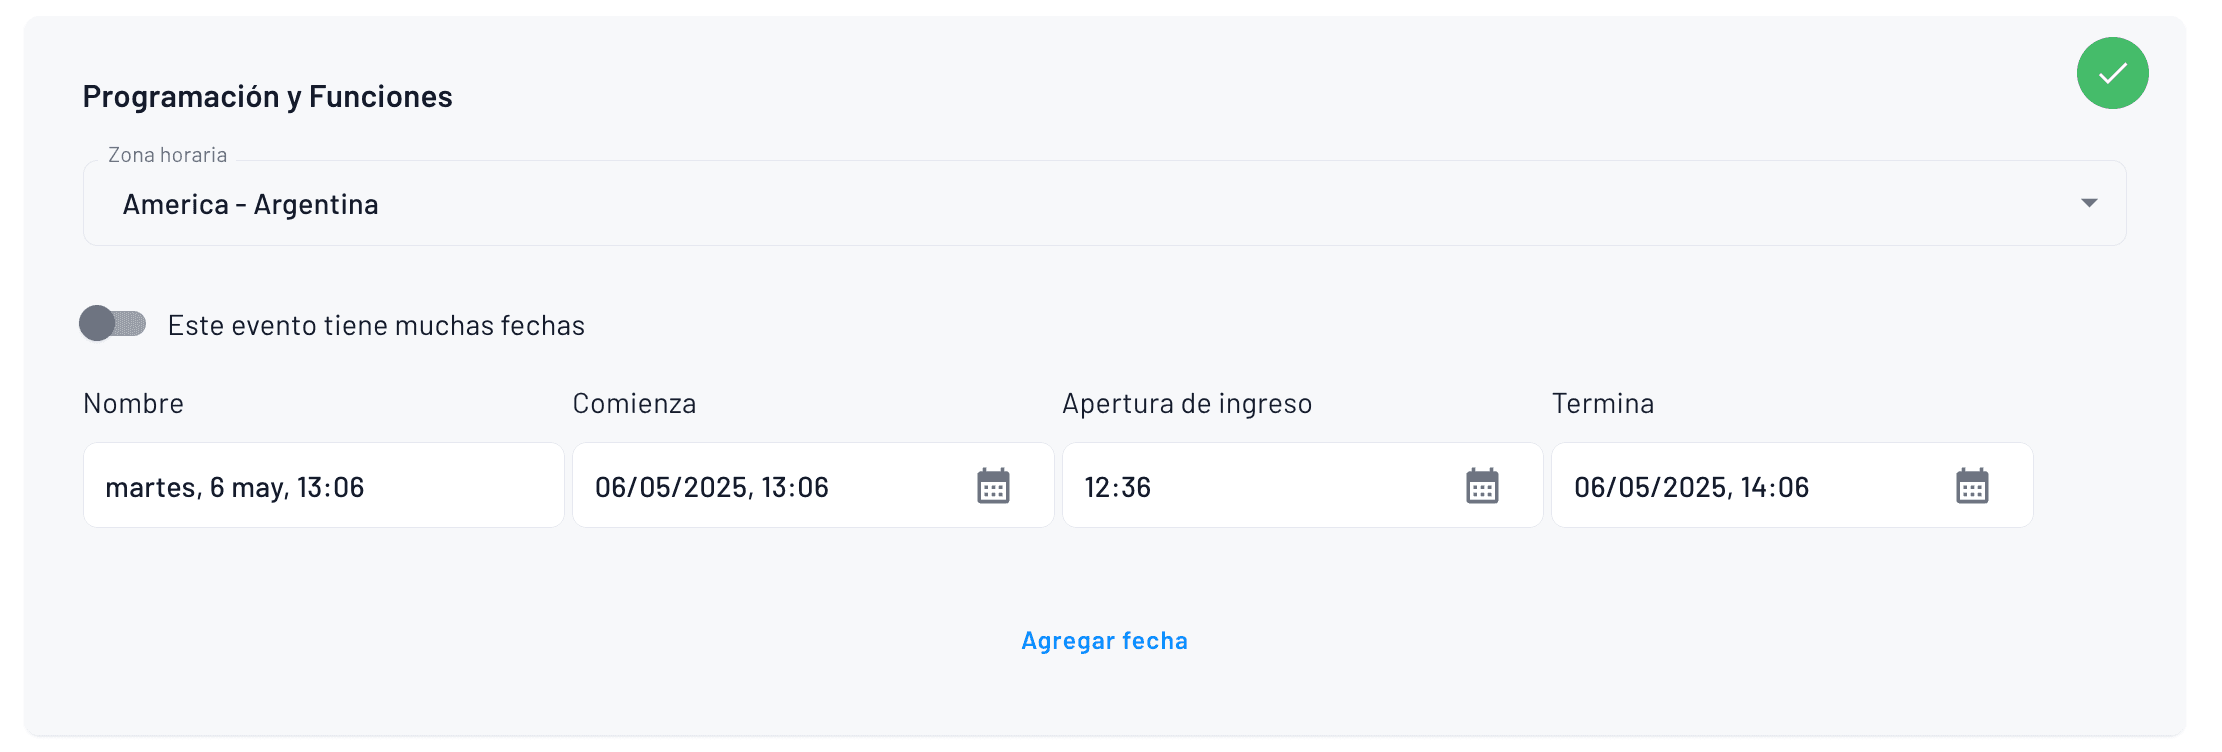
Dates can be configured for any type of event, whether single or with multiple shows.
If there are many shows, you can add them manually:
or use the multiple shows generator
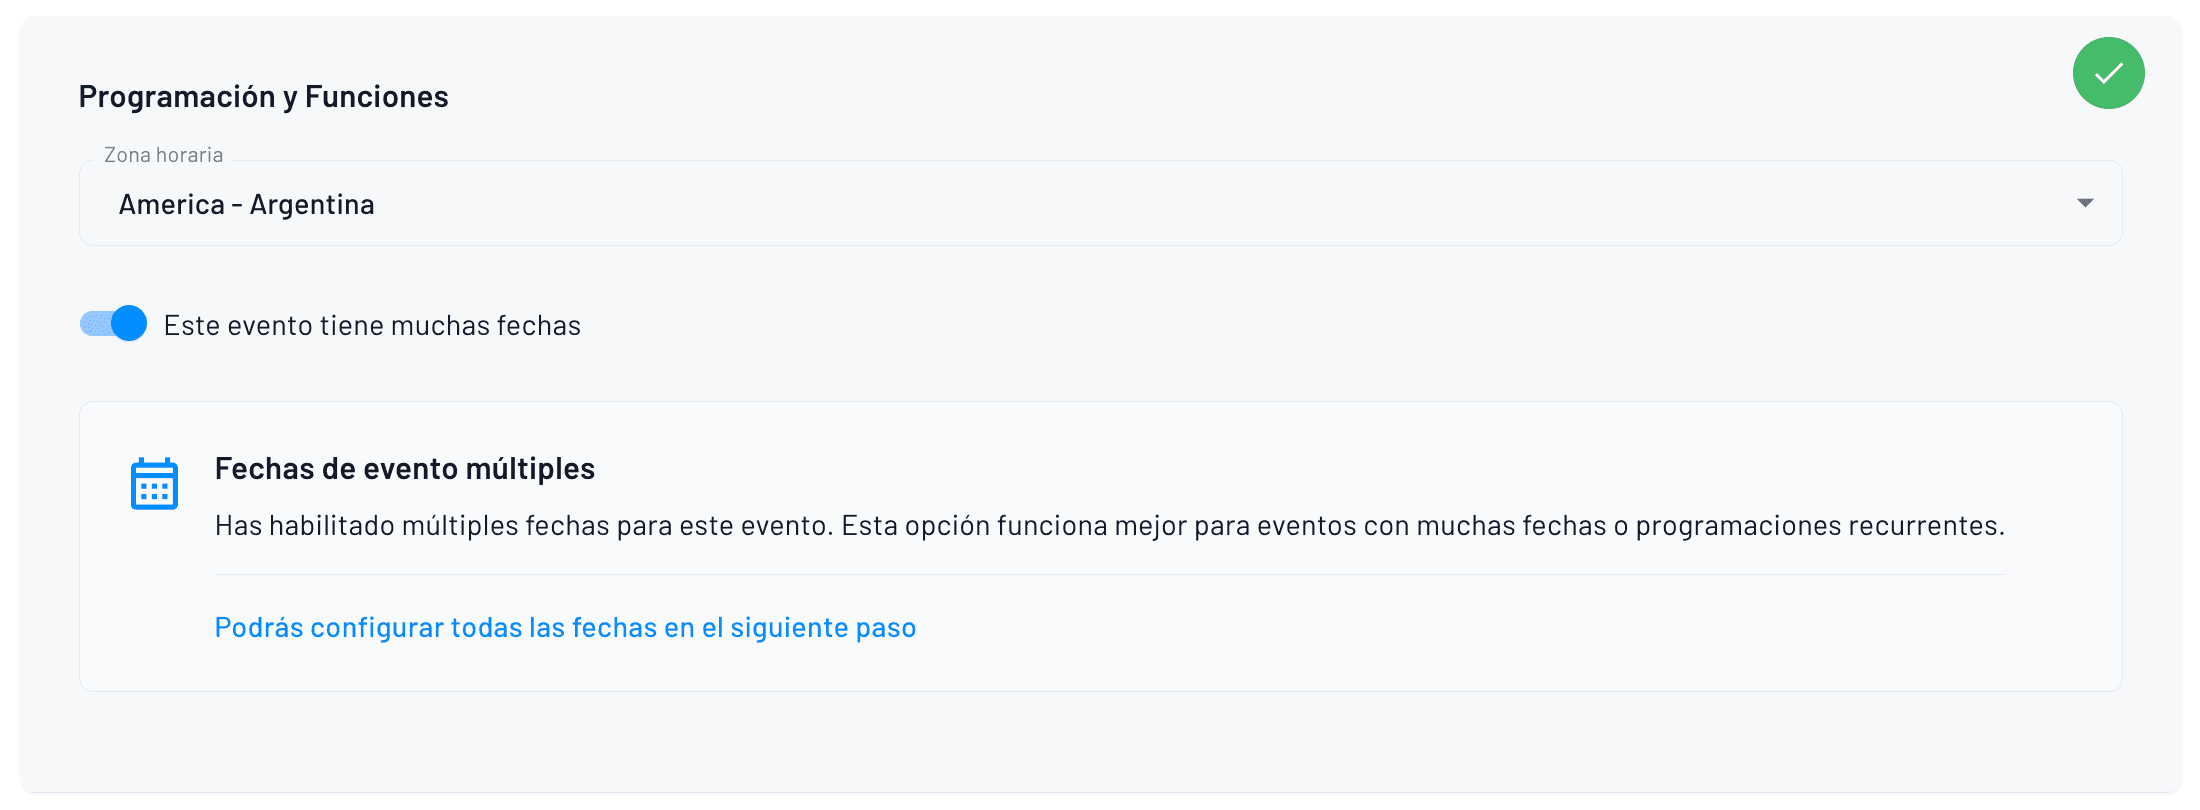
This will be enabled in the next step to finish generating all the shows. It's often used when the same event repeats during multiple days of the week at different times, generating hundreds of shows in 2 clicks.
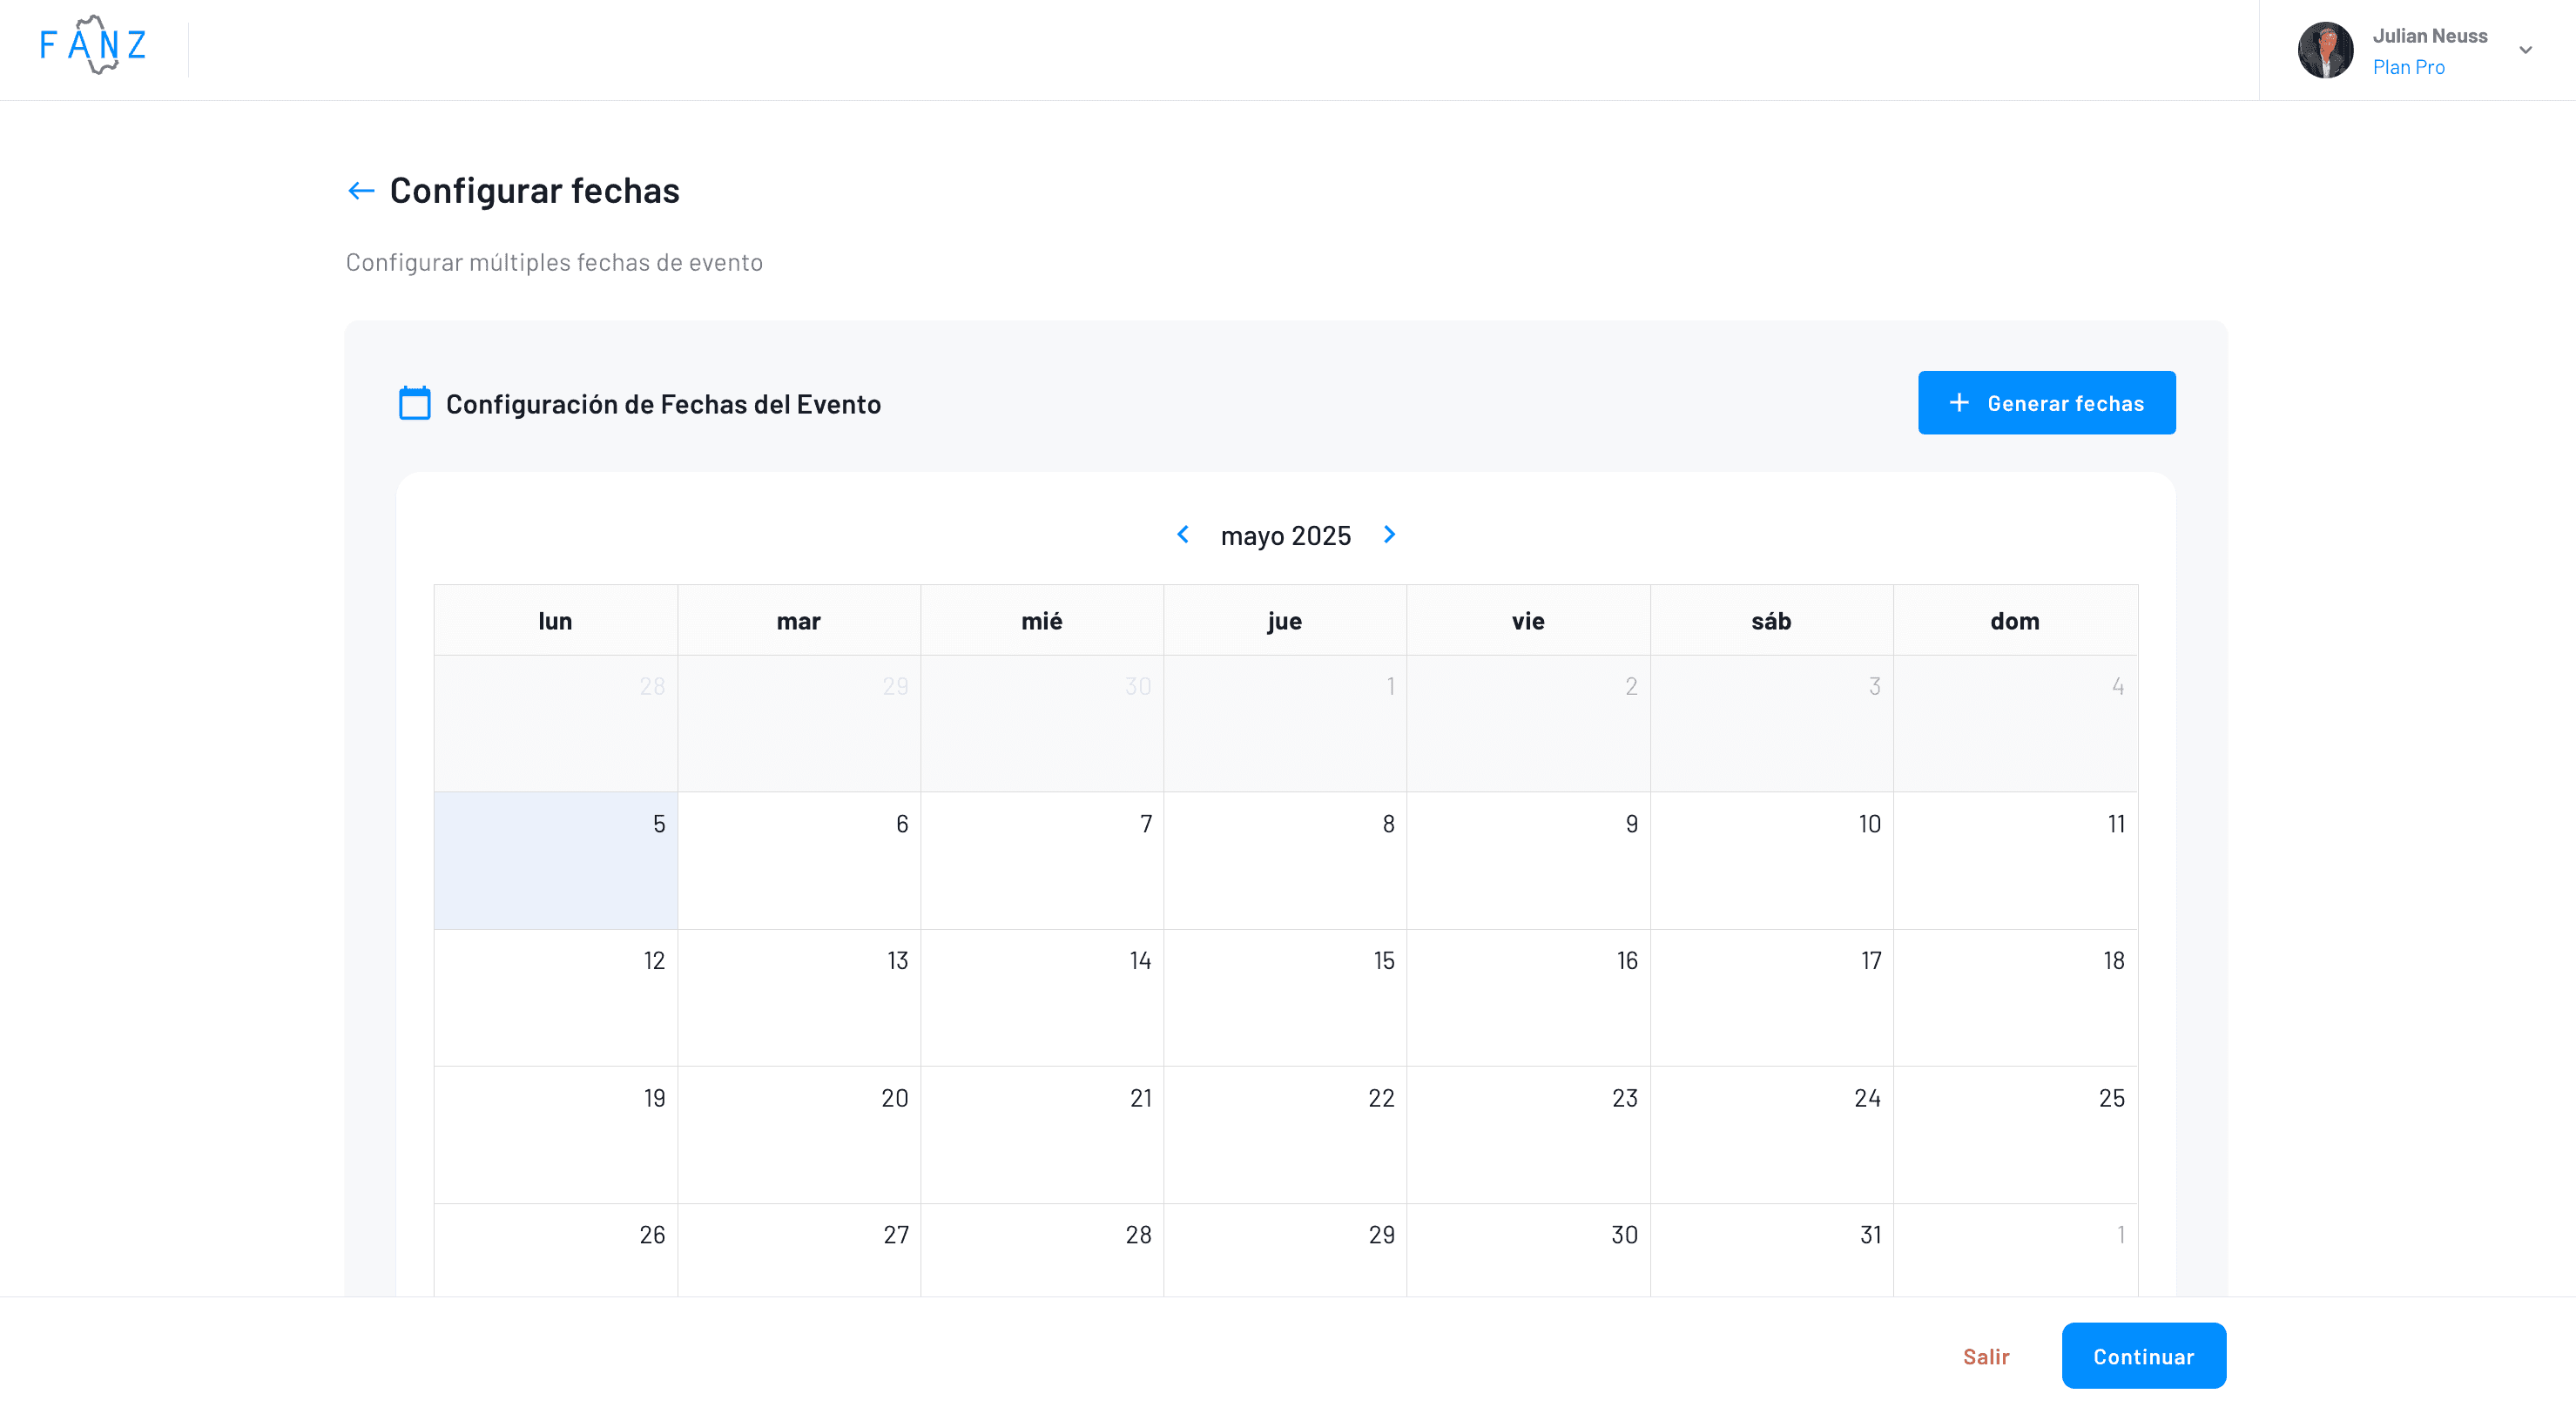
This is how the form to generate shows looks:
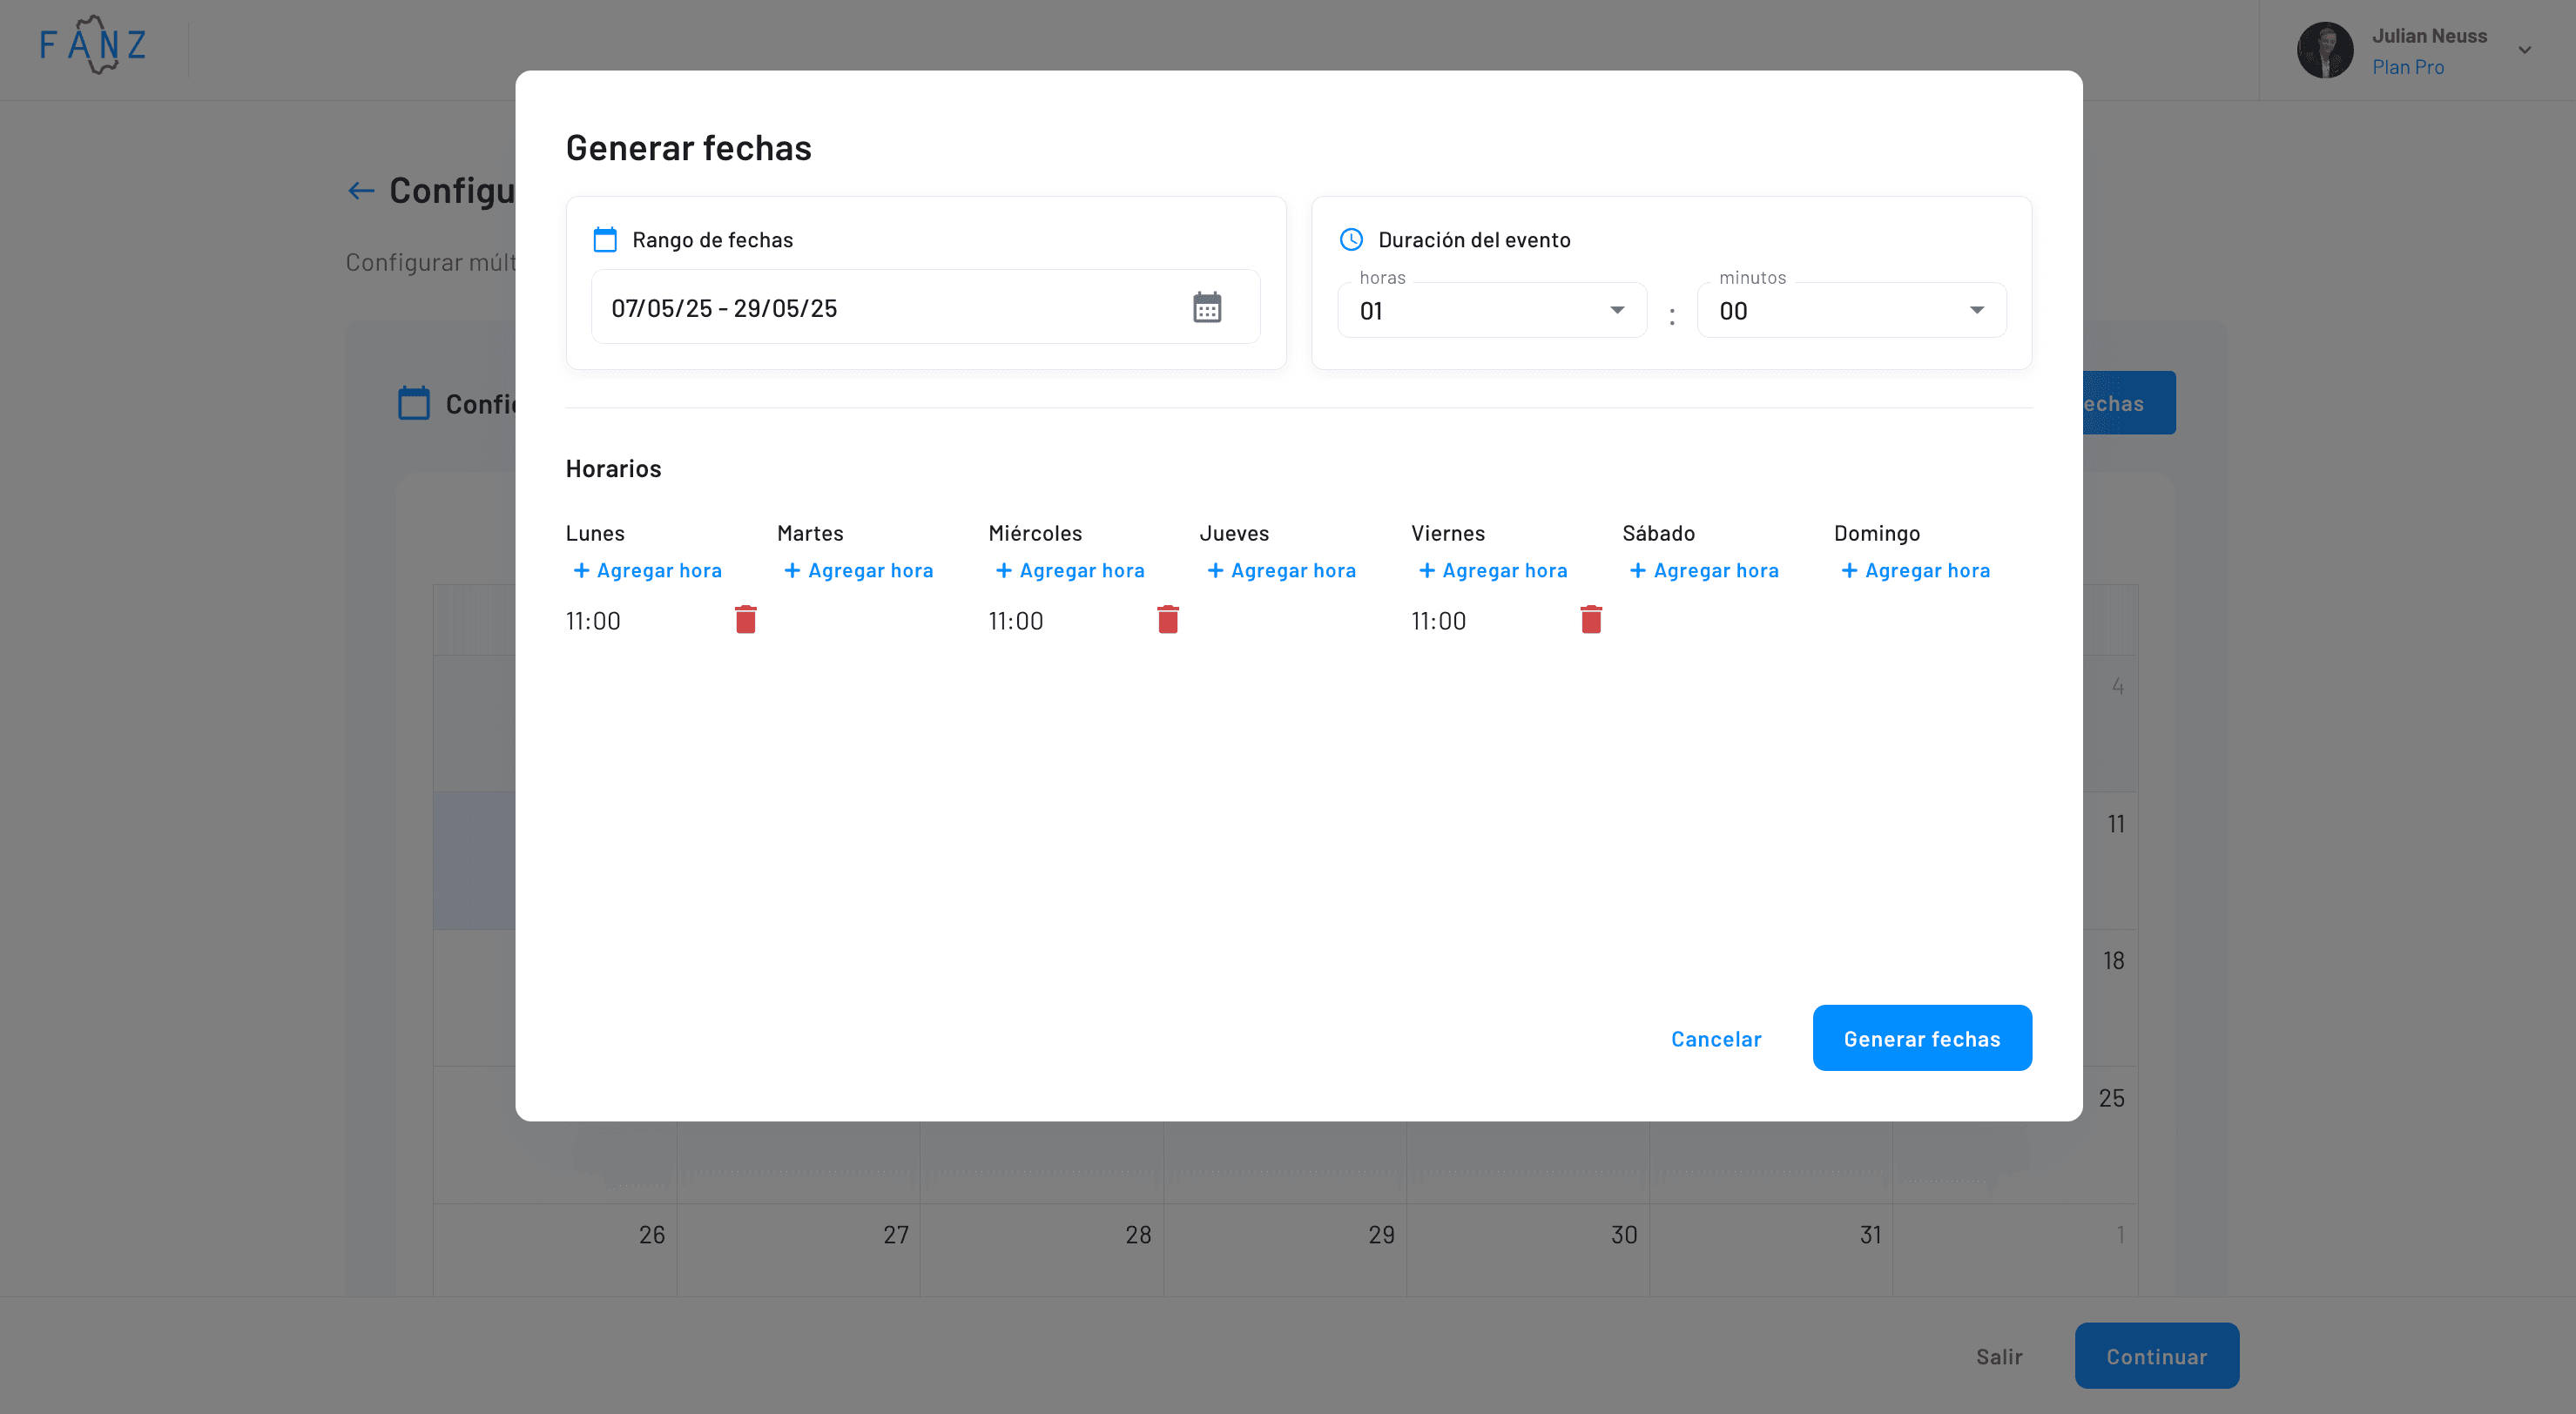
Then you can finish adjusting the generated shows in the calendar
Step 5 — Revenue Sharing
If you need to split revenue with partners or artists, first create the rule in Settings > Revenue Sharing.
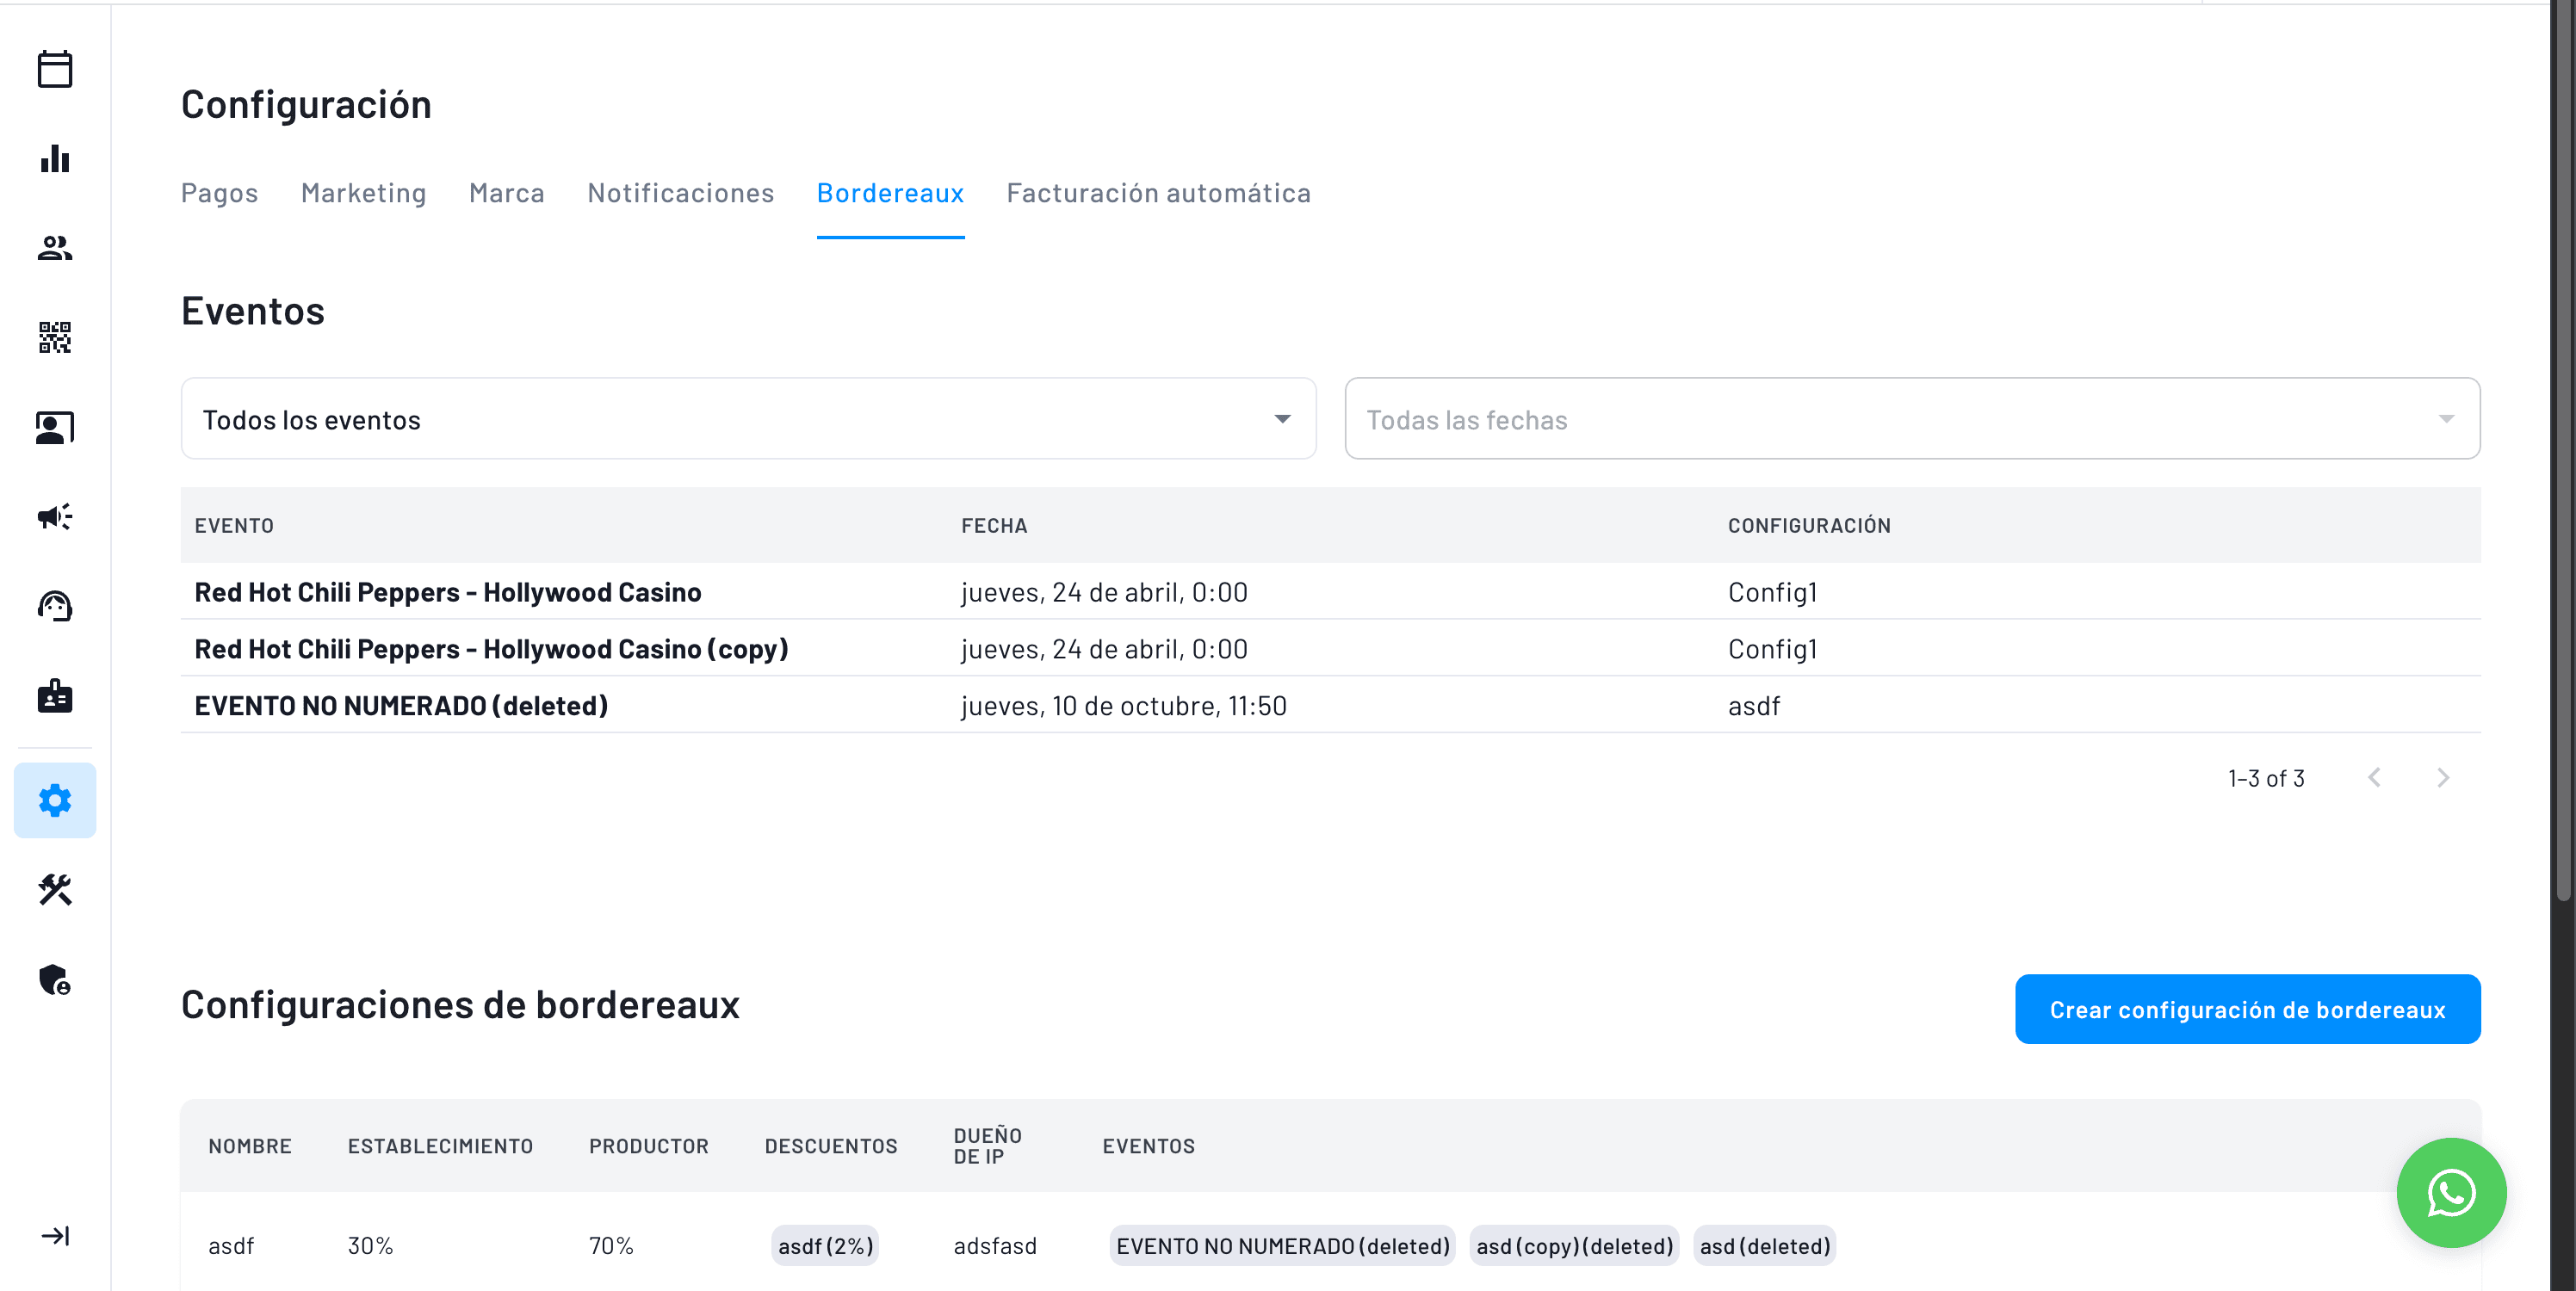
Then you can assign that configuration to all the events you want

and then, within events, you'll be able to view it and adjust it in real time
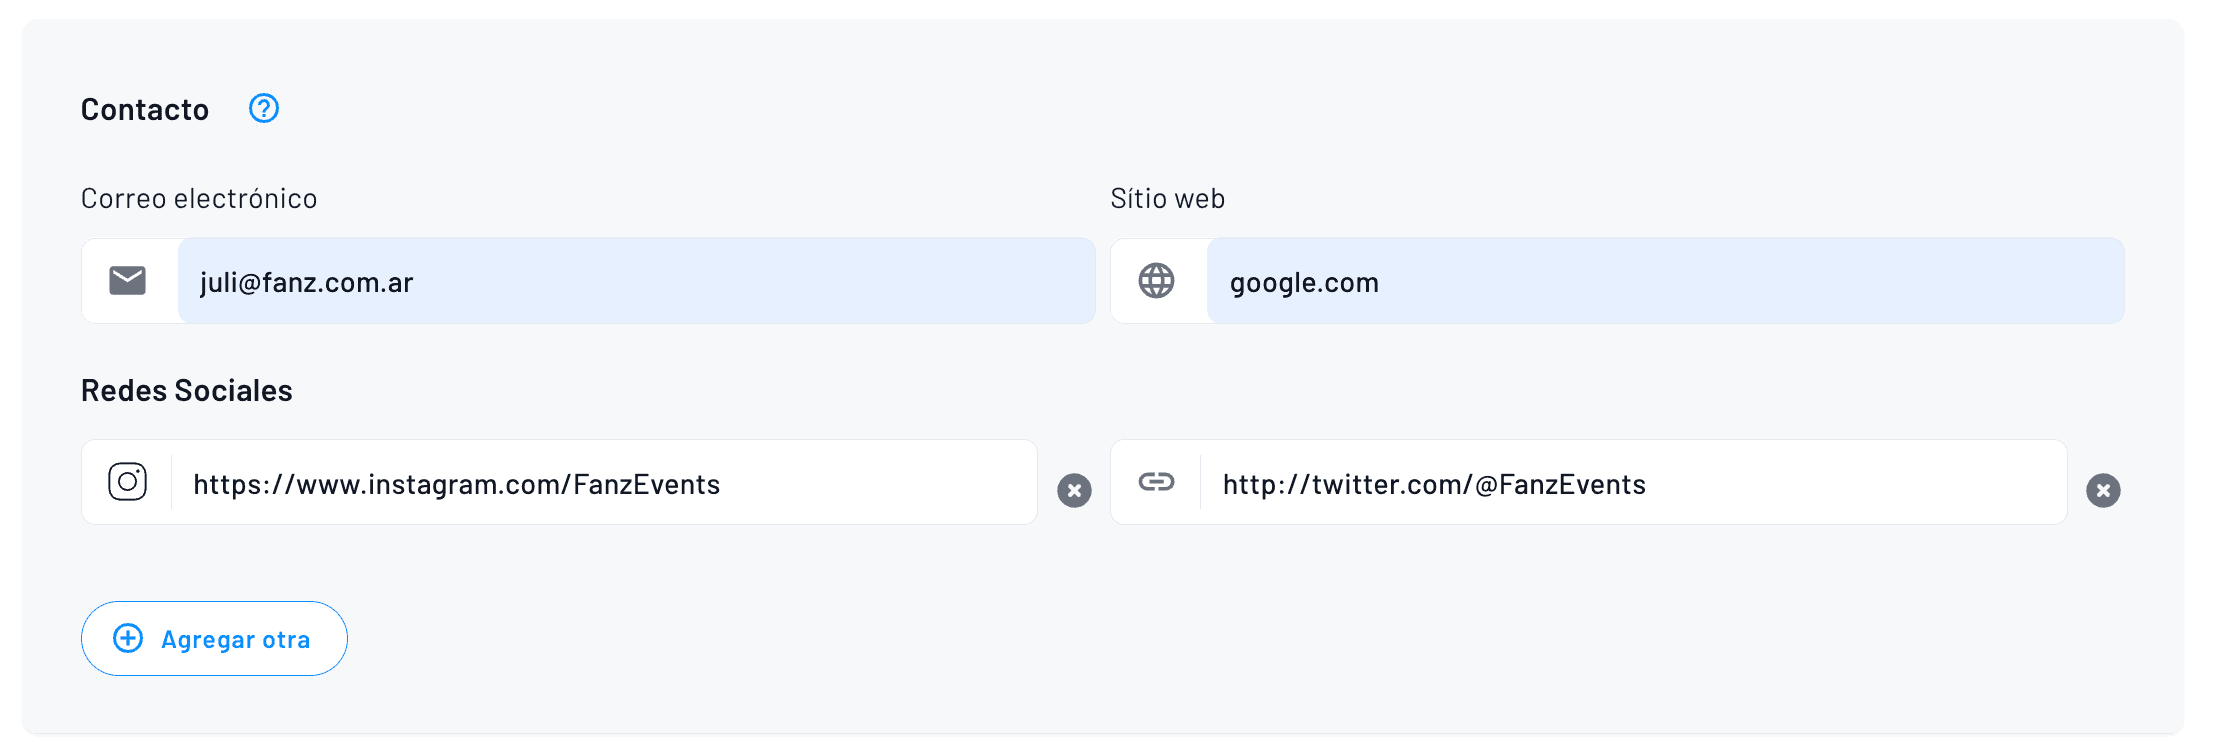
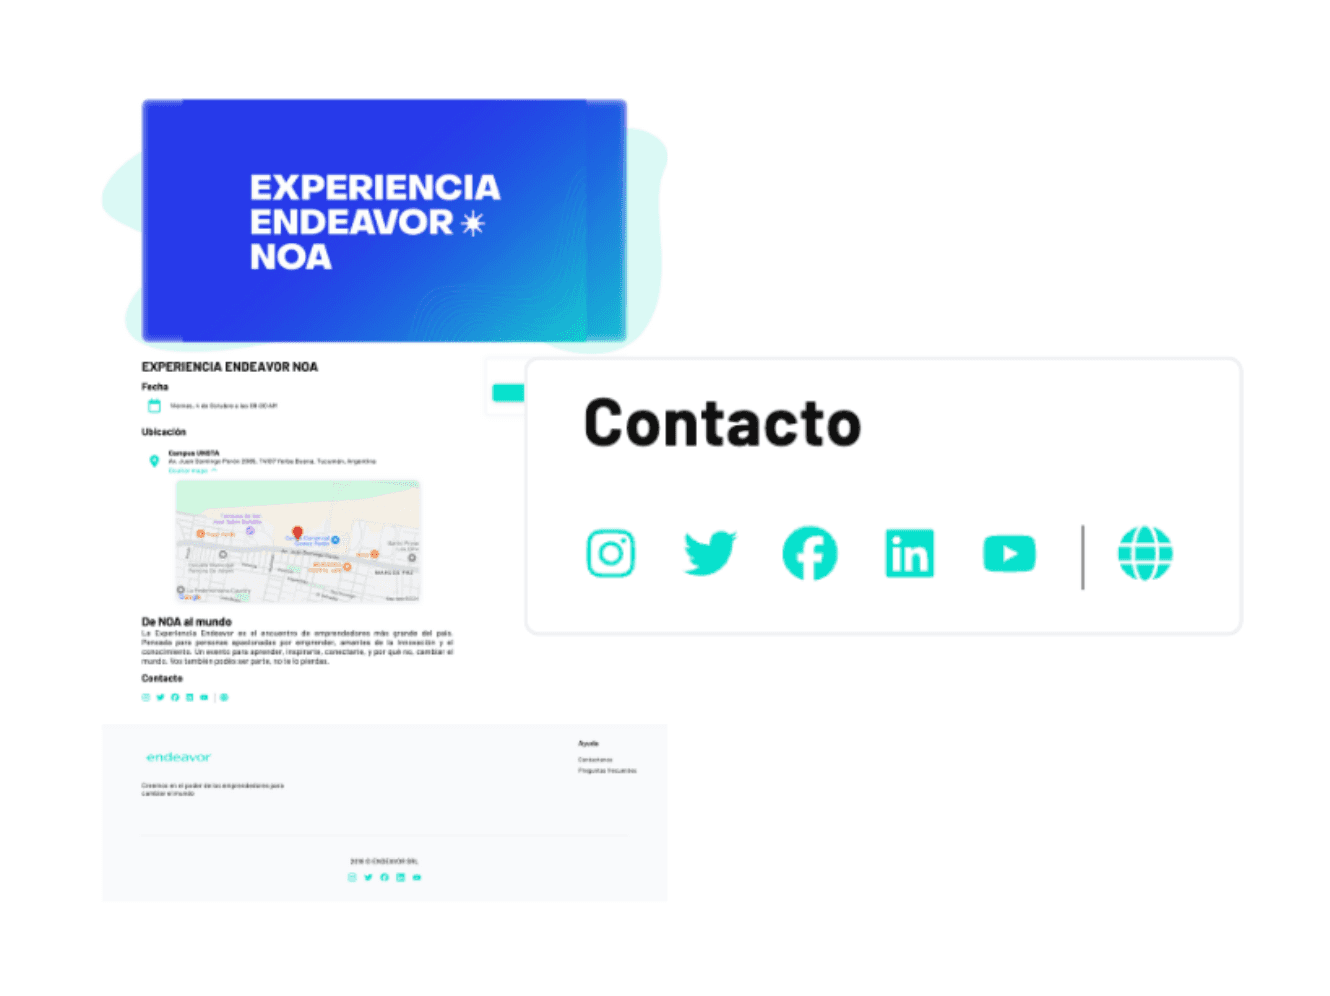
Step 6 — Contact and Online Presence
Fill in a support email, your website, and the event's social networks. Everything will be shown to the public so they can contact you or visit your page. If you have questions about the event, don't hesitate to contact us.
This is how it looks on the event page:
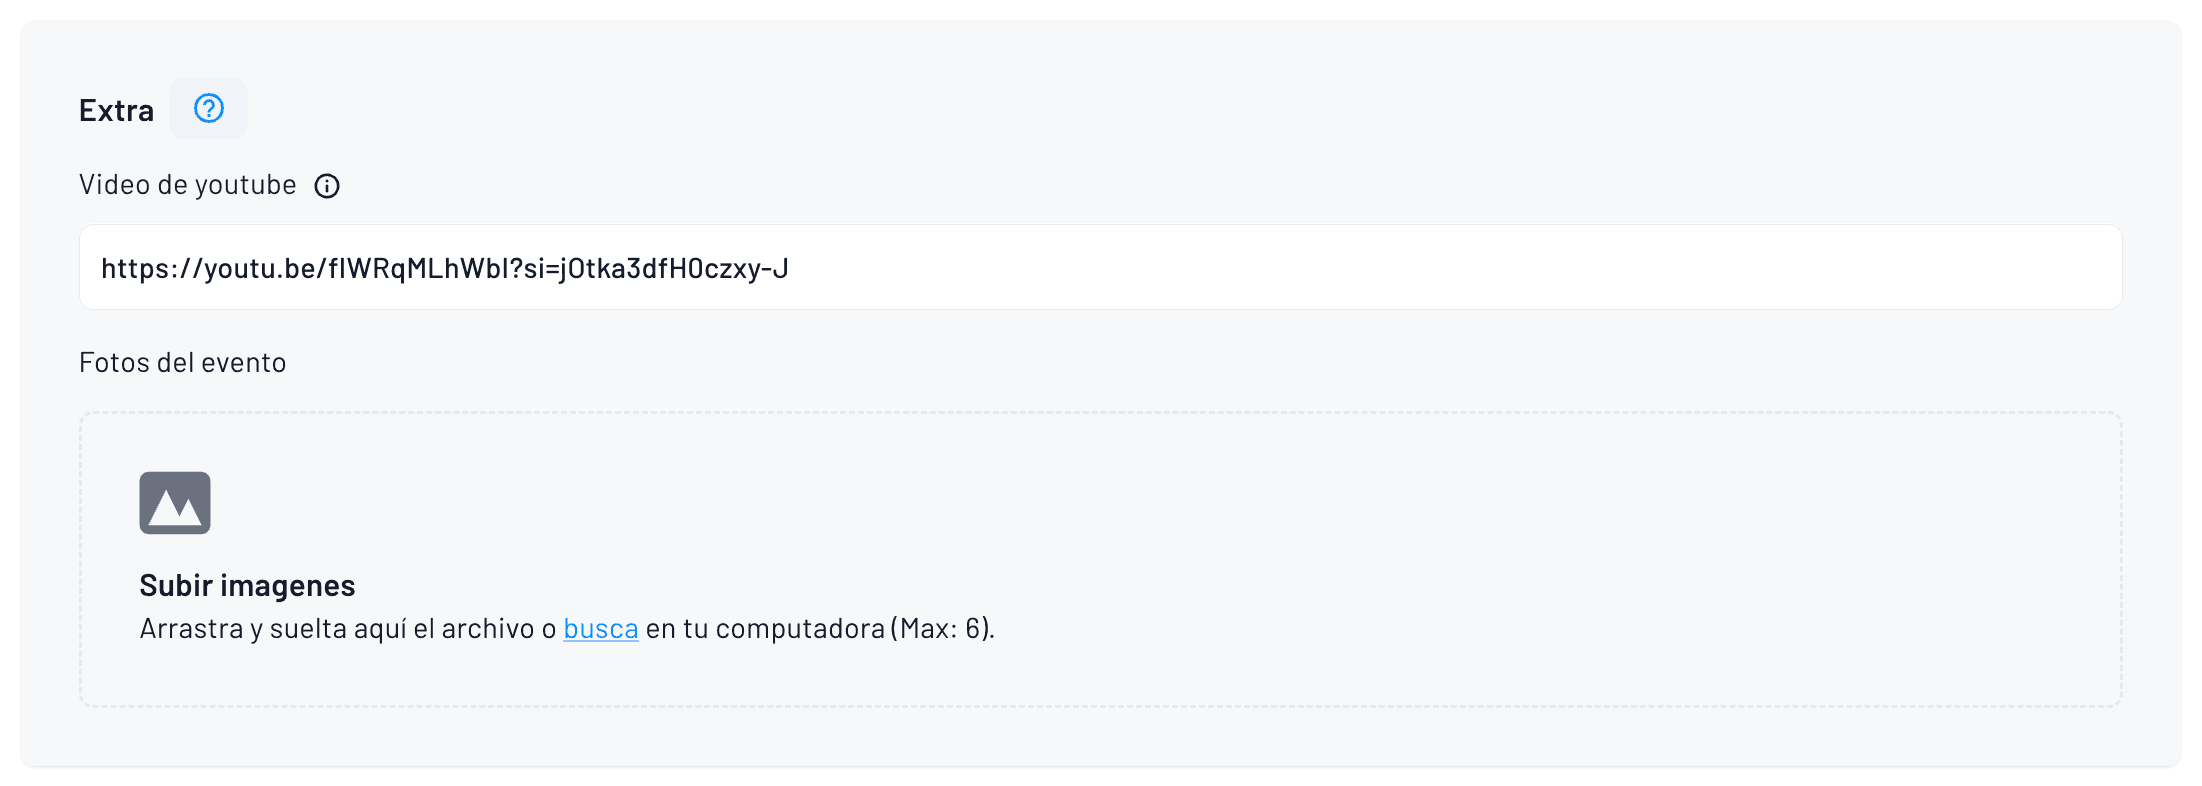
Step 7 — Event Media
Paste a YouTube link if you want a trailer and upload up to five extra photos. Drag them to the box or choose them from your PC and wait for them to finish loading. You can also send a confirmation email with the trailer link and additional photos.
Use horizontal 1920×1080 images so they look crisp on any screen.
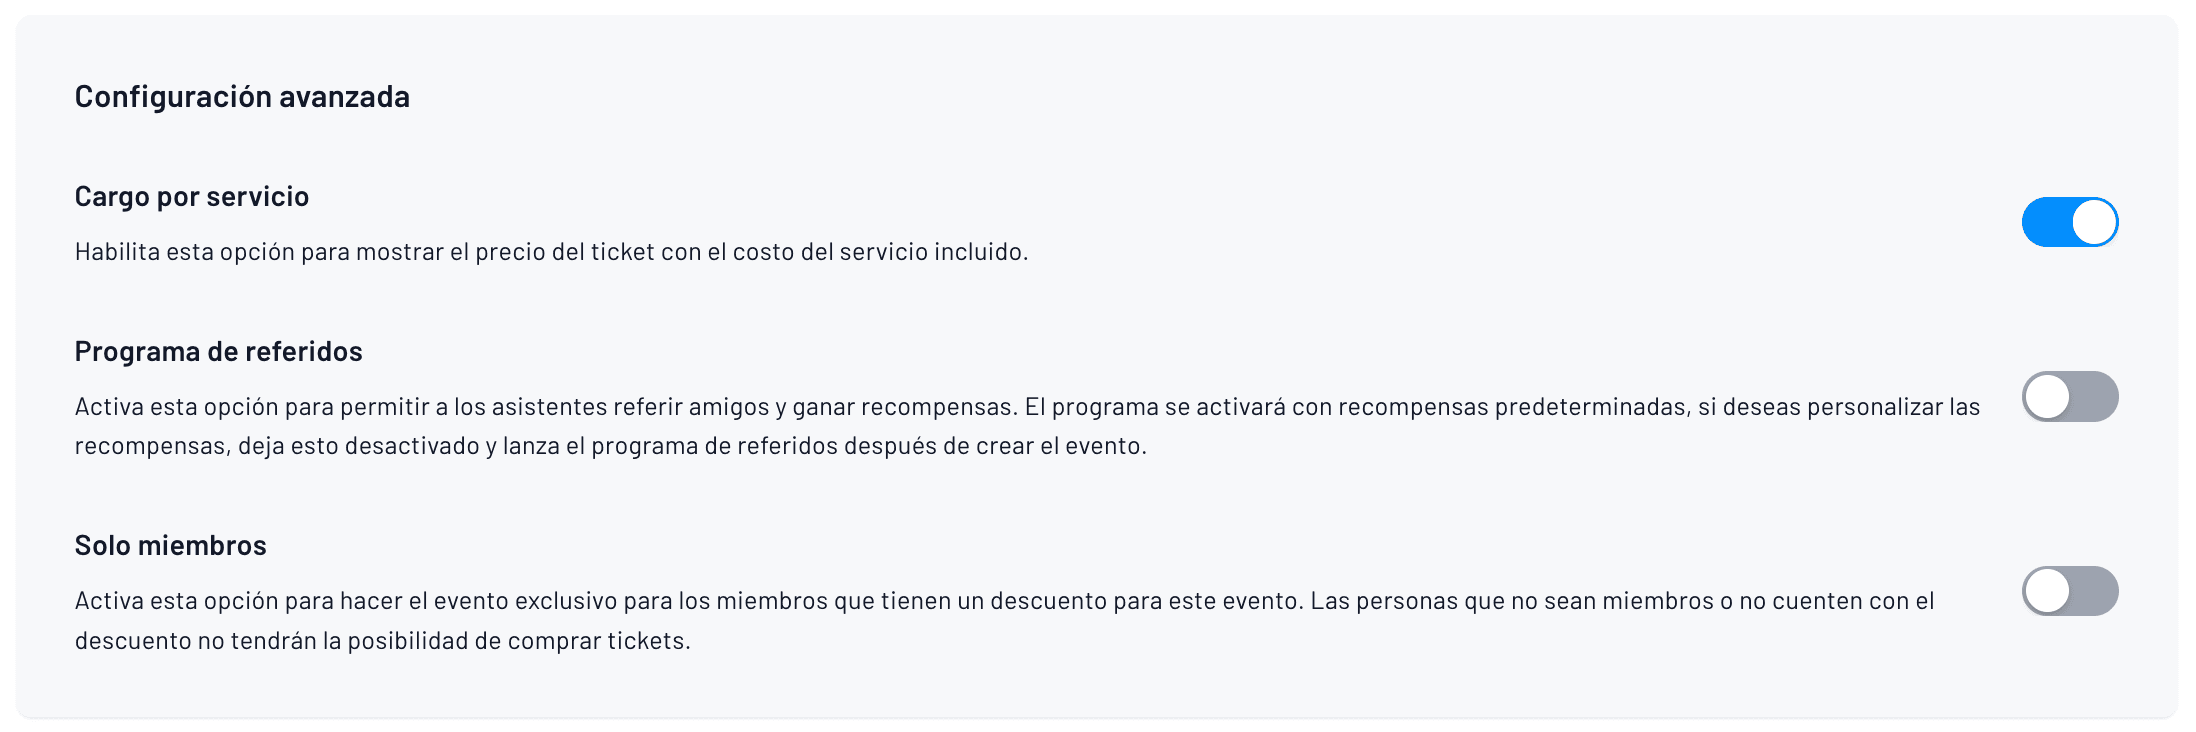
Step 8 — Advanced Monetization Options
You have three switches.
Service fee included: the price already shows the fee, so no one is surprised at checkout and payment is facilitated through various options like cash, transfers, and credit cards.
Referral program: activate links that give cashback to those who bring friends.
Members only: blocks purchase to anyone who doesn't have a VIP pass or discount. Choose the ones you need and continue.
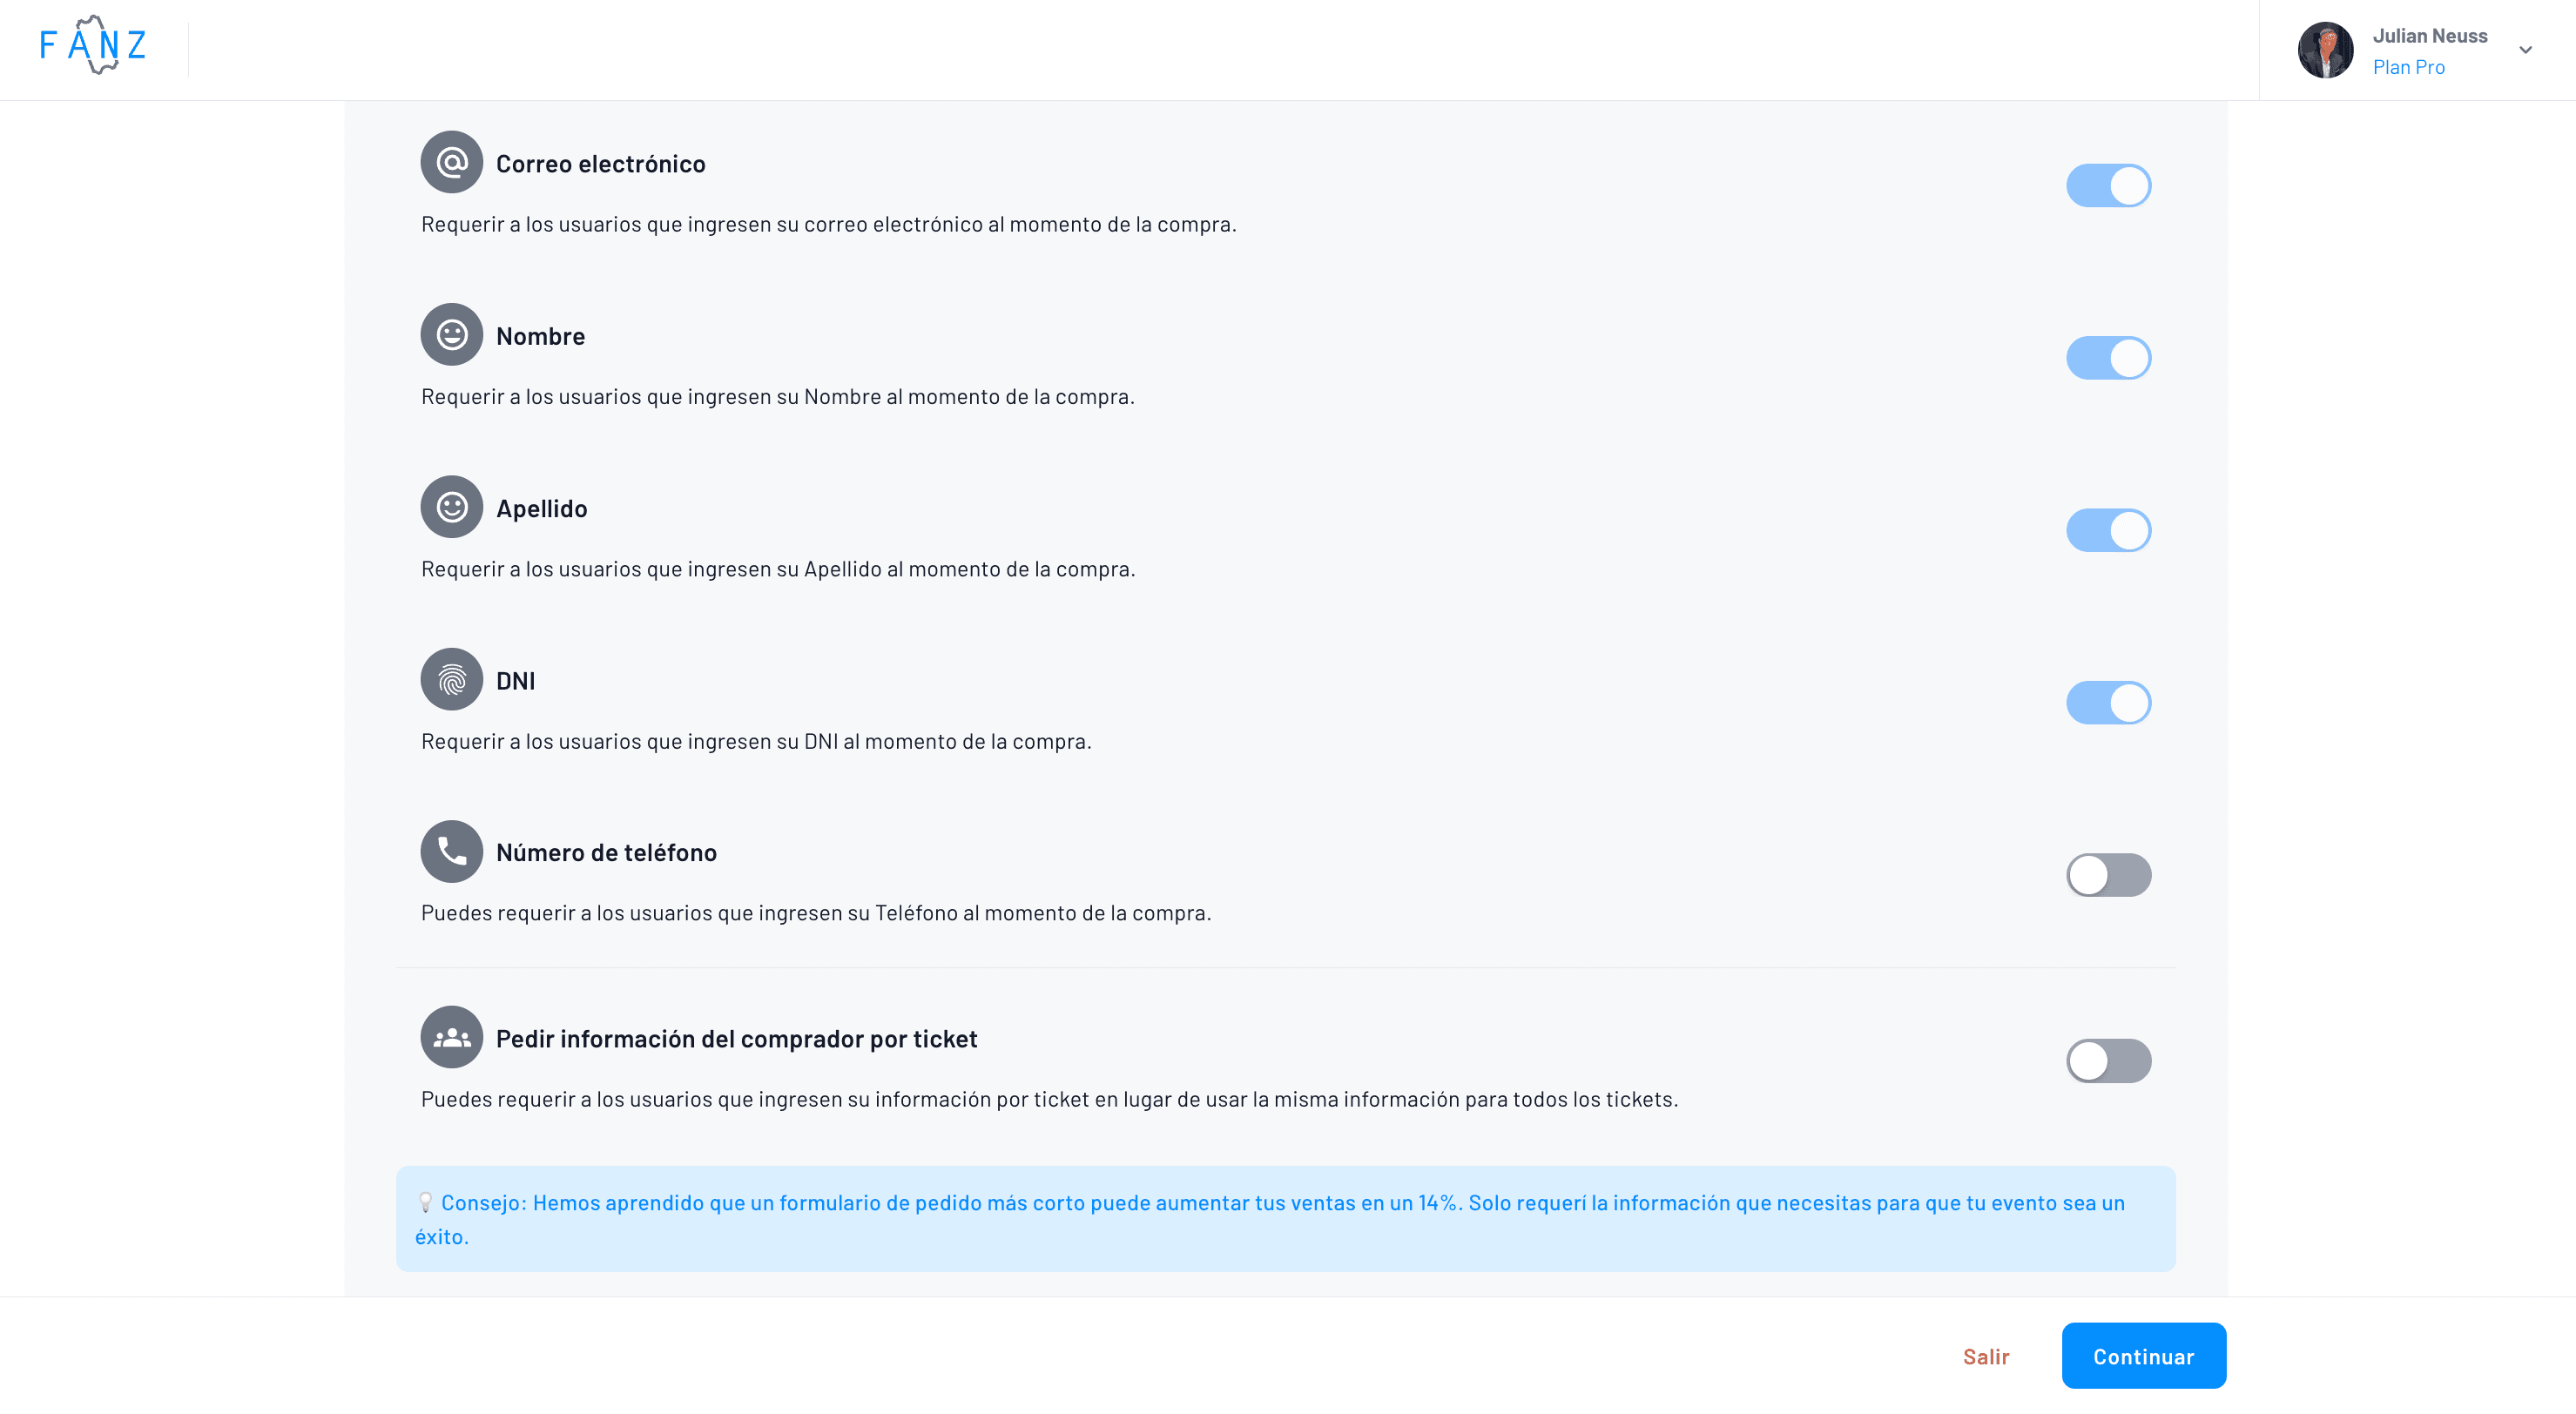
Step 9 — Buyer Information
Mark if you want to request email, name, last name, ID, or phone number.
It's crucial to verify buyer identity for events that require ID.

If the event requires data for each ticket (useful for marathons or assigned seating with names), activate "Request information per ticket".
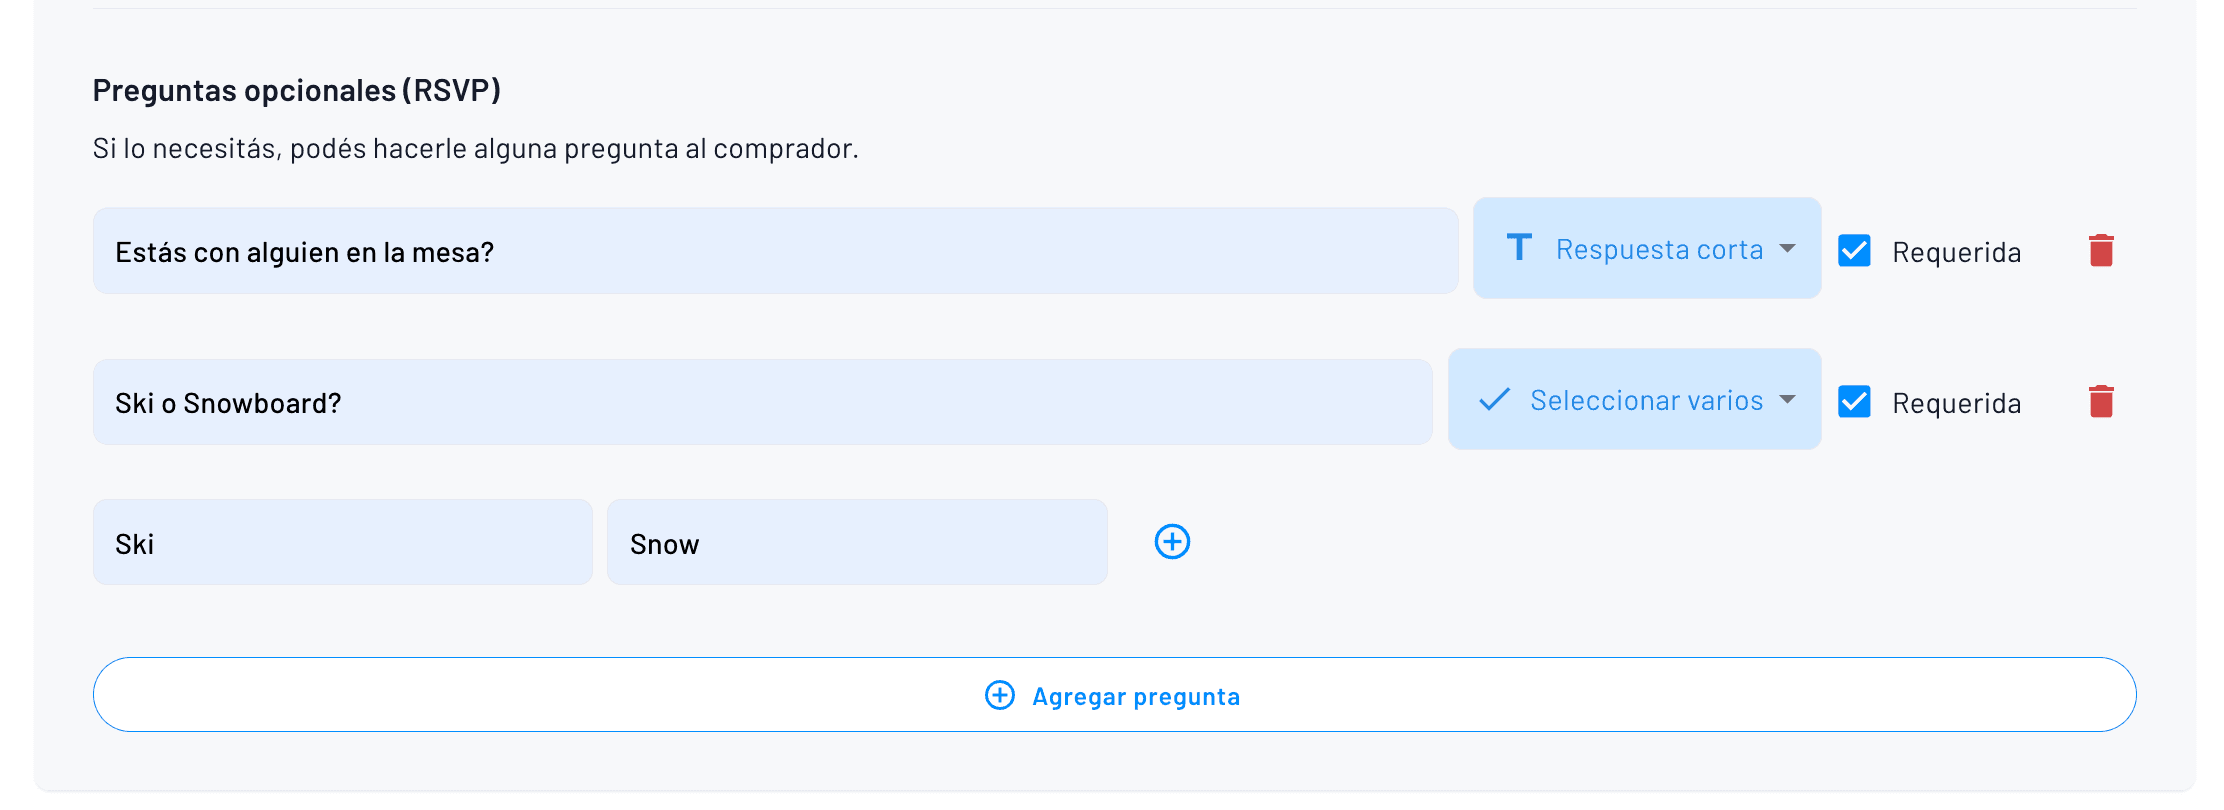
Step 10 — Optional Questions (RSVP)
If you need something extra, click "Add question", write the phrase and mark if it's required. This way you can ask about allergies, t-shirt size, company, or whatever you want.
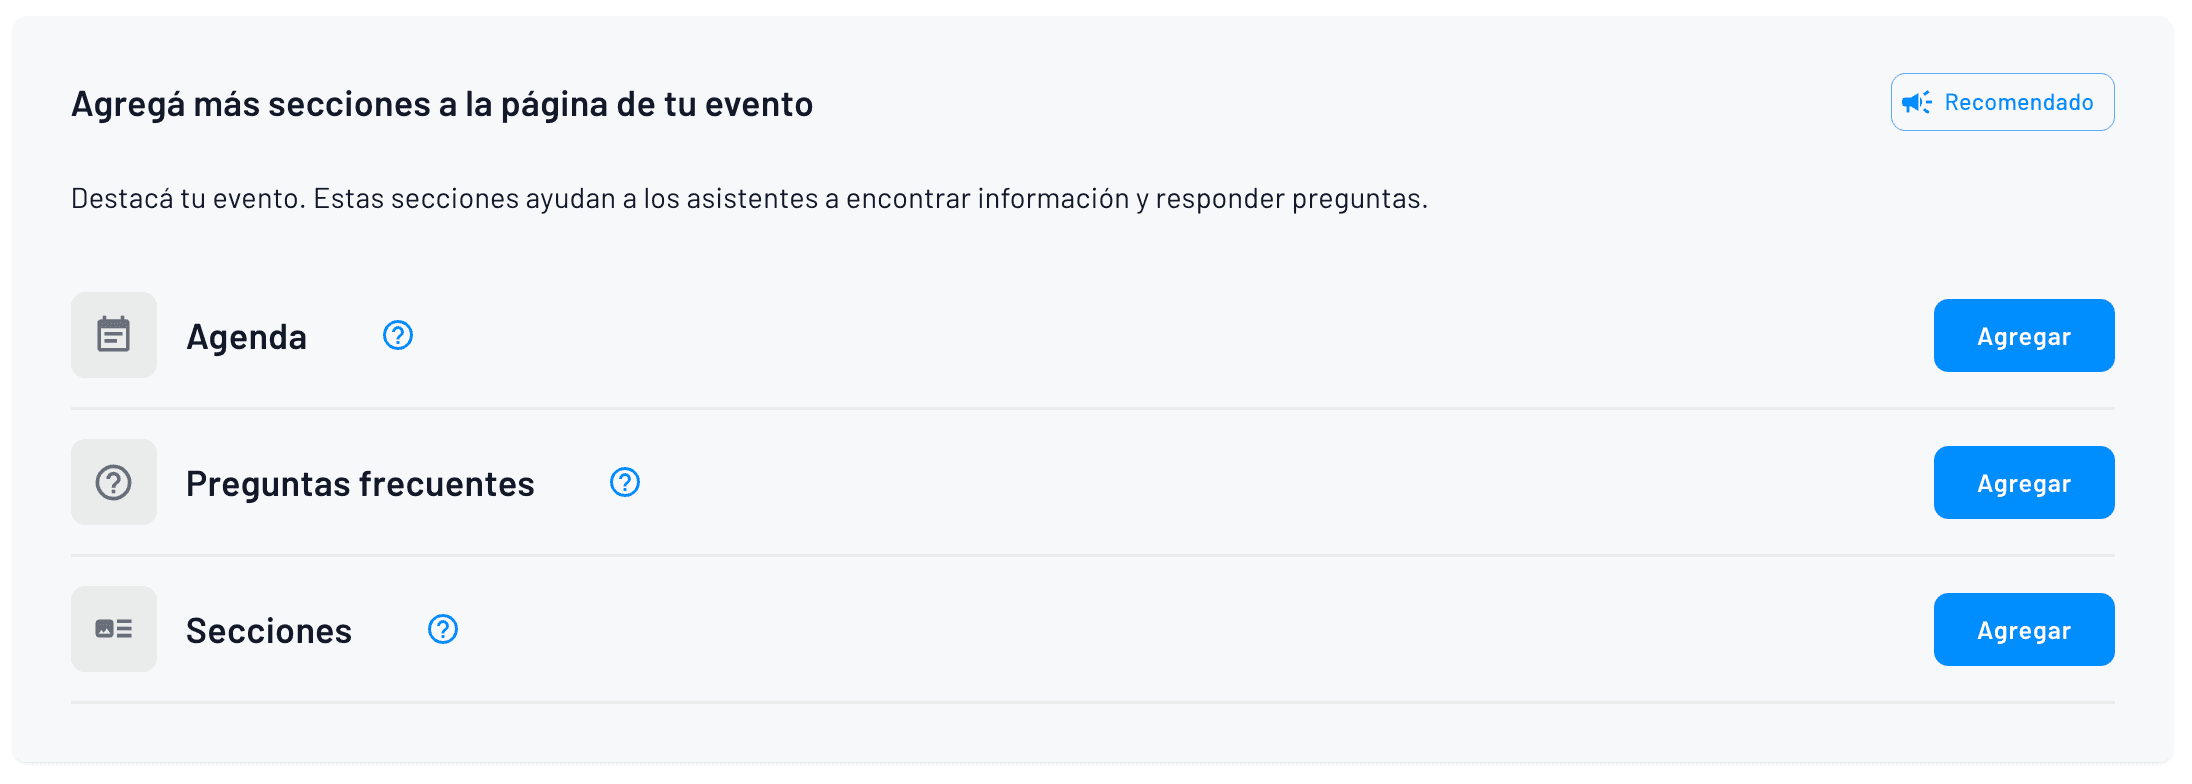
Step 11 — Extra Sections on the Event Page
With "Add section" you can add a detailed Agenda, a FAQ block, or any HTML section for sponsors.
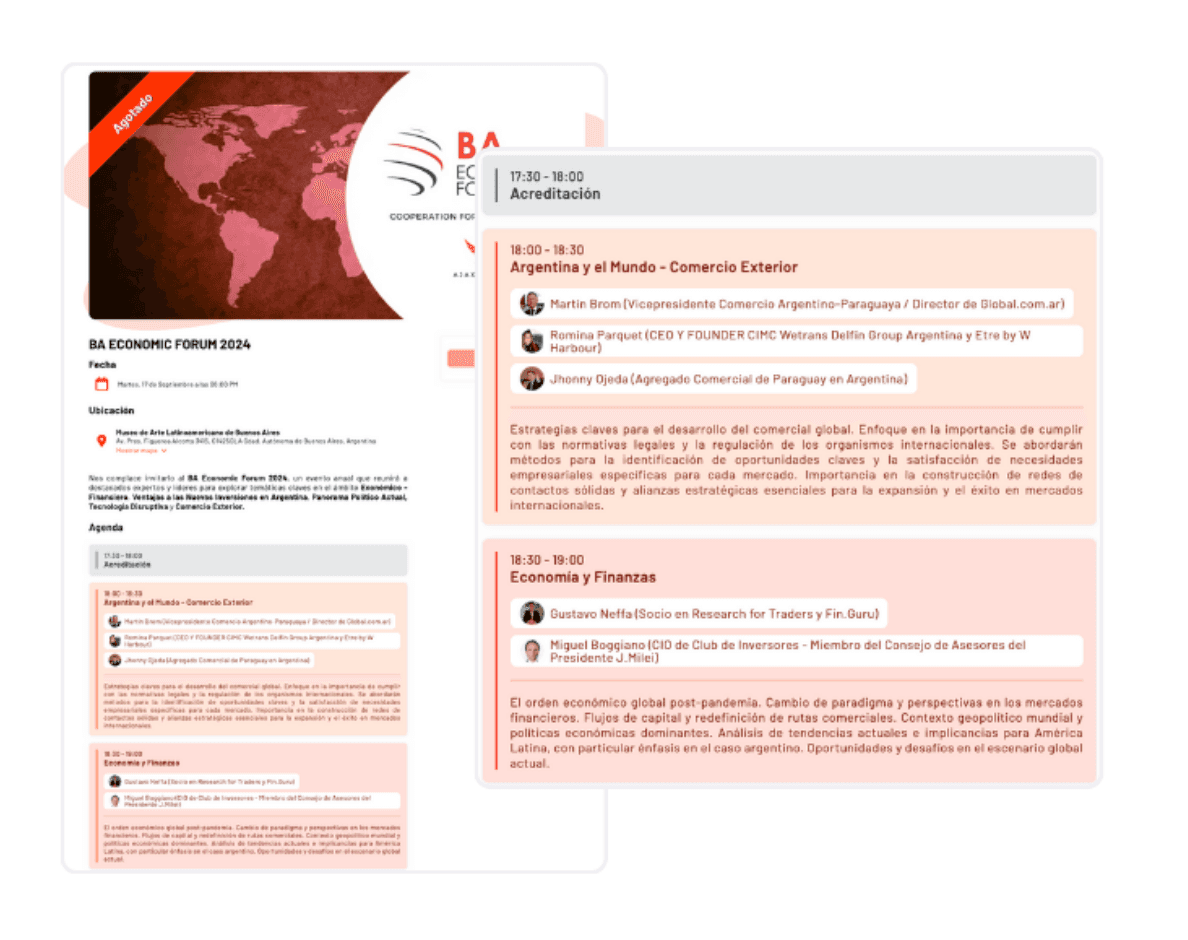
Example of agenda at the Chicago Economic Forum at the Art Institute:
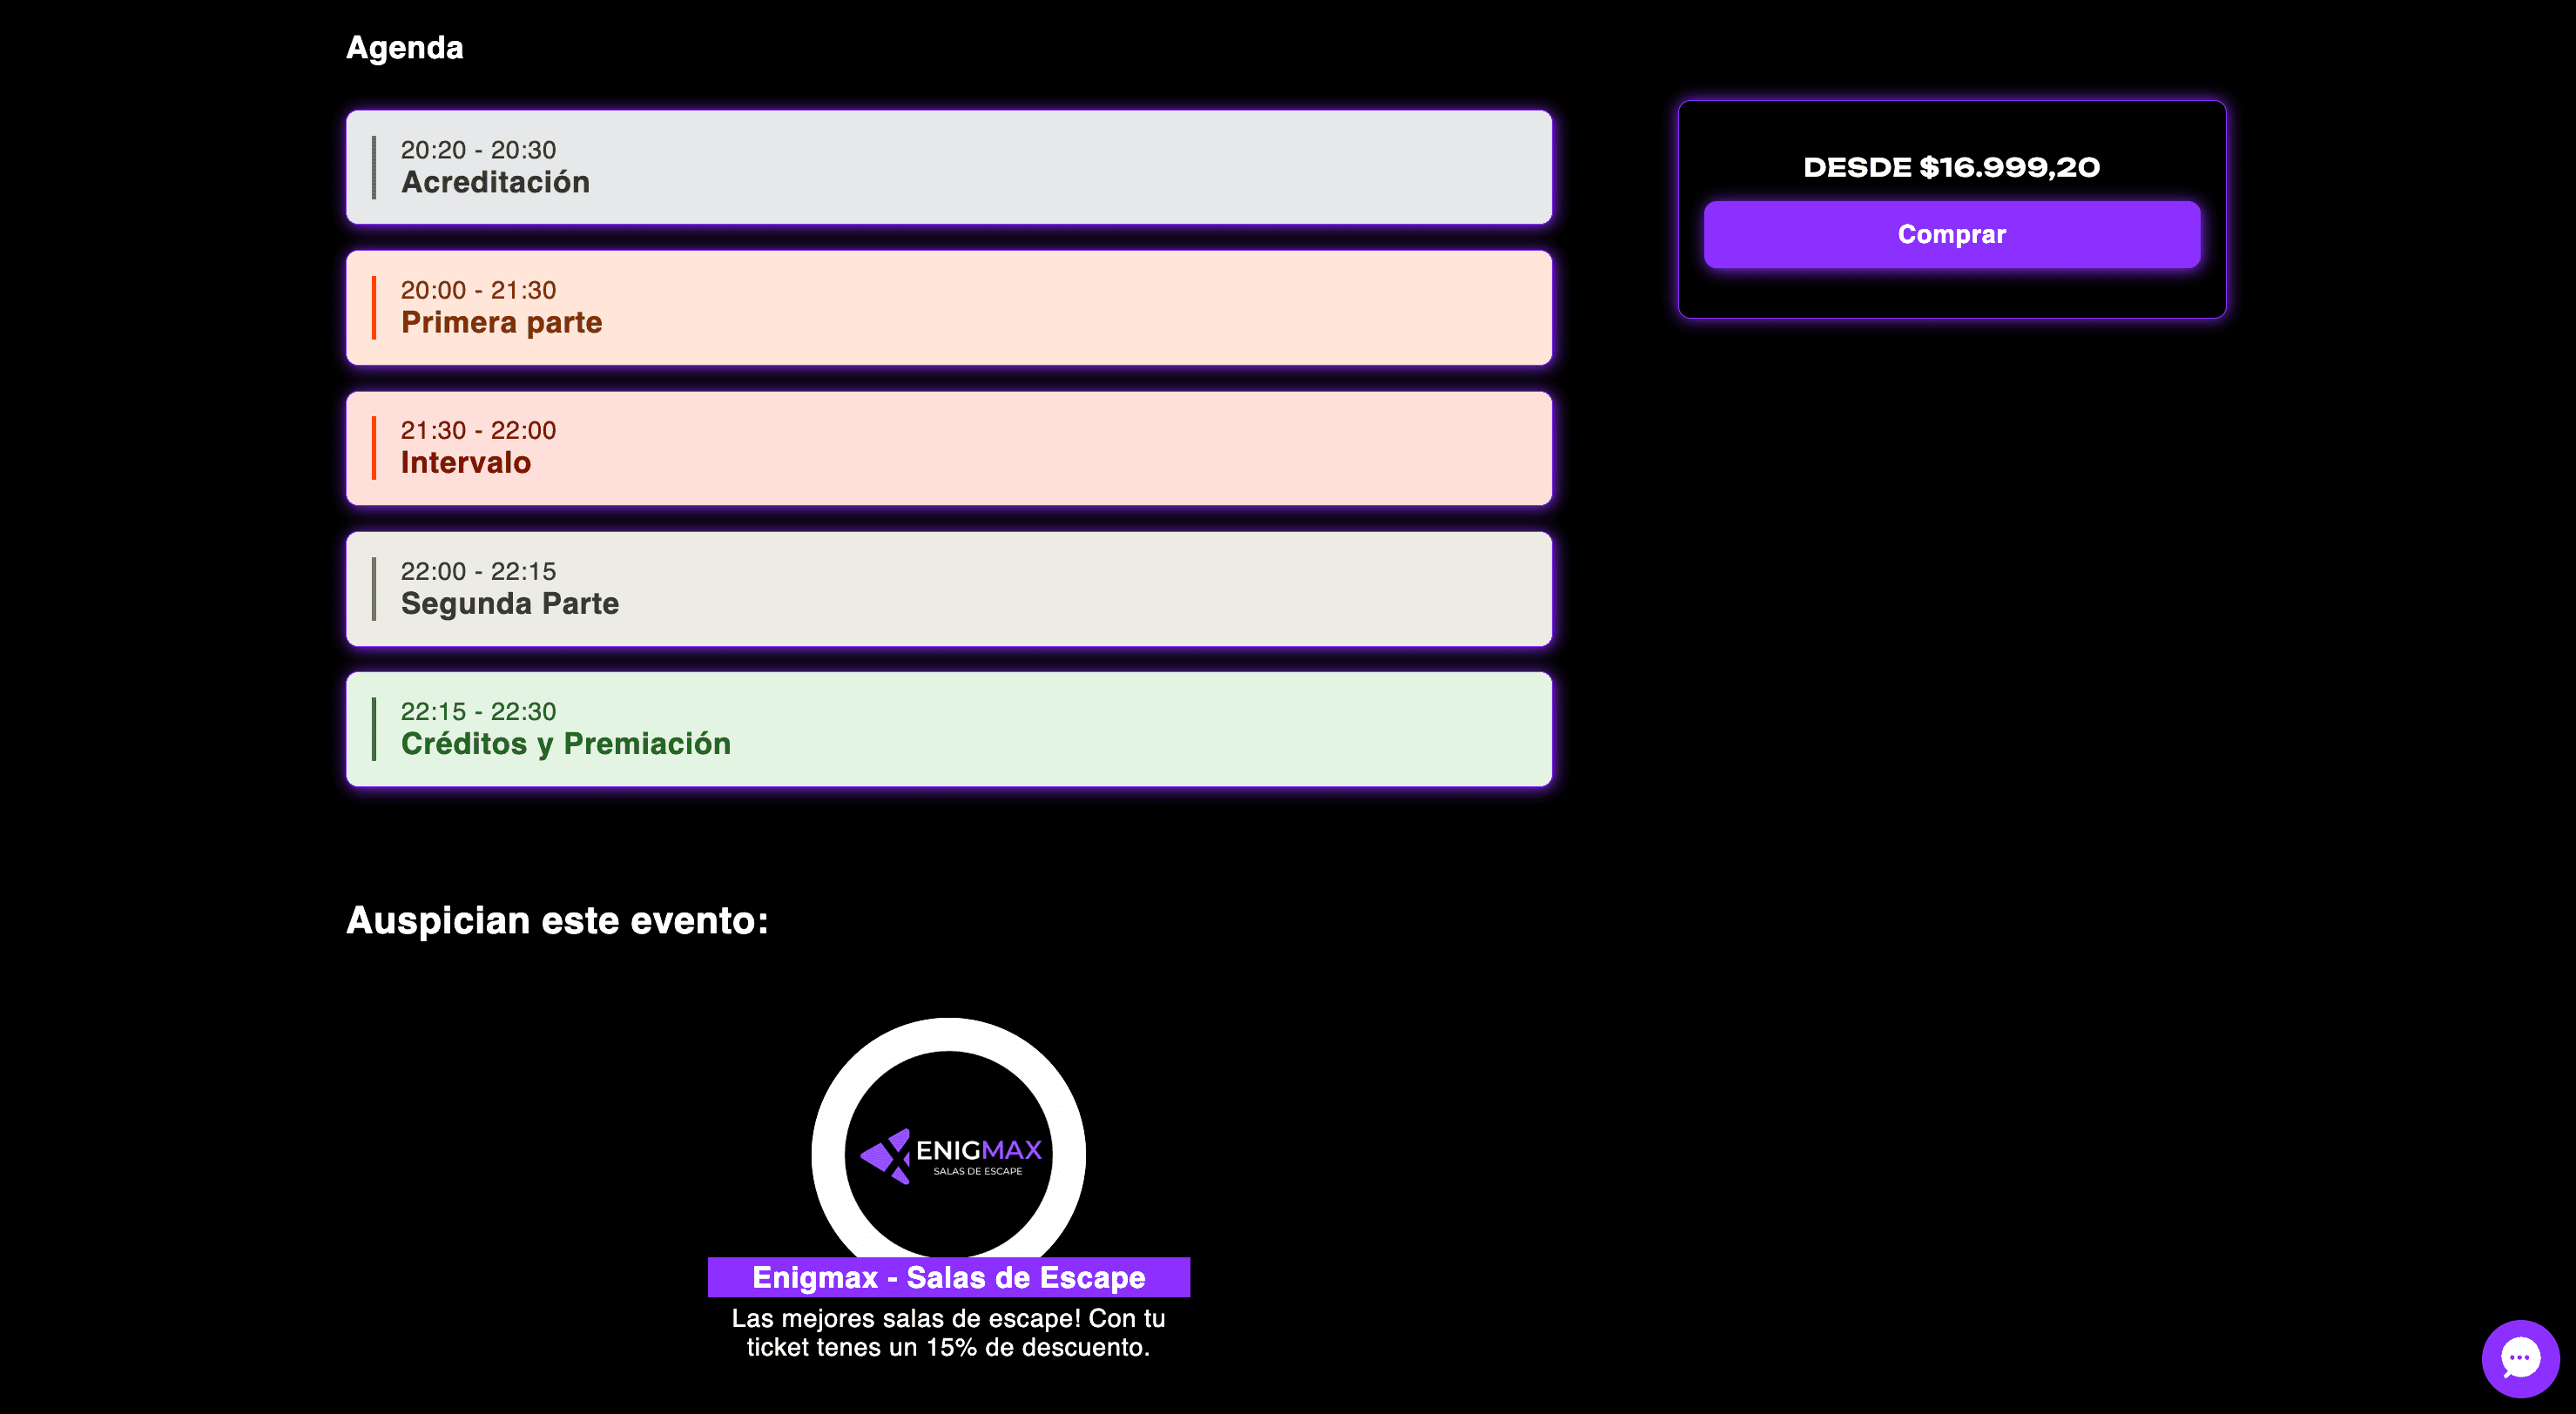
Example of agenda on the Enigmax website:
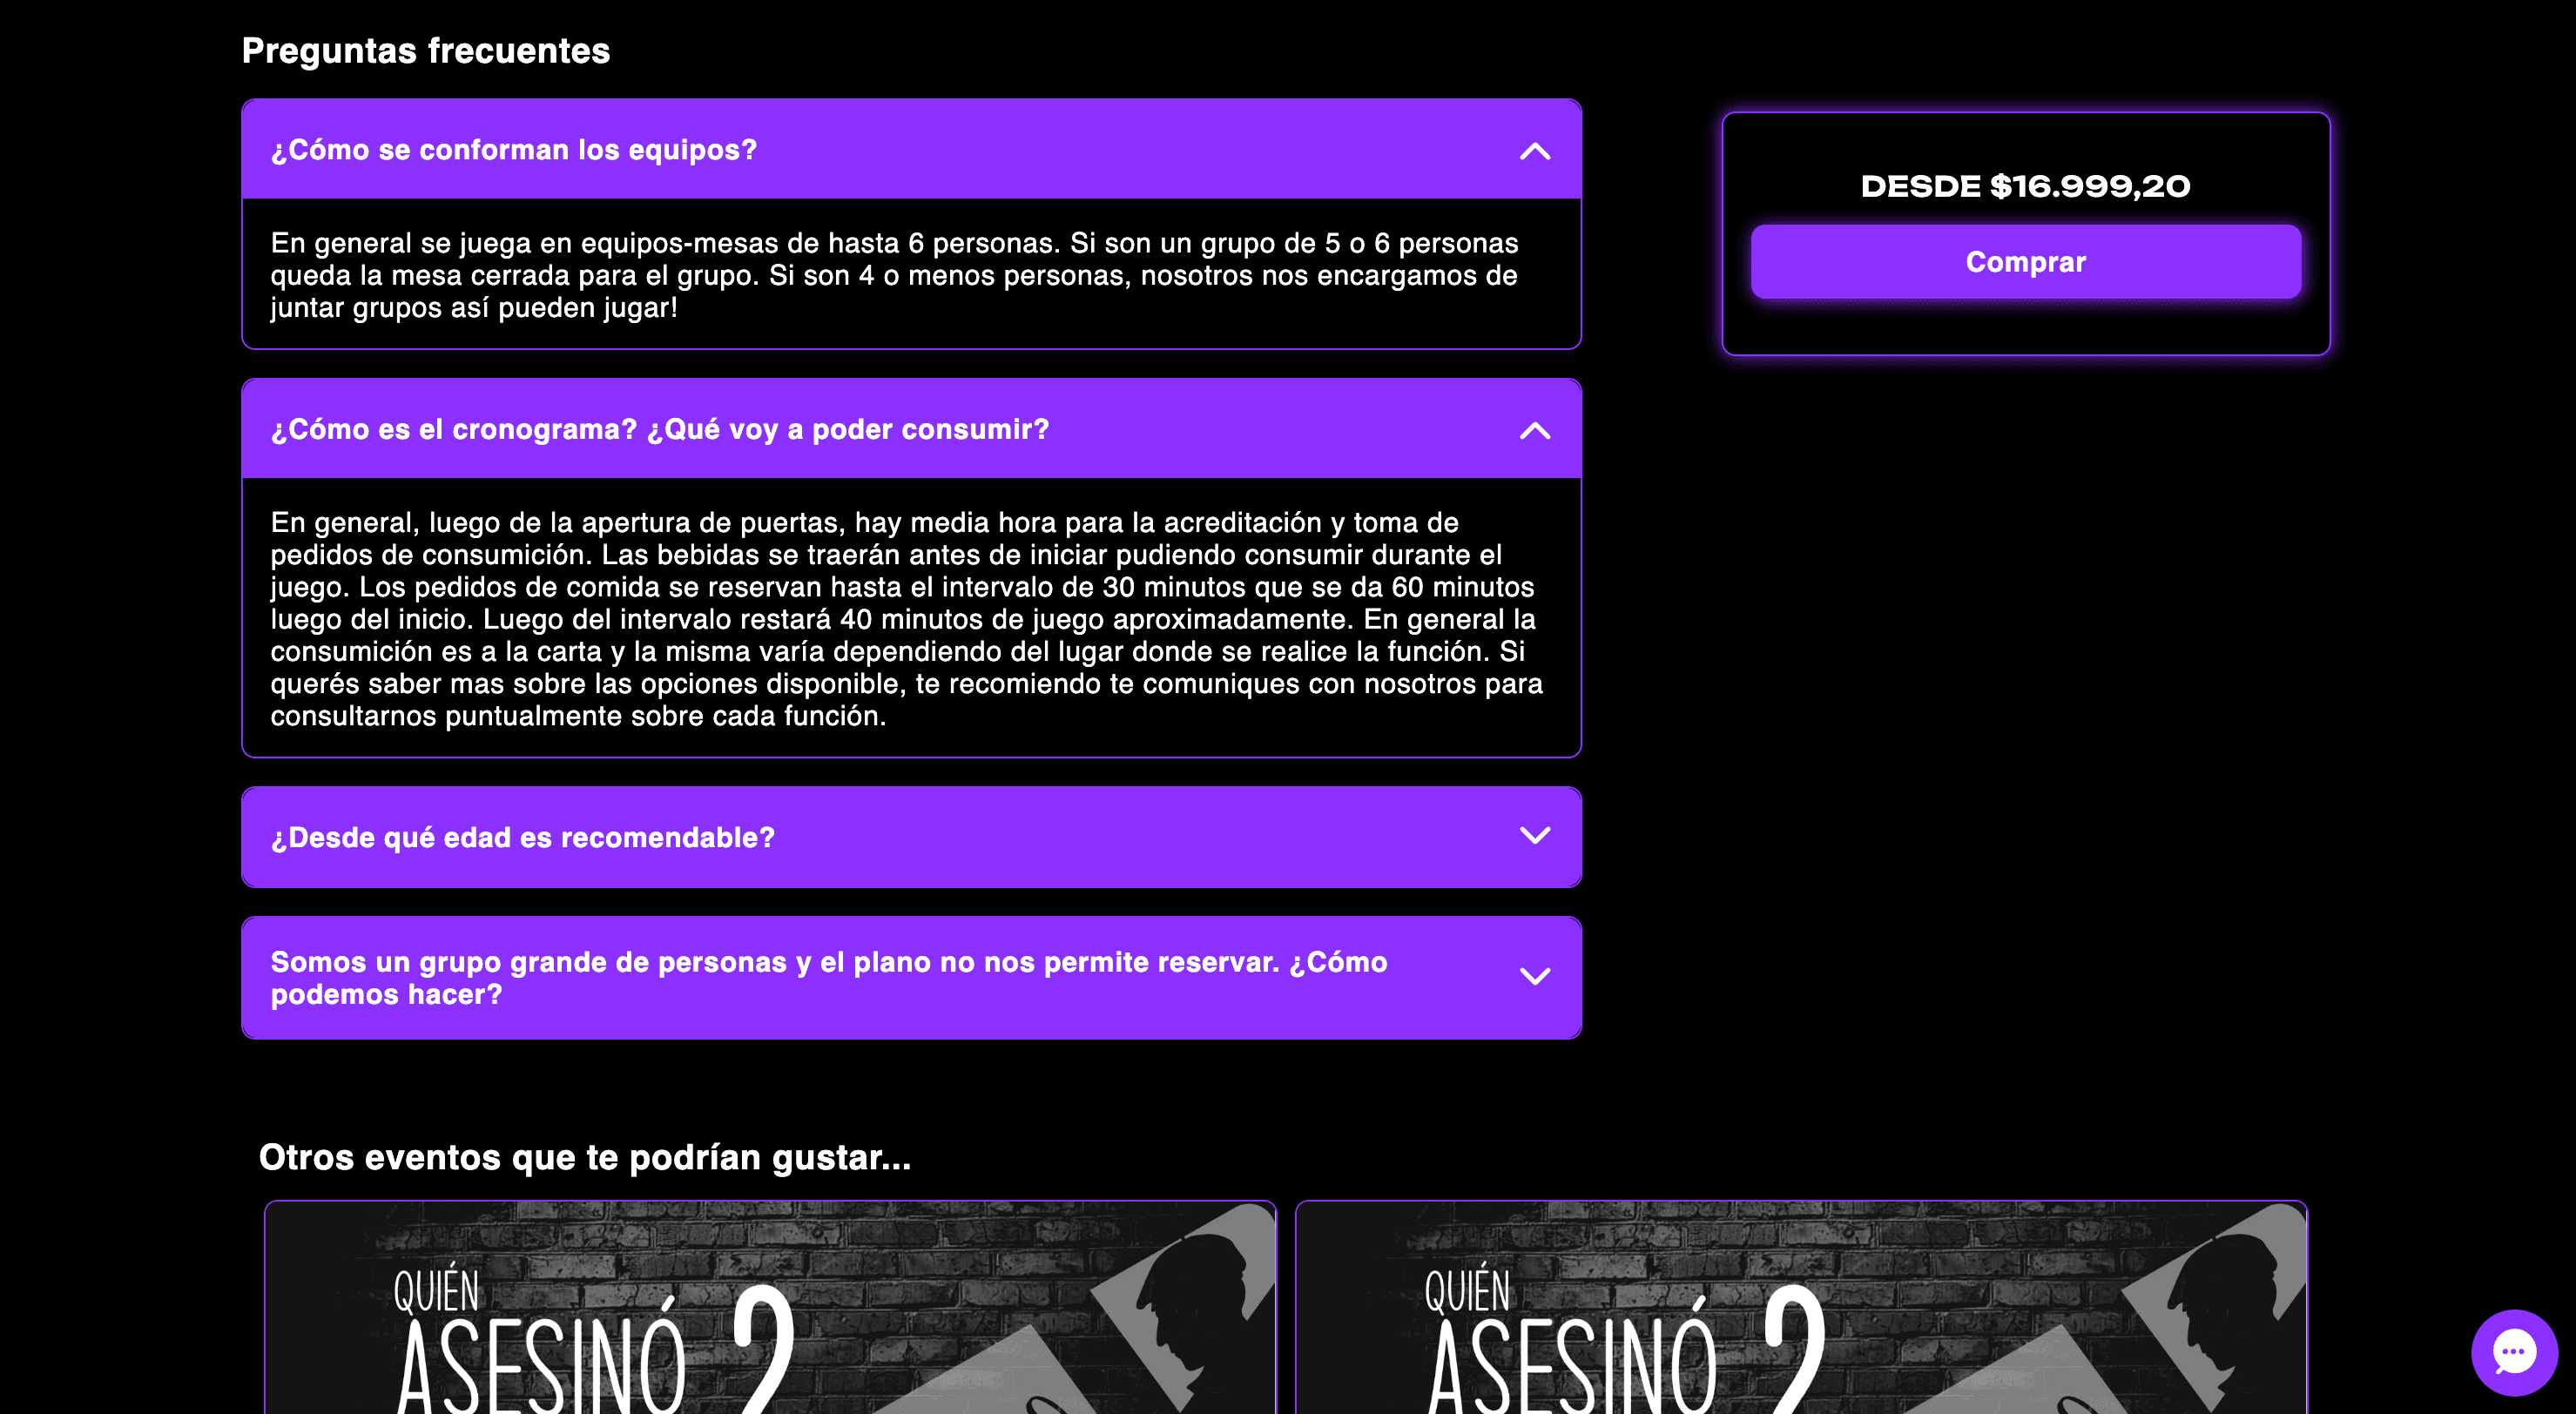
Example of FAQs on the Enigmax website:
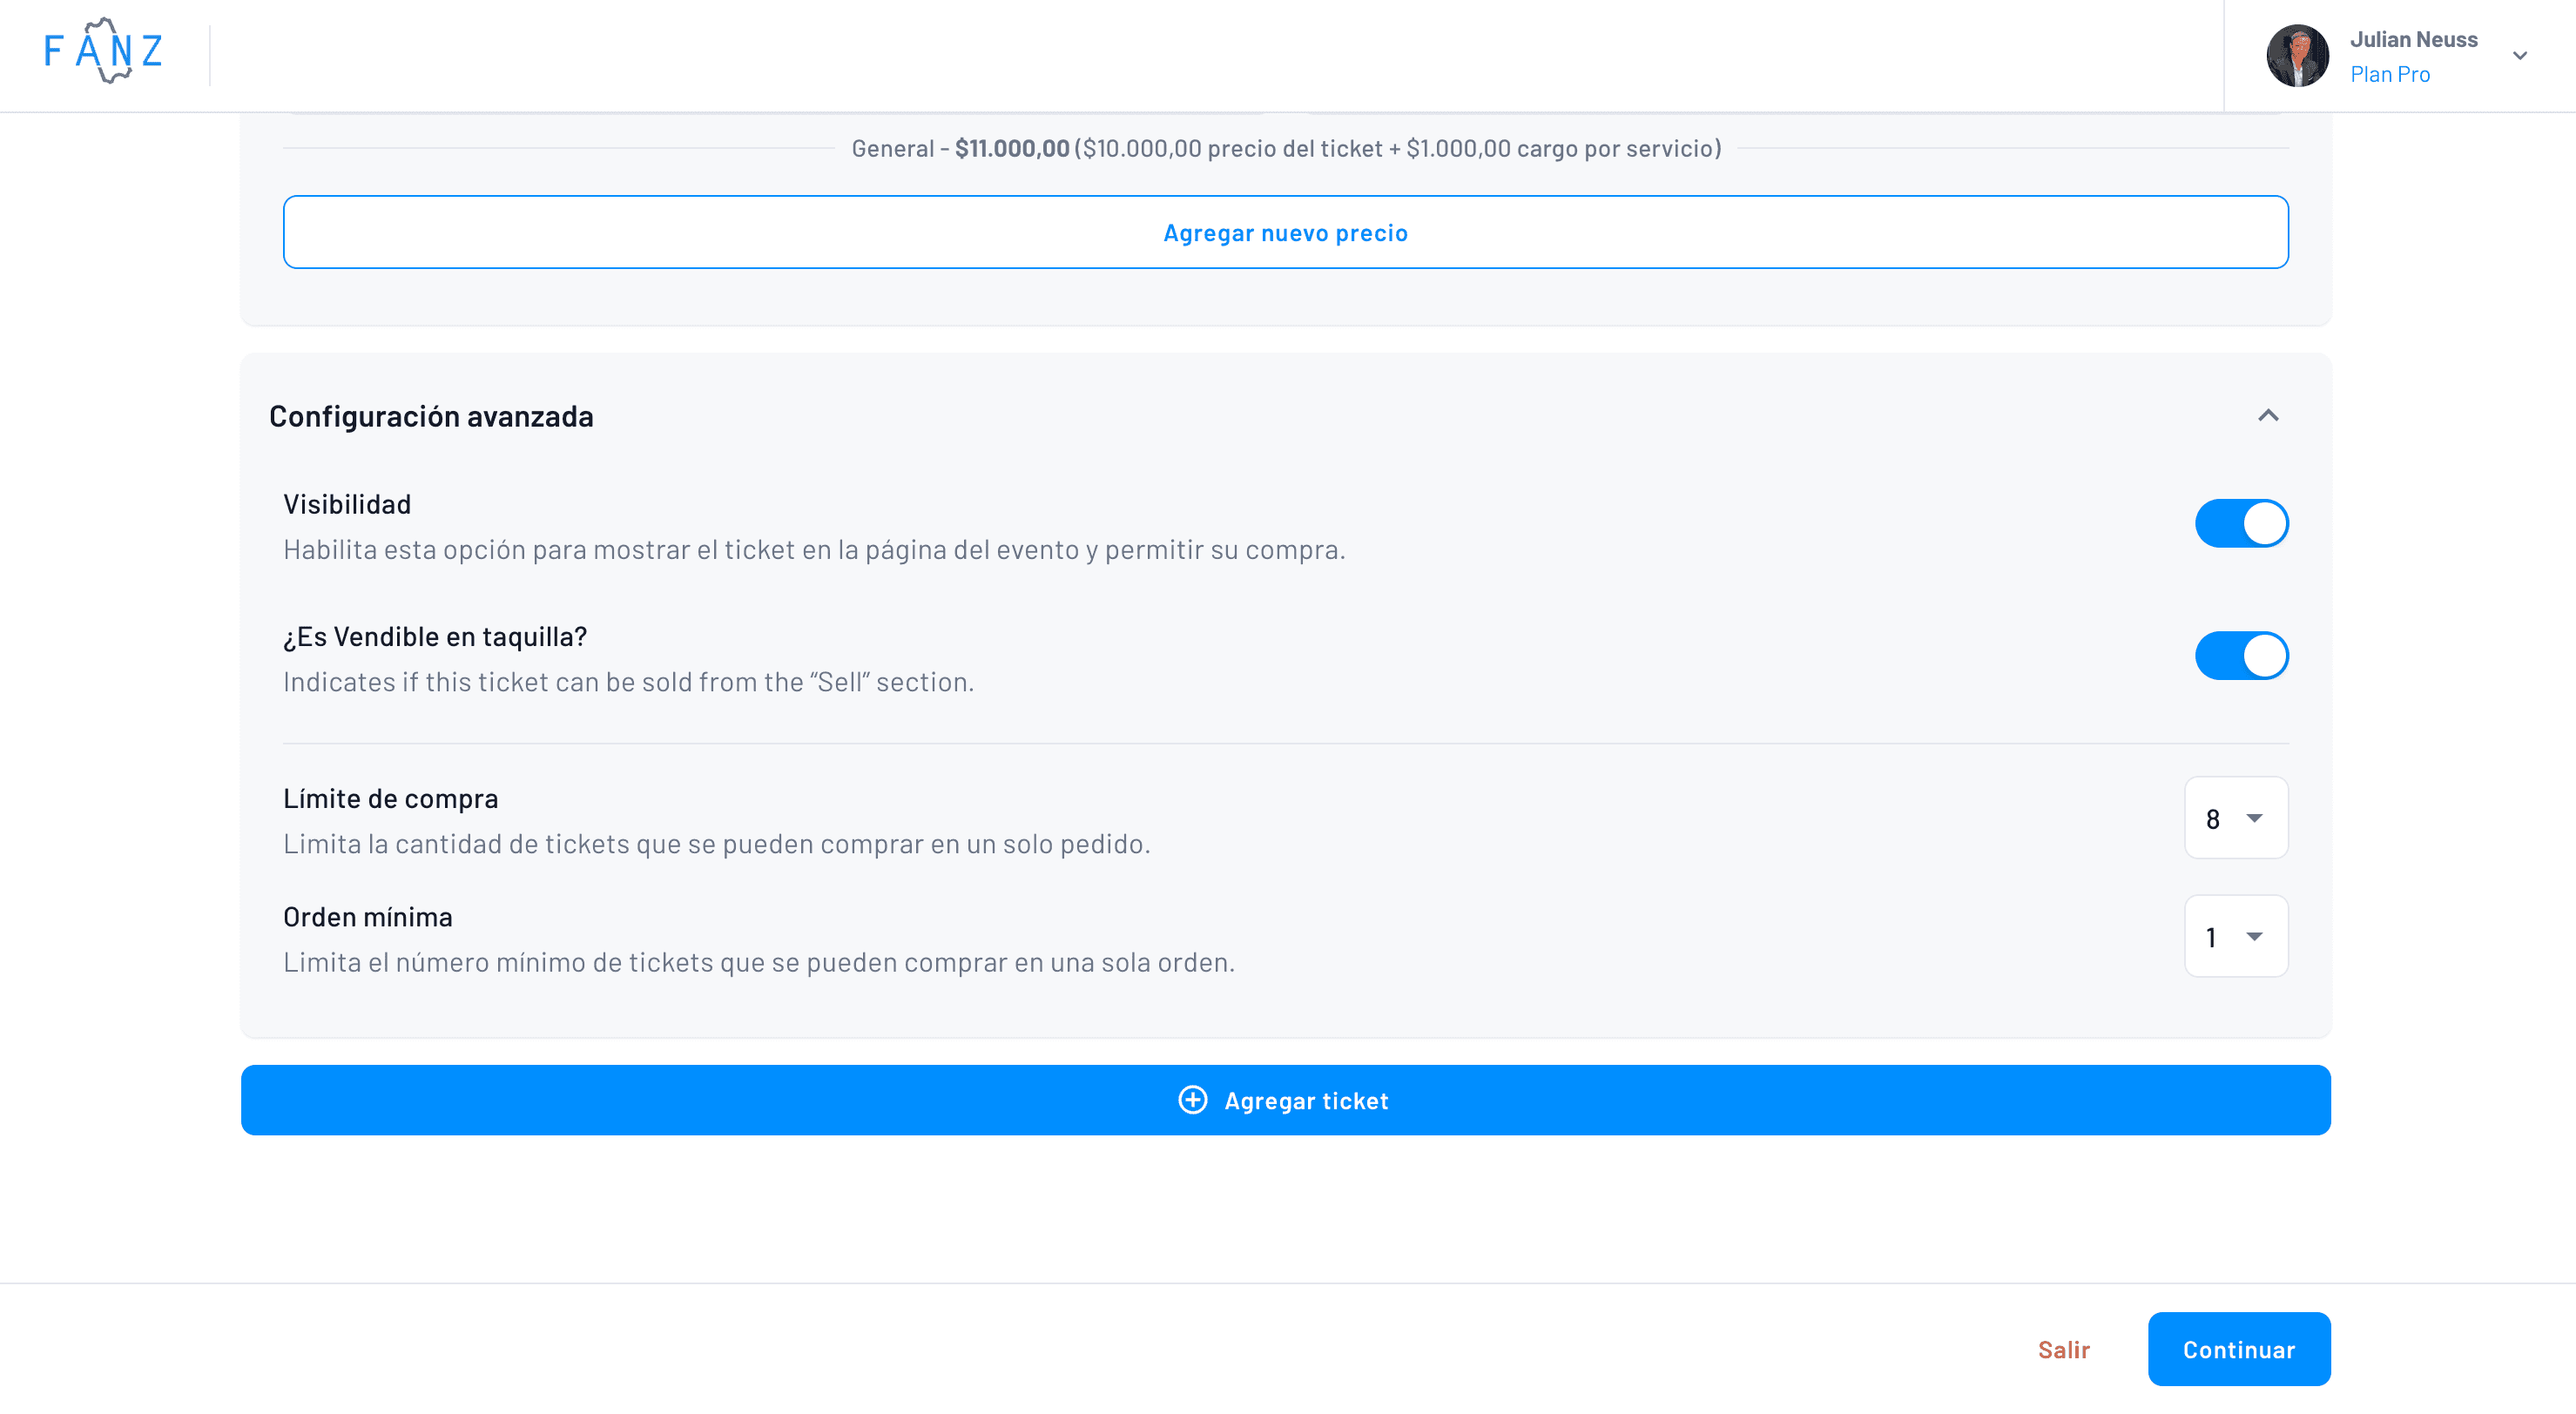
Step 12 — Create Your Tickets
After configuring the bulk of the event, you'll be able to configure tickets, their quantity, description, price, and service charge.
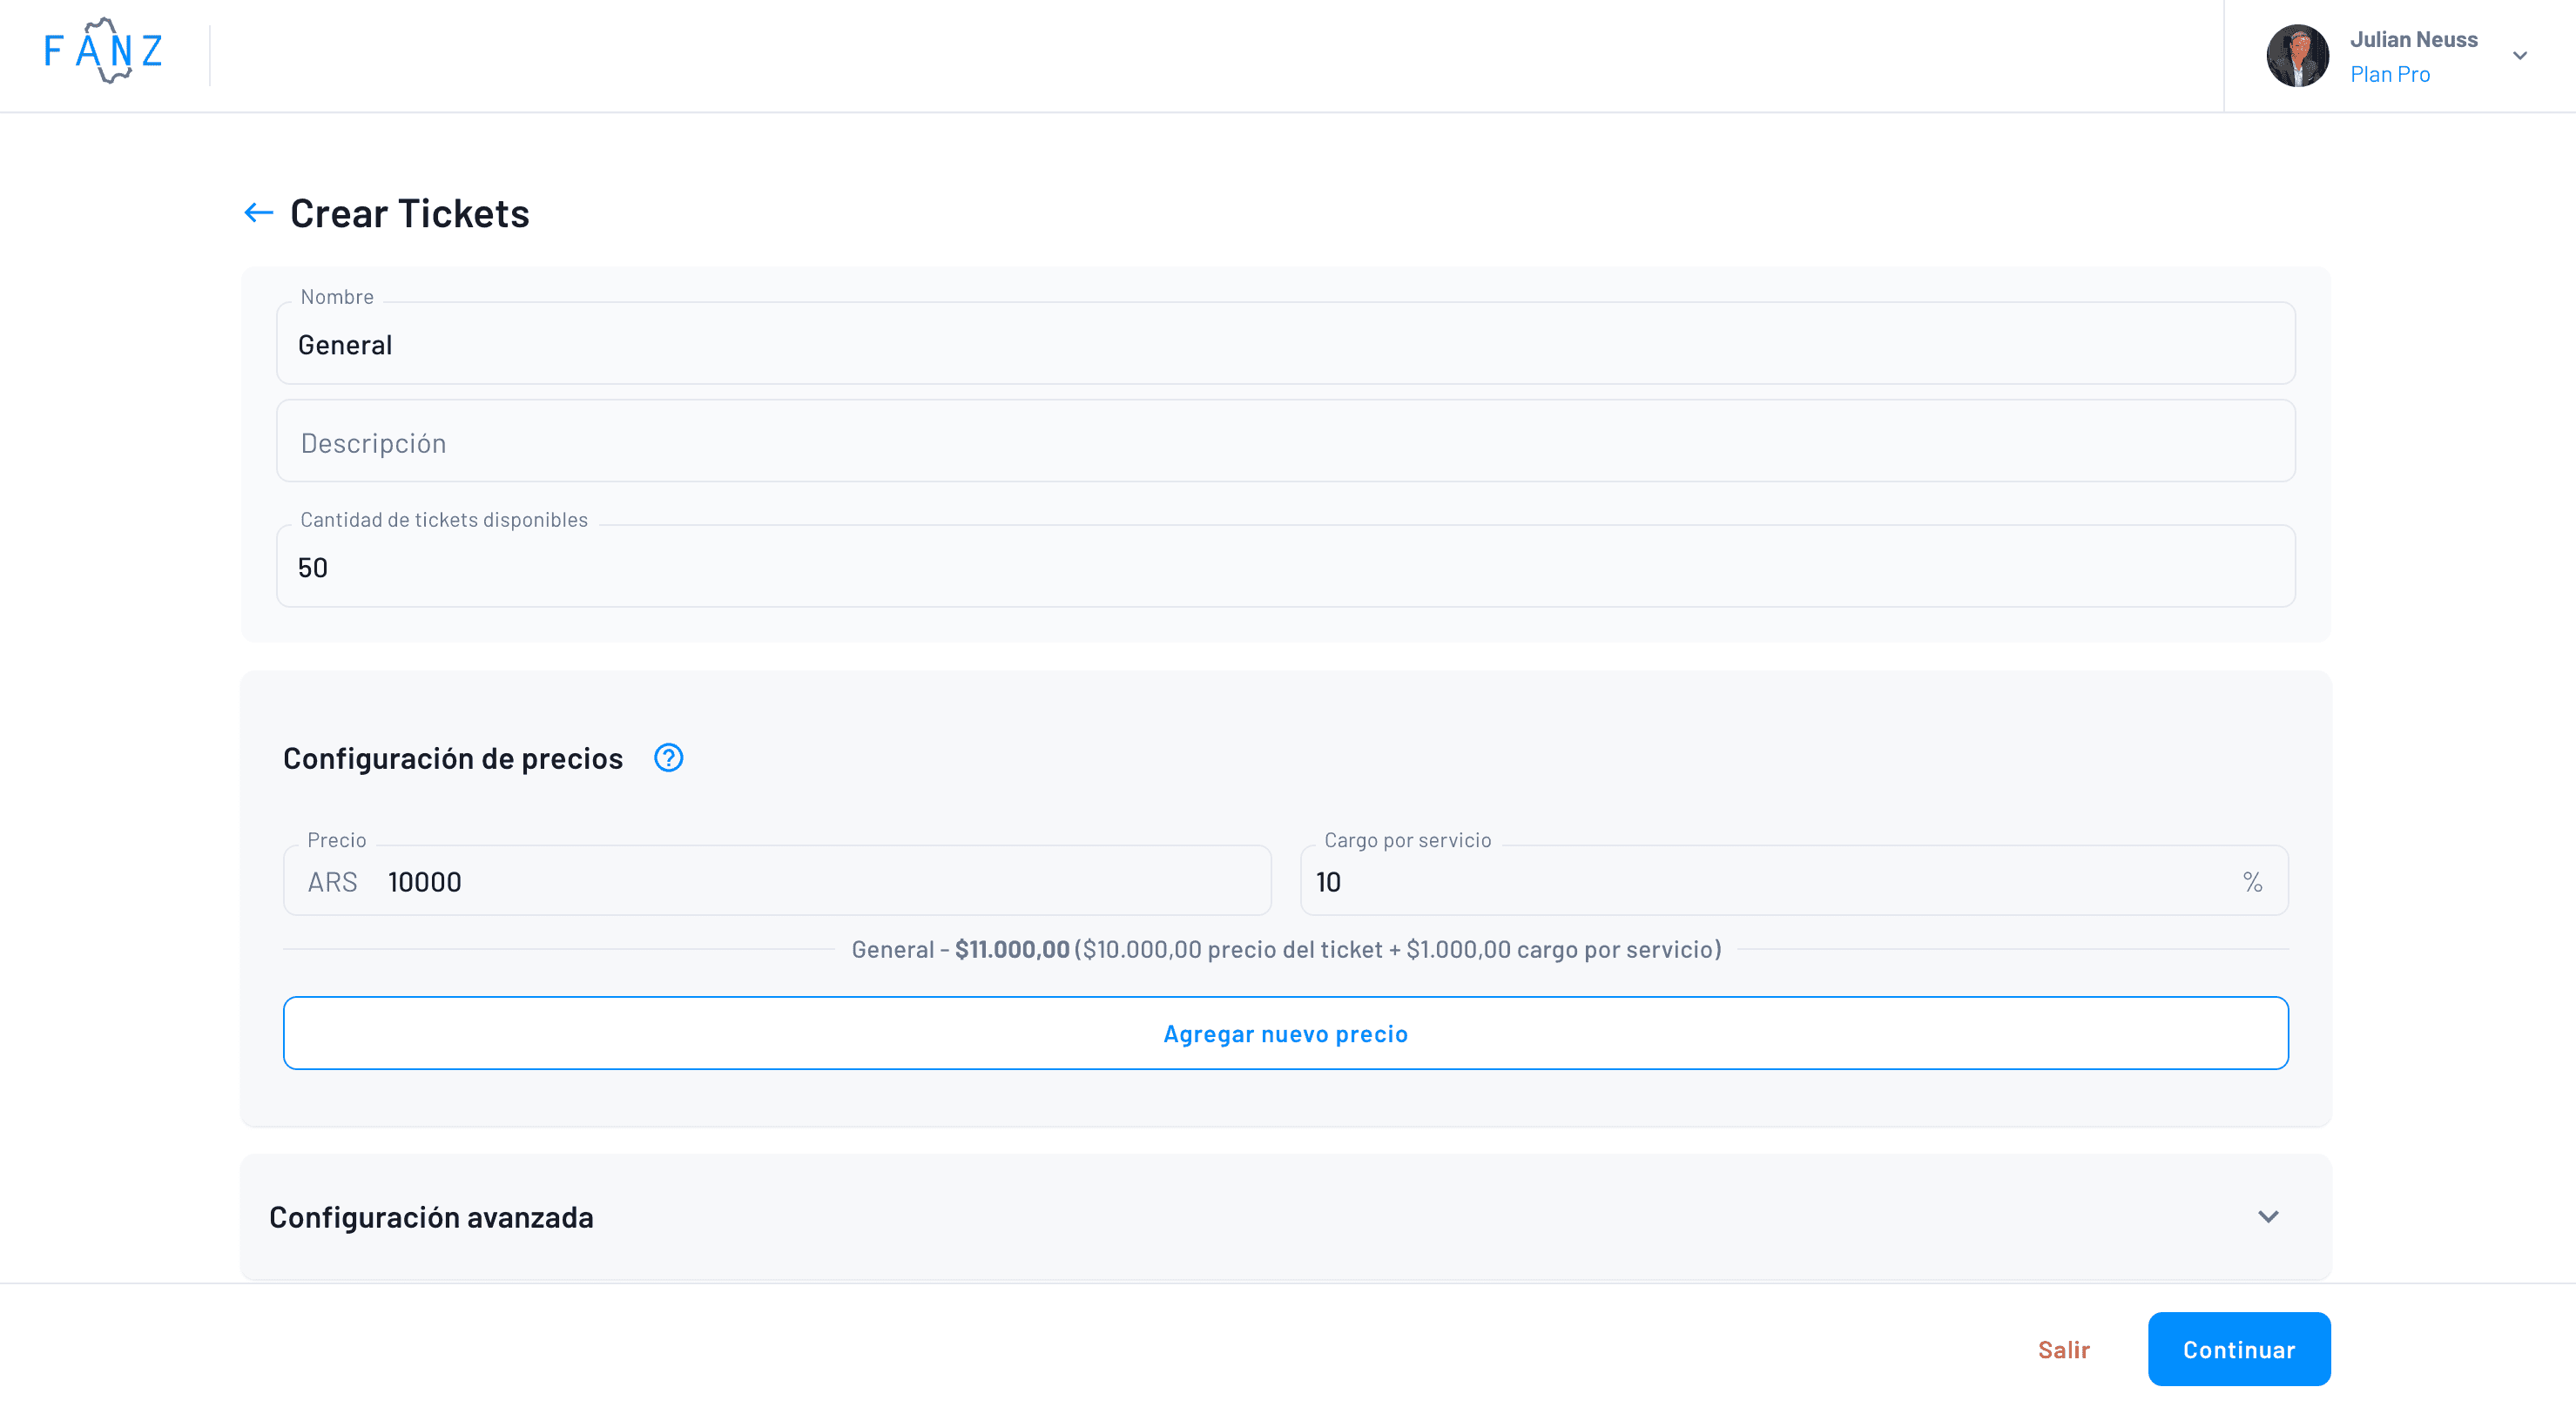
Additionally, you'll be able to configure ticket visibility on the event page, at the box office, and set maximum and minimum limits.
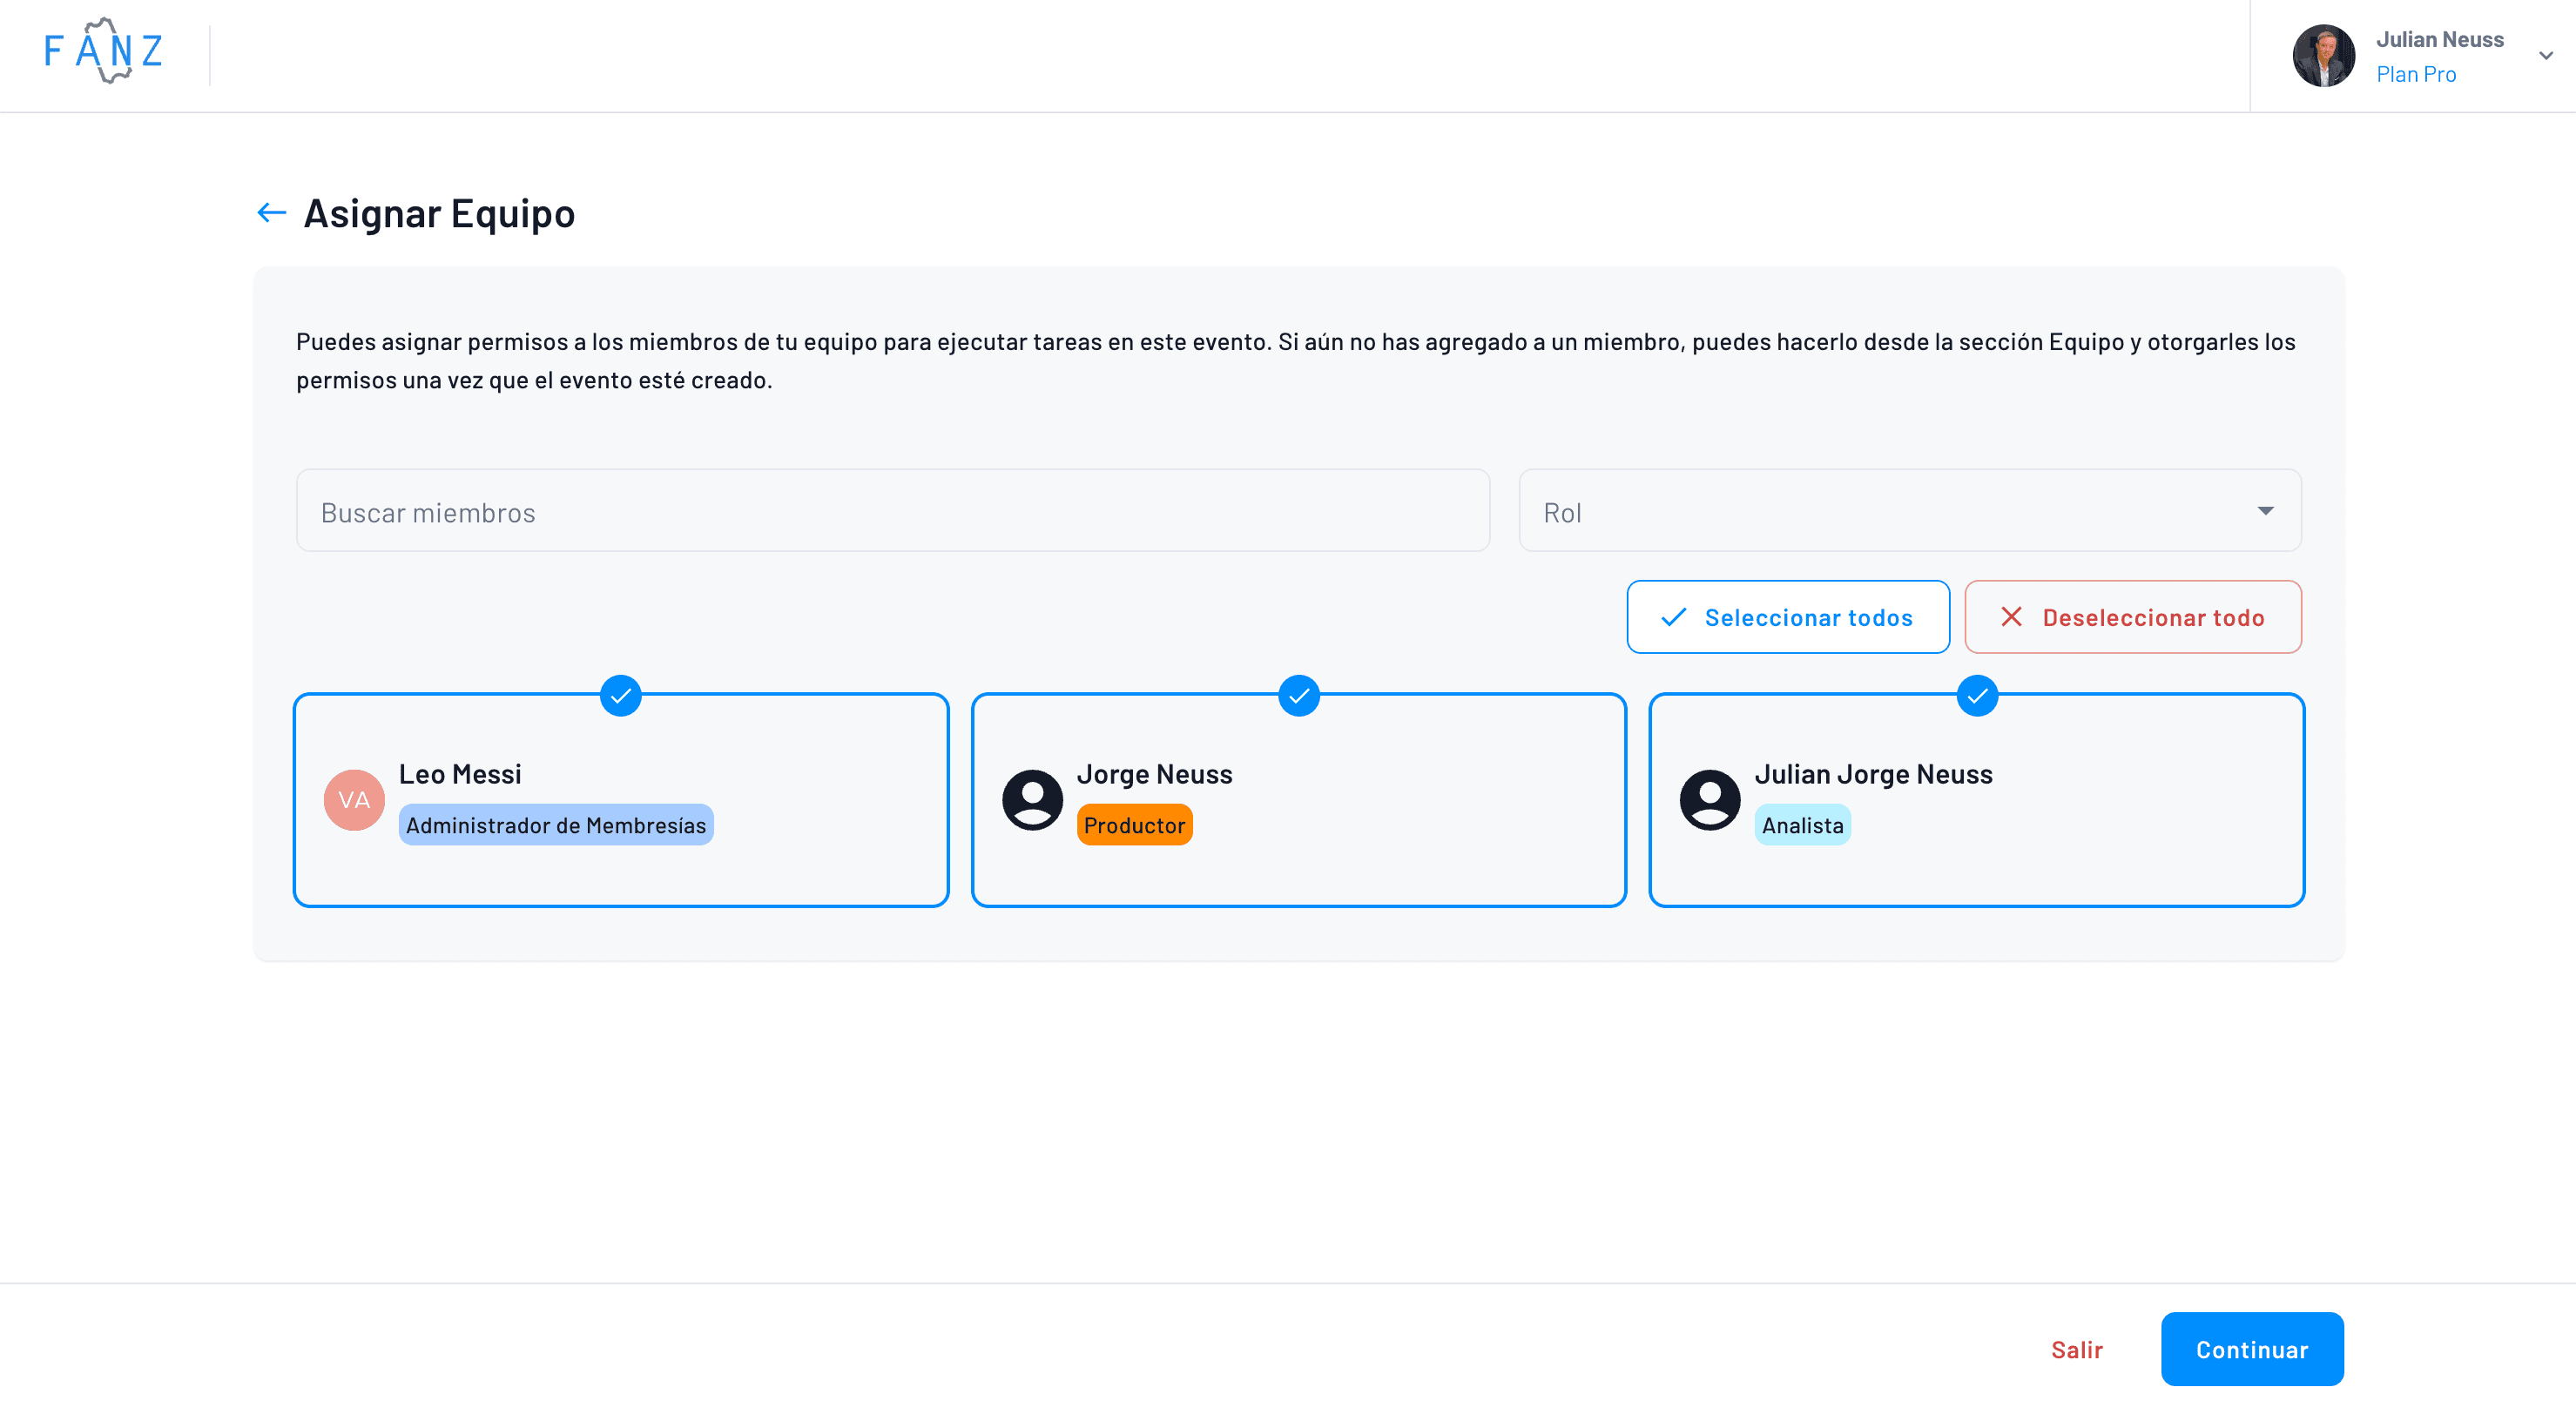
Step 13 — Assign Your Team and Permissions
You have a shortcut to add team members who are responsible for the event through the platform. If they're not on your list yet, first add them in the Team section.
Step 14 — Payment Methods and Security
Our platform offers integration with Stripe, credit cards, ACH, and Apple Pay, allowing buyers to purchase tickets securely and reliably. Through Stripe, we accept payments with credit and debit cards, digital wallets, bank transfers, and more, covering a wide variety of options for attendees in the US market. This flexibility extends to international customers as well, with support for payment methods across 47+ countries.
Our platform uses advanced security technology to protect buyer information and ensure transactions are secure. Payment data is encrypted and handled with the highest security standards, providing peace of mind for both organizers and attendees.
Event organizers can configure their own payment methods and set corresponding fees. Additionally, we offer installment payment options through our payment processors, making it easier for attendees to purchase tickets for higher-priced events like music festivals such as Coachella, SXSW, or Lollapalooza.
¿Cómo creo un evento en Fanz desde cero?
Para crear un evento en Fanz, hacés clic en 'Create Event' y completás tres campos básicos: subís la foto principal (pensá en ella como el póster de la entrada), escribís el nombre del evento (por ejemplo 'Hamilton Musical'), y contás en una oración de qué se trata. Si querés que suene mejor, podés hacer clic en 'Improve with AI' y la plataforma te va a sugerir texto con emojis y formato bonito. Después seguís con los pasos de categoría, ubicación, fechas y configuración de entradas.
¿Qué datos básicos necesito para crear un evento en la plataforma?
Los datos básicos que necesitás son: una imagen principal rectangular y nítida que funcione como póster, el nombre del evento, una descripción de una oración explicando de qué se trata, la categoría (Teatro, Música, Expo, etc.), la ubicación con dirección completa, las fechas y horarios, y la configuración de las entradas con precios. También podés agregar información de contacto, redes sociales, fotos adicionales y video trailer de YouTube.
¿Puedo generar múltiples fechas automáticamente para mi evento?
Sí, Fanz tiene un generador de múltiples shows que te permite crear cientos de funciones en 2 clics. Es muy útil cuando el mismo evento se repite durante varios días de la semana en diferentes horarios. Podés usar el generador automático configurando los días, horarios y duración, o agregar las fechas manualmente una por una. Después podés ajustar las fechas generadas en el calendario.
¿Qué métodos de pago acepta Fanz para la venta de entradas?
Fanz ofrece integración con Stripe, tarjetas de crédito, ACH y Apple Pay. A través de Stripe, acepta pagos con tarjetas de crédito y débito, billeteras digitales, transferencias bancarias y más, cubriendo una amplia variedad de opciones para asistentes en el mercado estadounidense. También hay soporte para métodos de pago en más de 47 países. Los organizadores pueden configurar sus propios métodos de pago y establecer las comisiones correspondientes, e incluso ofrecer opciones de pago en cuotas.
¿Qué información puedo solicitar a los compradores de entradas?
Podés configurar qué información solicitar a los compradores: email, nombre, apellido, documento de identidad o número de teléfono. Es crucial verificar la identidad del comprador para eventos que requieren documento. Si el evento necesita datos para cada entrada (útil para maratones o asientos asignados con nombres), podés activar 'Request information per ticket'. También podés agregar preguntas opcionales como alergias, talle de remera, empresa o lo que necesites para tu evento.
Tags